FRAMING A TWO-CAR GARAGE CEILING FOR DRYWALL: STRUCTURAL METHODS AND BEST PRACTICES
Preparing a conventionally framed two-car garage for a drywall ceiling requires careful planning and a strict adherence to structural engineering principles. Because drywall adds substantial dead load to the framing structure, standard open-rafter configurations must be reinforced or modified before drywall can be safely hung. While structural requirements vary based on local building codes, snow loads, and specific lumber species, there are three universally accepted methods for spanning a standard 20-foot by 20-foot garage to support a ceiling.
METHOD 1: CONVENTIONAL FRAMING WITH RAFTER TIES AND STRONGBACKS
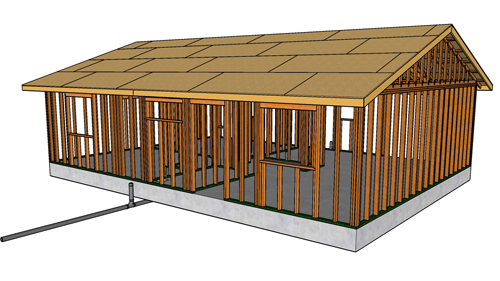
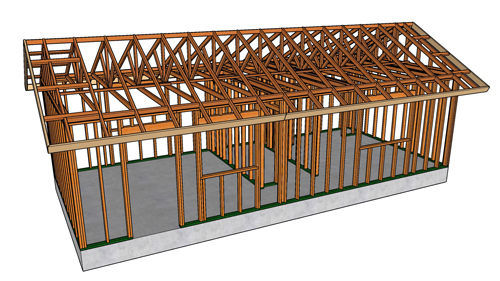
In a standard conventionally framed roof that utilizes individual rafters rather than prefabricated roof trusses, specific ties must be installed to maintain the structural integrity of the building. Collar ties are installed in the upper third of the roof structure to hold the rafters together at the ridge, primarily resisting wind uplift. Rafter ties, however, span the entire width of the garage from wall to wall.
These rafter ties act in tension to keep the exterior bearing walls from spreading outward under the downward weight of the roof. To support the load of a new drywall ceiling, standard 2x4 or larger rafter ties can be utilized. To mitigate sagging and provide additional rigidity across the long span, strong backs typically 2x4 or 2x6 boards laid on edge are attached perpendicularly across the top of the rafter ties.
METHOD 2: SPANNING WITH 2X8 CEILING JOISTS
If you are establishing a new ceiling plane without utilizing traditional rafter ties, installing dedicated ceiling joists is the standard approach. For a 20-foot span, 2x8 dimensional lumber can be used, but the spacing and lumber grade must be strictly managed.
To prevent deflection (sagging) over a 20-foot distance, 2x8 ceiling joists must typically be spaced 12 inches on center. Furthermore, standard Number 2 construction-grade lumber often lacks the tensile strength required for this distance. Selecting Number 1 grade or better is usually necessary to meet acceptable span tables and safely carry the drywall load.
METHOD 3: MAXIMIZING EFFICIENCY WITH 2X10 CEILING JOISTS
The most structurally robust method for a 20-foot garage ceiling is upgrading to 2x10 ceiling joists. The increased depth of the joist significantly improves its bending strength, allowing for a wider layout. When using 2x10 lumber, the joists can safely be spaced 16 inches on center, which reduces the total number of boards required and simplifies the drywall installation process. However, just like the 2x8 method, Number 2 grade lumber may still fall short depending on the exact wood species. Upgrading to Number 1 grade ensures the framing meets deflection limits.
CRITICAL BUILDING CODES FOR JOIST NOTCHING
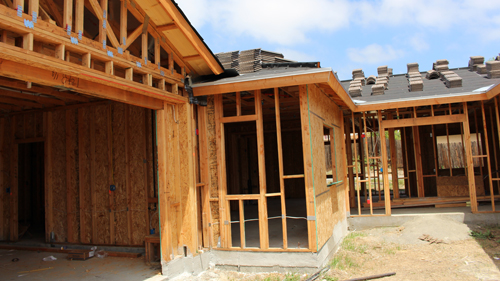
Regardless of the lumber size selected, proper installation at the bearing points (where the joists rest on the exterior walls) is a critical life-safety issue. Because roof slopes often interfere with the top corners of ceiling joists, framing carpenters frequently need to notch the ends of the joists to make them fit under the roof sheathing.
According to standard building codes, including the International Residential Code (IRC), you cannot notch the end of a ceiling joist by more than one-fourth (25 percent) of the joist's total depth. Cutting away more than a quarter of the material drastically reduces the shear strength of the joist at its most vulnerable load-bearing point. For example, over-notching a 2x8 effectively reduces its structural capacity to that of a 2x6, rendering it unsafe for a 20-foot span and at high risk of structural failure.
CONCLUSION
Hanging drywall in a garage transforms the space, improves fire resistance, and provides a finished look. However, the framing that supports it must be engineered to carry the load. Whether utilizing reinforced rafter ties, tightly spaced 2x8 joists, or rigid 2x10 joists, prioritizing high-grade lumber and strictly adhering to joist-notching limitations will ensure a safe, sag-free ceiling for decades to come.
THREE KEY TIPS
USE RAFTER TIES TO PREVENT WALL SPREAD: If you are not installing dedicated heavy ceiling joists, ensure rafter ties are securely fastened in the lower third of the roof to prevent the weight of the roof and ceiling from pushing the exterior walls outward.
UPGRADE LUMBER GRADE FOR LONG SPANS: Standard Number 2 framing lumber is rarely sufficient for spanning 20 feet without support. Always verify your span tables and upgrade to Number 1 or Select Structural grade lumber to prevent ceiling sag.
NEVER OVER-NOTCH BEARING ENDS: Never cut more than 25 percent of a joist's total depth at the ends. Doing so destroys the shear strength of the board and compromises the structural integrity of the entire ceiling assembly.
BEYOND THE BASICS: ADVANCED STRUCTURAL CONSIDERATIONS
While understanding joist sizing and span limits is the foundation of ceiling framing, achieving a fully code-compliant and durable structure requires looking at how the ceiling interacts with the rest of the building. Below are three advanced technical considerations to keep in mind before you begin hanging drywall.
QUESTION: What is the required deflection limit when installing a drywall ceiling?
ANSWER: According to the International Residential Code (IRC Table R301.7), ceiling framing that supports a brittle finish like drywall must be designed to a deflection limit of L/240. This means that under maximum load, the joist cannot sag more than the total span length (in inches) divided by 240. For a 20-foot (240-inch) span, the maximum allowable sag is exactly 1 inch. If the framing sags more than this, the drywall seams will crack, and the fastener heads will pop. This is why using properly sized, high-grade lumber is mandatory rather than optional.
QUESTION: How does planning for attic storage change the structural requirements for ceiling joists?
ANSWER: The sizing guidelines for 2x8 and 2x10 joists mentioned above assume the ceiling is strictly supporting its own dead load (the weight of the wood, drywall, and insulation) with no additional weight above. The IRC requires standard uninhabitable attics without storage to be designed for a 10 pound per square foot (psf) live load. However, if you plan to lay plywood over the joists for light storage, the code mandates designing for a 20 psf live load (IRC Table R301.5). This massive increase in weight drastically reduces the allowable span of the lumber, meaning a 2x10 that safely spans 20 feet for a standard ceiling will fail code if used for an attic storage floor without intermediate support.
QUESTION: How many fasteners are required when connecting ceiling joists to rafters?
ANSWER: Ceiling joists parallel to rafters must be securely nailed to the rafters to form a continuous structural tie across the building, known as the heel joint. The IRC (Table R802.5.2) explicitly dictates the exact number and size of nails required at this connection based on the roof pitch, the snow load of your specific region, and the span of the building. For a standard 20-foot garage with an average roof pitch, this often requires five to eight 16d common nails per connection. Inadequate fastening at this joint is a primary cause of roof failure and exterior wall spreading under heavy wind or snow loads.