STRATEGIC PLUMBING PLACEMENT: HOW TO SAVE MONEY ON A NEW BATHROOM ADDITION
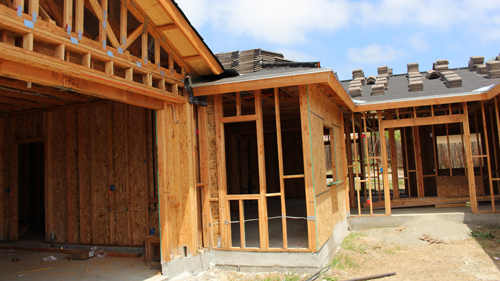
When planning to add a second or third bathroom to an existing home, homeowners often focus on interior design, fixtures, and square footage. However, one of the most critical considerations and one that significantly impacts your overall budget is the physical location of the new space relative to your home's existing plumbing infrastructure.
By strategically positioning a new bathroom adjacent to or near existing plumbing lines, you can dramatically streamline installation, lower labor requirements, and minimize material costs.
THE COST OF DISTANT PLUMBING LOCATIONS
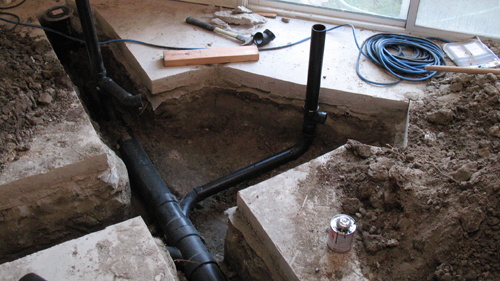
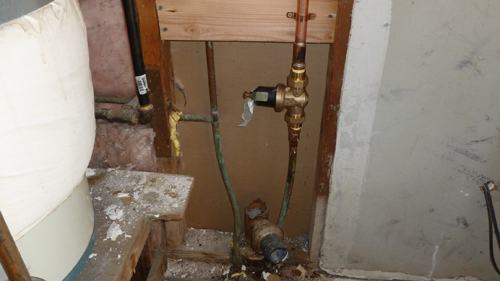
Installing a bathroom in a isolated corner of the home far from existing supply and waste lines requires extensive trenching, structural modifications, and additional pipe runs. Water supply lines must be extended through attics, crawlspaces, or walls, while primary three-inch or four-inch soil and waste drainage pipes must be routed all the way back to the main sewer line or septic stack.
While adding a bathroom adjacent to a kitchen can shorten the required run for supply lines, it may not solve drainage challenges. If the main waste stack does not extend to that side of the structure, you will still face lengthy, complex drain line installations to achieve the required slope for proper drainage.
If layout constraints dictate a distant location, the project remains entirely achievable, but homeowners should account for the higher labor and material overhead in their initial budgeting.
THE BACK-TO-BACK SOLUTION: OPTIMAL LAYOUT DESIGN
The most cost-effective approach for a bathroom addition is a back-to-back configuration sharing a common plumbing wall (often called a wet wall) with an existing bathroom.
In a back-to-back layout, supply and waste pipes for sinks, toilets, and tubs are grouped within the same wall cavity. This configuration minimizes the total linear feet of piping required and drastically reduces the labor needed to tie into main vent stacks and drain lines.
FLOORING AND SUBSTRUCTURE CONSIDERATIONS
The construction style of your home's foundation also determines the complexity of tying into existing plumbing:
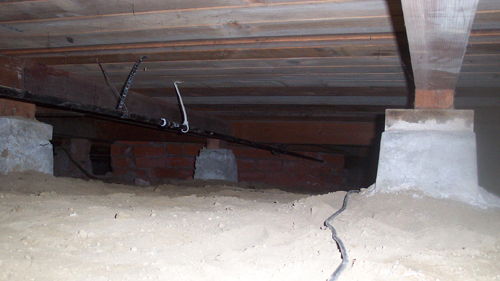
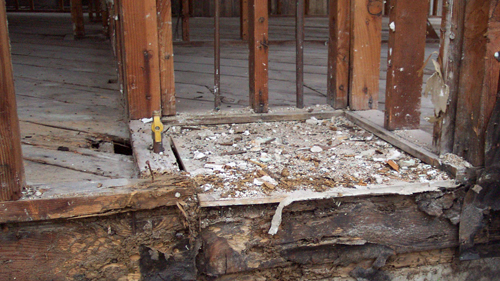
Wood-Framed Floor Systems: Homes with crawlspaces, basements, or raised wood floor joist systems allow tradespeople to access, run, and tie in plumbing lines from underneath or by temporarily removing section panels of subflooring. This makes utility routing relatively straightforward.
Concrete Slab Foundations: Adding plumbing over a concrete slab requires cutting and jackhammering trenches into the slab to recess new drain lines at the correct pitch. Placing new fixtures close to existing slab-embedded drains minimizes the total linear footage of concrete demolition required.
SPACE PLANNING BALANCE
While sharing a wet wall is the ideal engineering solution, spatial balance must be preserved. Placing a new bathroom back-to-back with an existing one often requires absorbing space from an adjacent bedroom or hallway. Ensure that reducing adjacent room dimensions does not compromise egress requirements, living quality, or overall home resale value.
CONCLUSION
When designing a home addition, placing a new bathroom as close as possible to existing plumbing stacks yields substantial savings in labor, materials, and structural alteration. Evaluate your existing layout early in the planning phase to find the optimal balance between functional design and plumbing efficiency.
THREE KEY CONSTRUCTION TIPS
MATCH DRAIN LINE INCLINE ACCURATELY FOR PROPER GRAVITY FLOW
When extending horizontal waste drainage lines (3-inch or 4-inch pipe) to reach a main drain stack, maintain a minimum uniform slope of 1/4-inch fall per foot of pipe run. Insufficient slope leads to solid waste buildup and blockages, while excessive slope can allow liquids to flow faster than solids, leaving debris behind.
SIZE WET WALL CAVITIES ADEQUATELY FOR PLUMBING AND VENTING
A standard 2x4 stud wall is often too narrow to comfortably house a 3-inch or 4-inch main soil stack alongside supply pipes and required venting without compromising the structural integrity of the studs. When building or modifying a shared wet wall, construct it using 2x6 framing lumber or staggered 2x4 studs on a 2x6 plate to provide sufficient mechanical clearance.
MAINTAIN ADEQUATE STRUCTURAL JOIST NOTCHING AND DRILLING STACK LIMITS
When routing new plumbing through a wood-framed floor system, strictly follow building code rules for altering joists. Never notch the middle third of a floor joist span. Bored holes must be at least 2 inches from the top or bottom edges, and the hole diameter must not exceed one-third of the joist depth to prevent structural sag or floor failure.
BONUS QUESTIONS AND ANSWERS
QUESTION 1: Can a new bathroom toilet share the same vent line as the existing bathroom next door?
TRANSITION: While placing two bathrooms back-to-back simplifies pipe routing, homeowners often wonder if these adjacent fixtures can share a single venting line.
ANSWER: Yes, back-to-back toilets can share a common vent stack through a technique recognized by the International Residential Code (IRC) known as common venting or wet venting, provided specific sizing and hydraulic rules are followed. Building codes mandate that every plumbing trap must be vented to equalize atmospheric pressure, preventing water seals from being siphoned out and letting sewer gases enter the home. When two toilets connect at the same vertical level into a double sanitary tee or double fixture tee, a single common vent extending vertically through the roof line (or reventing above the highest flood level rim) provides adequate pressure relief for both fixtures. The vent pipe diameter must be sized correctly according to total drainage fixture units (DFUs) to handle simultaneous discharges without breaking the water seal.
QUESTION 2: What are the minimum spacing requirements around a new toilet to meet building safety codes?
TRANSITION: Beyond locating your plumbing lines efficiently, you must also ensure your new bathroom layout complies with standard structural dimension requirements.
ANSWER: Under Section R307 of the International Residential Code (IRC), a toilet requires a minimum clearance of 15 inches from its centerline to any side wall, partition, or adjacent vanity, creating a total minimum clear space width of 30 inches. Additionally, there must be at least 21 inches of clear floor space in front of the toilet bowl, though 24 to 30 inches is widely recommended for comfortable accessibility and usability. These spatial codes exist not only for human comfort, but also to ensure adequate physical access for proper maintenance, installation, and safe egress in emergency situations.
QUESTION 3: Why is it necessary to install a cleanout fitting when extending a main sewer line to a new bathroom?
TRANSITION: As you extend new drain lines from your existing waste stack to reach new fixtures, proper long-term maintenance access must be built into the system.
ANSWER: Building codes (such as IRC Section P3005.2) strictly require accessible cleanout fittings at specific locations along building drain lines to permit mechanical clearing of blockages. A cleanout must be installed at or near the base of every vertical stack, at changes of direction greater than 45 degrees, and on long horizontal runs so that no section of 3-inch or 4-inch pipe exceeds 100 feet without a cleanout point. Installing a cleanout during the initial framing phase ensures that future plumbing snakes or hydro-jetters can access the entire drainage system without needing to remove toilets or cut into finished walls when a sewer backup occurs.