INTRODUCTION
Bathroom remodeling is one of the most popular home improvement projects, but it is also one where minor missteps can lead to extensive structural, moisture, and financial damage. Whether taking on a full tear-out or a minor update, proper planning and adherence to sound building practices are essential. By understanding how to protect existing finishes, handle electrical upgrades safely, and maintain proper ventilation, homeowners can avoid common remodeling pitfalls and ensure a long-lasting, code-compliant result.
PREVENTING DAMAGE DURING DEMOLITION
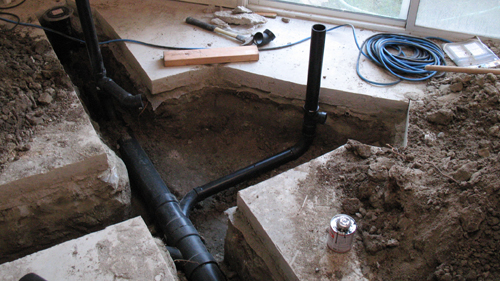
The demolition phase often sets the stage for the rest of the project. A common oversight is failing to adequately protect surfaces that will remain in the home. Nearby carpeting, hardwood flooring, and adjacent plumbing fixtures should be shielded using heavy-duty drop cloths or temporary floor protection materials. In tight quarters, such as a single-bathroom home, temporary toilet removal requires careful planning. Always drain the toilet tank and bowl completely, placing towels beneath the fixture during removal to catch residual water. If temporary storage in a bathtub is necessary, pad the tub surface with heavy towels or moving blankets to prevent scratching the enamel or acrylic finish. Furthermore, always plug or cover open soil pipe drains to prevent sewer gases from entering the living space and to stop stray tools or debris from falling into the drainage stack.
PLUMBING AND MOISTURE CONTROL
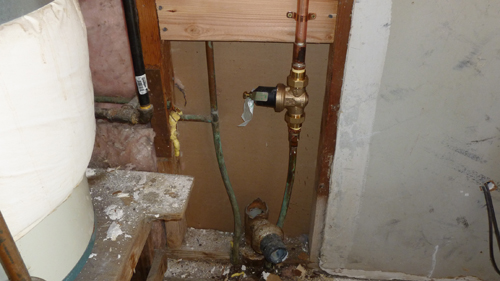
Unseen moisture leaks behind walls and under finish materials can compromise structural framing and foster mold growth. When removing wall paneling or wainscoting, inspect the exposed drywall and framing for evidence of water intrusion. Plumbing stub-outs, such as toilet and sink water supply lines, should be capped or sealed with protective bags during work to prevent drywall dust and tile debris from clogging valve seats and cartridge mechanisms. Before closing up walls, verify that all plumbing valves and concealed connections are fully serviceable and leak-free. Selecting brand-name valves with readily available replacement cartridges ensures long-term maintenance can be performed without destroying finished tile walls in the future.
ELECTRICAL AND VENTILATION BEST PRACTICES
Bathroom electrical systems demand strict attention to safety and code compliance. During wall cavity exposure, replace any outdated two-wire non-grounded circuits with modern grounded wiring systems. Existing electrical boxes that are cracked, brittle, or undersized should be replaced with properly sized multi-gang boxes designed to accommodate the volume of conductors, switches, and receptacles required by code. Avoid blind cutting into wall cavities with reciprocating saws or sledgehammers; always verify wire and pipe locations before opening walls.
Ventilation is equally critical for moisture management. Bathroom exhaust fans must discharge directly to the exterior of the building using approved rigid or semi-rigid ductwork. Venting an exhaust fan directly into an attic space introduces warm, moist air that can cause wood decay and mold proliferation on roof framing. Ensure all exterior vent terminations incorporate screen mesh to prevent pest intrusion.
STRUCTURAL FRAMING AND DRYWALL CONSIDERATIONS
Framing members support the structural integrity of the home and must never be needlessly notched, over-drilled, or cut during mechanical installations. Where wall-mounted accessories such as towel bars, grab bars, or toilet paper holders are planned, install solid wood blocking flush between studs prior to drywall installation. Relying solely on drywall anchors often results in loose fixtures and damaged wallboard over time.
When applying wall finishes, properly smooth and feather joint compound in thin coats rather than relying on heavy applications that require extensive mechanical sanding. In temporary patching situations where future remodeling is planned, flexible sealant at plane transitions can provide a temporary seal, though standard taped and finished drywall joints remain the requirement for permanent fire-resistant wall assemblies.
CONCLUSION
A successful bathroom renovation depends on detailed prep work, respectful handling of structural framing, and strict adherence to basic building codes. Taking time to plan electrical layouts, route proper ventilation, and install solid structural backing ensures the final space is not only visually appealing, but safe, functional, and durable for years to come.
THREE KEY TIPS
Install Solid Wood Backing For Accessories: Before installing new drywall or tile backer board, fasten nominal two-by-four or two-by-six wood blocking flush between wall studs at the designated heights for grab bars, towel racks, and heavy fixtures. Secure backing provides a structural anchor point, preventing fixture pull-out and drywall damage over time.
Vent Bathroom Exhaust Fans Directly Outdoors: Always route bathroom exhaust ductwork continuously to an approved exterior wall or roof cap. Never discharge exhaust air into an attic, soffit, or crawl space, as accumulated moisture will degrade roof sheathing, lower insulation effectiveness, and foster fungal growth.
Protect Structural Framing Members: Avoid excessive notching or drilling of wall studs and floor joists when running electrical cables or plumbing lines. Re-use existing mechanical holes whenever possible, and strictly follow building code limits on stud notch depths and bore hole sizes to maintain load-bearing capabilities.
BONUS QUESTIONS AND ANSWERS
QUESTION
Is it acceptable to exhaust a bathroom ventilation fan directly into the attic or soffit space?
TRANSITION
Once your tile, fixtures, and layout are finalized, managing moisture control becomes the most crucial step for preserving your renovation over time.
BUILDING CODE AND STRUCTURAL REASONING
Section M1501.1 of the International Residential Code (IRC) strictly mandates that all bathroom exhaust systems terminate outside the building envelope. Venting a fan into an attic, garage, crawl space, or soffit overhang is a severe code violation. Bathroom air carries extreme relative humidity; discharging warm, moist air into an unconditioned attic space causes immediate condensation on underside roof sheathing, framing, and insulation. This persistent moisture leads to rapid wood decay, structural roof degradation, and toxigenic mold growth. The vent ducting must be smooth-walled (or approved flexible metal), insulated if passing through unconditioned attic spaces to prevent internal duct condensation, and routed to an exterior wall or roof cap equipped with a damper.
QUESTION: Why does the building code require Ground-Fault Circuit-Interrupter protection for all bathroom electrical outlets?
ANSWER: While upgrading old electrical boxes, home remodelers must also ensure the circuitry itself meets modern safety standards. International Residential Code section E3902.1 mandates Ground-Fault Circuit-Interrupter protection for all 125-volt, single-phase 15- and 20-ampere receptacles installed in bathrooms. Because moisture drastically reduces electrical resistance on human skin, GFCI devices rapidly shut off power upon detecting a current imbalance as small as 4 to 6 milliamperes, preventing lethal shock hazards.
QUESTION: What is the maximum allowable distance between a bathroom plumbing fixture trap and its vent pipe?
ANSWER: In addition to proper fan ventilation, correct plumbing vent piping is critical to maintaining a functional drainage system. According to International Plumbing Code section 909.1, the maximum distance between a fixture trap and its developed vent connection depends directly on pipe diameter. A 1.5-inch trap arm allows a maximum distance of 6 feet to the vent, while a 2-inch trap arm allows up to 8 feet. Maintaining these limits prevents siphoning of the trap water seal, which protects indoor living spaces from sewer gases.