THE DANGERS OF UNSEALED COUNTERTOP GAPS AND HOW TO FIX THEM
INTRODUCTION
Installing a bathroom vanity or kitchen sink requires careful attention to detail. One of the most frequently overlooked details is the perimeter gap between the countertop and the adjacent drywall or tile surfaces. Even a tiny opening along the back or sides of a lavatory basin can create a pathway for water intrusion, leading to hidden structural damage, wood rot, and mold growth.
THE HIDDEN DANGERS OF UNSEALED COUNTERTOP GAPS
During routine cleaning or everyday use, water naturally spills onto countertop surfaces. Wiping down a vanity with a wet sponge can easily push two or more tablespoons of water into unsealed perimeter gaps. While a few drops may seem harmless, repeated moisture accumulation creates an ideal environment for mold and mildew to thrive behind cabinets and inside wall cavities.
HOW MOISTURE SEEPAGE DESTROYS CABINETRY AND FRAMING
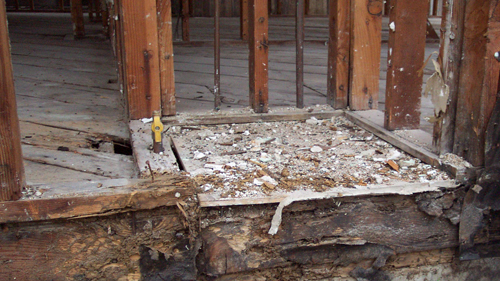
Moisture that enters through countertop gaps drips down the backside of the cabinet, saturating wood-based substrates such as particleboard, medium-density fiberboard (MDF), or plywood. Over time, these materials absorb water, swell, delaminate, and rot. In severe cases, the cabinet base deteriorates entirely, generating foul odors and requiring complete tear-out and replacement of the vanity and surrounding wallboard.
EFFECTIVE METHODS TO SEAL COUNTERTOP EXPANSION GAPS
Preventing water intrusion along countertop boundaries requires establishing a continuous, watertight seal:
For Small Gaps (Under One-Quarter Inch): Apply a high-quality, 100 percent silicone sealant or mold-resistant kitchen-and-bath caulk along all wall-to-countertop joints.
For Large Gaps (Over One-Quarter Inch): Install a matching solid-surface or cultured marble side splash, or a non-porous composite trim piece, using silicone adhesive to bridge the space before caulking the remaining joints.
CONCLUSION
Protecting your bathroom cabinetry from moisture damage comes down to proactive maintenance. Inspecting perimeter joints around lavatories and sealing them correctly ensures your home remains sanitary, structurally sound, and free from costly hidden rot.
THREE KEY CONSTRUCTION TIPS
Apply 100 percent silicone or high-grade siliconized acrylic sealant specifically formulated for kitchen and bath applications to ensure a flexible, waterproof bond that withstands joint movement and resists mildew.
Use solid-surface side splashes or engineered composite filler strips rather than solid wood trim when closing wide countertop gaps, as wood will absorb moisture and warp over time.
Clean and dry all wall and countertop contact surfaces thoroughly with rubbing alcohol prior to applying sealant to ensure maximum adhesion and eliminate trapped mold spores.
BONUS FREQUENTLY ASKED QUESTIONS
QUESTION 1: Do residential building codes require sealing vanity tops and sinks to adjacent wall surfaces?
Beyond basic maintenance aesthetics, home builders often ask if sealing countertops is required by regional building standards. Yes, Section R307.2 of the International Residential Code (IRC) mandates that all plumbing fixtures be installed with smooth, nonabsorbent, and cleanable surfaces in surrounding areas. Unsealed perimeter gaps allow water to migrate into concealed wall spaces, violating sanitary surface requirements and risking long-term moisture accumulation within the wall assembly.
QUESTION 2: What structural damage can occur if countertop leaks go unnoticed for an extended period?
Understanding how minor surface spills compromise lower wall assemblies helps highlight the structural stakes involved. Sustained moisture penetration raises the moisture content of underlying wood studs, sole plates, and subflooring above 20 percent, which triggers wood-decay fungi growth. Over time, this biological decay breaks down the cell structure of structural lumber, weakening load-bearing capabilities and breaching IRC Section R317 requirements regarding decay protection of structural framing.
QUESTION 3: Is standard interior drywall acceptable behind a bathroom vanity, or should water-resistant backing be used?
Selecting the correct substrate material during vanity installation serves as a crucial secondary line of defense against hidden leaks. Under IRC Section R702.3.8, water-resistant gypsum backing board or cementitious backer units are required in wet areas subjected to direct splash or high humidity. Using standard paper-faced gypsum board behind a vanity top leaves the wall vulnerable to swelling, delamination, and fungal growth whenever surface water breaches the perimeter seal.