Planning a bathroom remodel often involves modifying existing walls to accommodate new plumbing lines or to level out uneven framing. Furring out a wall adding thin strips of wood or metal framing to increase wall thickness seems like a straightforward solution. However, adding even a fraction of an inch to a wall surface can disrupt the tight spatial tolerances required for standard bathroom fixtures. Before altering wall framing in a bathroom, it is critical to understand how fixture dimensions, rough-in requirements, and finishing materials interact.
THE 60-INCH BATHTUB ROUGH-IN CHALLENGE
The most common structural roadblock when furring out a bathroom wall involves the bathtub alcove. Standard residential alcove bathtubs are designed for a 60-inch (5-foot) rough opening measured precisely from stud face to stud face on opposing walls. If you fur out one or both end walls of a bathtub alcove without adjusting the surrounding framing, the available distance between studs drops below 60 inches. Because cast iron, fiberglass, and acrylic bathtubs cannot be trimmed, a standard tub will no longer fit into the opening.
To overcome this issue when wall furring is necessary for plumbing routing, contractors typically have three options: adjust the opposing framing to preserve the 60-inch rough-in width, install a smaller custom tub or walk-in shower unit, or terminate the furring strips above the bathtub flange line so the tub rests directly against the original structural studs.
TOILET ROUGH-IN CLEARANCES AND FINISHED WALL THICKNESS
The second major conflict occurs at the water closet (toilet). Standard floor-mounted toilets require a 12-inch rough-in measurement, which is the distance from the finished wall surface to the center of the toilet drain line (closet flange). While a rough framing layout typically leaves 12 and 1/4 inches from the stud face to allow for 1/2-inch drywall, adding furring strips reduces this dimension.
Furthermore, wall finish choices significantly alter final clearances. For instance, applying 1/2-inch cement backer board along with mortar and ceramic tile can add up to 3/4 inch of total thickness. If the wall moves forward toward the drain flange, the porcelain toilet tank will hit the finished wall before the base seats properly over the closet flange, preventing a watertight wax ring seal. Checking the tank-to-wall clearance on your existing toilet before adding wall thickness is essential.
PLUMBING ADJUSTMENTS AND PRE-PLANNING
Unlike bathtubs and toilets, vanity sinks and cabinets offer greater flexibility. Supply lines and drain stub-outs for a sink can usually be extended or adjusted through the furred wall without compromising cabinet installation. However, to avoid costly re-work, all fixture dimensions, tile thicknesses, and drain locations must be calculated as a unified system before securing any furring strips to the wall framing.
THREE KEY CONSTRUCTION TIPS
Verify Rough-In Clearances Before Framing: Always measure from the finished wall surface, not the raw stud, when positioning closet flanges and tub alcoves. A standard toilet flange requires 12 inches to the finished wall, and a standard alcove tub requires exactly 60 inches of clear space between framing faces.
Account for Tile and Substrate Thickness: When calculating total wall thickness, include every layer in your measurements. A 1/2-inch cement backer board plus thin set mortar and wall tile adds approximately 3/4 inch to your framing, which directly reduces fixture clearance.
Maintain Plumbing Accessibility and Slope: If furring out a wall to conceal drain or vent pipes, ensure that horizontal drain runs maintain a minimum slope of 1/4 inch per foot toward the main stack without exceeding allowable notch or hole limits in structural framing.
BONUS QUESTIONS AND ANSWERS
QUESTION 1
What are the electrical outlet requirements when installing a new vanity cabinet?
TRANSITION:
Upgrading bathroom cabinetry often involves relocating or adding electrical outlets for hair tools, electric toothbrushes, or internal drawer power.
ANSWER:
At least one GFCI-protected receptacle must be installed within 36 inches of the outside edge of each sink basin, and any outlets installed inside drawers require safety shut-off switches.
Building Code Reasoning: According to National Electrical Code (NEC Article 210.52(D)), every bathroom vanity must have a receptacle located adjacent to the sink to prevent the dangerous use of extension cords near water sources. Additionally, NEC 210.8(A)(1) mandates that all bathroom receptacles have Ground-Fault Circuit-Interrupter (GFCI) protection. If you plan to install power outlets inside a vanity cabinet or pull-out drawer, UL 962A and local building codes require an automatic power-cut switch that de-energizes the outlet whenever the drawer is closed. This prevents plugged-in heating appliances, such as curling irons, from causing a fire inside an enclosed cabinet.
QUESTION 2
How should supply lines and drain pipes be configured inside the vanity cabinet for code compliance?
TRANSITION:
Once the cabinet is secured, connecting the plumbing correctly keeps your home safe from hidden water leaks and sewer gas.
ANSWER:
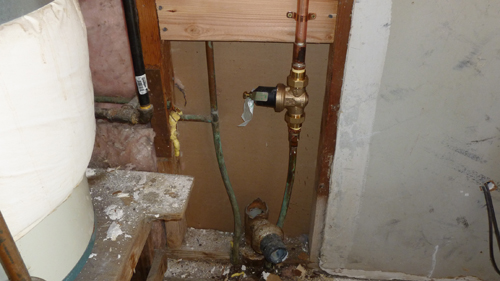
Shut-off valves must remain readily accessible inside the cabinet, and wall penetrations behind the vanity must be sealed tight around the pipes.
Plumbing and Building Code Reasoning: IRC Section P2903.9.3 mandates that individual shut-off valves must be installed on water supply lines at each fixture and remain readily accessible without requiring tools or removing structural cabinet panels. Furthermore, IRC air-sealing provisions require all pipe penetrations through the back wall to be caulked or foamed tight. Sealing behind the cabinet prevents warm, humid bathroom air from infiltrating wall cavities, which protects against concealed mold growth and maintains thermal insulation performance.
Question 3: What moisture barrier and wall backing requirements apply to tiled shower and tub surrounds?
Beyond physical dimensions, properly preparing a furred wall behind wet areas requires strict adherence to building science and waterproofing codes.
Answer: Per IRC Section R702.4.2, non-water-resistant gypsum board cannot be used as a backing material directly behind tile in tub or shower compartments. The code requires a water-resistant backer unit compliant with ASTM C1288 or ASTM C1325, such as cementitious backer board, installed over an approved continuous vapor retarder or treated with a liquid-applied waterproofing membrane. This prevents moisture intrusion from deteriorating the underlying timber framing or furring strips.