PREVENTING SHOWER LEAKS AT HOT-MOPPED BENCH TRANSITIONS
Water intrusion in custom tile showers remains one of the most frequent and costly failures in residential construction. While hot-mopping a waterproofing method using melted asphalt tar and roofing felt is a proven and effective technique for creating a sealed shower pan, critical vulnerabilities often arise where the waterproofing meets the surrounding wall substrate.
A common structural oversight occurs where water-resistant drywall, commonly known as greenboard, directly touches or abuts a hot-mopped shower seat or bench. Because shower seats accumulate standing and cascading water, moisture inevitably migrates toward the outer edges of the bench. If greenboard is installed directly against the hot-mopped surface without a proper buffer or impermeable cementitious backing, water will wick into the gypsum core, leading to mold growth, tile delamination, and severe hidden rot.
UNDERSTANDING SUBSTRATE LIMITATIONS: GREENBOARD IS NOT WATERPROOF
A persistent misconception in the building industry is that greenboard is waterproof. In reality, IRC guidelines and tile installation standards (such as TCNA standards) classify greenboard merely as water-resistant, not waterproof. While its treated paper facing retards initial moisture penetration, prolonged exposure to moisture or standing water rapidly breaks down the gypsum core. In wet environments like tile shower enclosures and adjacent bench ledges, greenboard can deteriorate completely within a few years if installed incorrectly.
PROPER DETAILING FOR SHOWER SEATS AND SUBSTRATE TRANSITIONS
To prevent moisture from wicking into susceptible wall assemblies, specific framing and substrate guidelines should be followed:
Maintain Substrate Separation and Use Cement Backer Units
Never butt greenboard directly against a hot-mopped waterproofing membrane or shower pan liner. Keep gypsum products back from high-exposure moisture zones. Within the immediate wet zone including the shower seat, curb, and lower wall enclosure always use an approved solid cementitious backer board (such as Wonder Board or Hardie Backer) or traditional thick-bed scratch coat mortar.
Strategic Substrate Layout Based on Tile Size
When transitioning from a waterproof cementitious substrate to water-resistant drywall outside the primary splash zone, plan your joints around tile layout. Shift the greenboard transition back so that full tiles completely cover the cement board and cross the seam. For example, if using 4-inch tile, set the greenboard transition at least 3.5 inches away from the wet corner. For 6-inch tile, set it back 5.5 inches. Ensure a physical gap of at least 1/2 inch between the bottom edge of the drywall and any horizontal waterproofed surface to prevent capillary action.
Extend the Hot-Mop Waterproofing Lip
Ensure the professional hot-mop application extends a minimum of 4 to 6 inches above the finished shower seat level and wraps continuously around the return corner of the wall assembly. Flashing or membrane continuous extensions at these transitions prevent driven water from migrating horizontally behind the wall finish.
By combining proper waterproofing height, cementitious backing materials in wet zones, and intentional joint placement, you protect the structural framing of the home from long-term, concealed water damage.
THREE KEY CONSTRUCTION TIPS
Always use continuous cement backer units (CBU) or solid mortar beds over all shower benches, curbs, and lower wall enclosures. Never rely on greenboard or standard drywall inside the direct wet envelope.
Maintain an isolation gap of at least 1/2 inch between the bottom edge of gypsum wallboard and any horizontal waterproofing pan lip or hot-mopped surface to eliminate capillary wicking of trapped moisture.
Ensure all hot-mop membranes or pan liners extend a minimum of 3 inches (ideally 4 to 6 inches) above the finished curb and shower bench height, including full wrapping around vertical corner turns.
BONUS QUESTIONS AND ANSWERS
QUESTION 1: Can green board ever be used on the ceiling of a shower or bathroom wet area?
TRANSITION: While we have established why green board fails on shower walls, you might be wondering if it is acceptable to use overhead on the bathroom ceiling instead.
ANSWER AND CODE REASONING:
According to the International Residential Code (IRC Section R702.3.8) and ASTM C1396 standards, water-resistant gypsum backing board (green board) can be installed on bathroom ceilings, but only under strict structural spacing limitations to prevent sagging.
If you use 1/2-inch thick green board on a ceiling, the framing joists or furring strips must be spaced no more than 12 inches on-center.
If your ceiling framing is spaced at 16 inches on-center, building codes require upgrading to 5/8-inch thick green board or applying a continuous vapor retarder on the warm side of the assembly in cold climates.
Crucially, building codes completely prohibit green board on ceilings in enclosed steam shower enclosures, where continuous elevated humidity degrades the gypsum core, causing ceiling collapse or tile delamination.
QUESTION 2: Do I need to upgrade my main sewer line or install a sewage ejector pump when adding an ADU?
TRANSITION:
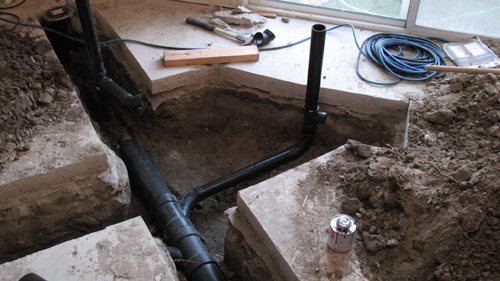
Beyond interior pipe layout, one critical connection homeowners often overlook is how the new ADU waste line ties into the existing property drainage system.
EXPLANATION AND CODE REASONING:
Drainage Fixture Unit (DFU) Load: Both the International Plumbing Code (IPC) and Uniform Plumbing Code (UPC) assign DFU values to every fixture (sinks, toilets, showers). Adding an ADU adds significant DFU load to the existing sewer lateral. If the main lateral is only 3 inches in diameter or already operating near capacity, it may need to be upsized to a 4-inch pipe to prevent backups.
Gravity and Slope Requirements: Plumbing codes mandate a minimum slope for gravity drainage (typically 1/4 inch fall per foot for pipes 2.5 inches or smaller, and 1/8 inch to 1/4 inch per foot for 3-inch to 4-inch pipes). If the ADU is located on a lower grade elevation than the street sewer main or primary house connection, gravity drainage becomes impossible.
Sewage Ejector Pump Systems: In low-elevation scenarios, code mandates a sealed sewage ejector basin with a pump, a fullway gate/ball valve, a backwater check valve, and a dedicated vent stack. The check valve prevents pumped effluent from flowing back into the basin, while the dedicated vent relieves air pressure variations during pump operation to protect fixture traps.
QUESTION 3: Since cement backer board is water-durable, why does building code still require a waterproof membrane over it?
TRANSITION: Now that you know why cement board is the preferred substrate for wet areas, you might ask why simply applying tile directly over cement board is still not enough to protect your home's structure.
ANSWER AND CODE REASONING:
A critical distinction in building science is the difference between water-durable and waterproof. Cement board is water-durable, meaning it will not break down or dissolve when exposed to water, but it remains porous.
Ceramic tile and cementitious grout are also porous, meaning water passes through them via capillary action during every shower.
IRC Section R702.4.2 and Tile Council of North America (TCNA) installation guidelines require a continuous waterproof membrane conforming to ANSI A118.10 standards (such as liquid-applied membranes or sheet membranes) applied over the substrate, or a 4-mil polyethylene vapor retarder placed directly behind the backer board.
Without a certified waterproof barrier, water migrates straight through the grout and cement board into the wall cavity, causing structural rot in wood wall studs, fastener corrosion, and subfloor damage over time.