CONVERTING A BATHTUB TO A SHOWER: ESSENTIAL PLUMBING AND CODE REQUIREMENTS
Converting an existing bathtub into a walk-in shower is one of the most popular bathroom remodeling projects. However, transitioning from a tub to a shower involves more than just swapping out fixtures and re-tiling walls. The underlying plumbing requirements for a shower differ significantly from those of a standard bathtub.
Failing to update your plumbing infrastructure during a conversion can lead to slow drainage, standing water, sewer gas leaks, and non-compliance with local building codes. Before starting your remodel, it is critical to understand the mechanical adjustments required for water supply lines, valves, and drain pipe configurations.
PLUMBING SUPPLY VALVES AND SHOWER HEAD LINES
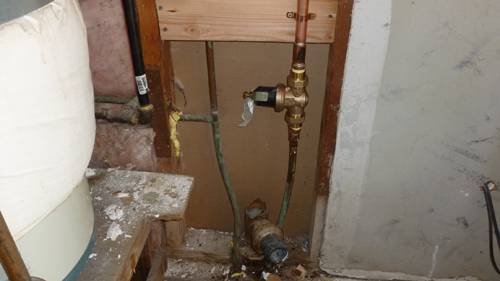
When replacing a bathtub with a shower, the first area to evaluate is the water supply valve assembly inside the wall cavity.
If your existing setup consists of a combination tub spout and shower head, the mixing valve is already plumbed to divert water upward. However, if the existing installation features only a low-level tub spout without an overhead pipe, you must replace or modify the valve body. This process requires running a dedicated 1/2-inch vertical riser pipe up to the new shower head location and removing or capping the lower spout connection.
Additionally, consider whether you plan to install multi-head shower systems, high-flow rain heads, or body sprayers. Standard residential supply lines are typically 1/2-inch. High-demand shower systems often require upgrading the supply piping to 3/4-inch lines and installing a high-flow thermostatic mixing valve to maintain adequate water volume and pressure.
DRAIN PIPE SIZING: INCH-AND-A-HALF VS. TWO-INCH PIPING
The most critical technical hurdle in a tub-to-shower conversion involves the drain line diameter.
According to the International Residential Code (IRC) and Uniform Plumbing Code (UPC):
Standard bathtubs are permitted to connect to a 1-1/2-inch drain pipe and P-trap.
Dedicated shower stalls require a minimum 2-inch drain pipe and P-trap.
The reasoning behind this code requirement comes down to water volume and drainage speed. A bathtub acts as a holding vessel, allowing water to drain slowly through a 1-1/2-inch outlet without overflowing into the room. A shower base, however, has a shallow threshold. Water must drain immediately as it exits the shower head to prevent standing water and basin overflow. Because a 2-inch pipe carries nearly twice the volume of an 1-1/2-inch pipe, the code mandates this larger size for shower stalls.
CORRECTING BELOW-FLOOR DRAIN CONNECTIONS
In many tract homes or older builds, plumbers used 1-1/2-inch pipe all the way to the main branch line. Tying a new 2-inch shower drain directly into an existing 1-1/2-inch branch pipe does not meet building code.
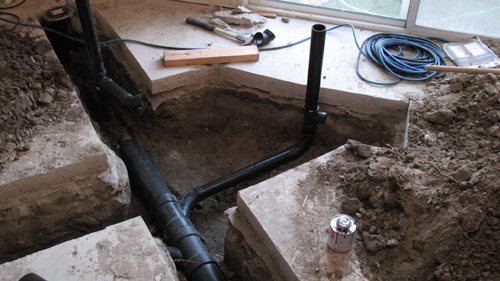
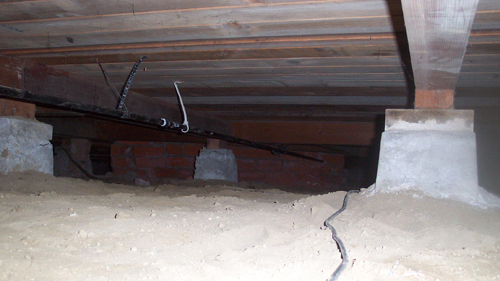
To achieve a code-compliant installation, you must access the drainage branch below the floor—either via a crawlspace, basement, lower-level ceiling, or by breaking concrete in a slab-on-grade foundation.
Key steps for upgrading the drainage structure:
Remove the existing 1-1/2-inch P-trap and sanitary tee or wye fitting at the branch line.
Install a new 2-inch fitting (such as a 2-inch combination wye and 1/8 bend or 45-degree angle fitting) at the main drain pipe.
Run a 2-inch pipe from the branch line connection to the new 2-inch P-trap directly beneath the shower drain assembly.
Maintain a minimum slope of 1/4-inch drop per linear foot on horizontal runs to ensure proper gravity drainage.
When joining modern plastic pipes (ABS or PVC) to older cast iron main lines, transition couplings with stainless steel shielding bands (shielded no-hub couplings) should be used to ensure a root-proof, leak-free, and structurally stable connection.
UNAPPROVED DRAIN REDUCTIONS AND HORIZONTAL TRANSITIONS
A common mistake made during DIY conversions is installing a 2-inch shower drain assembly at the basin, but reducing it down to an 1-1/2-inch pipe horizontally before reaching the main branch line. Another improper method is running an 1-1/2-inch pipe horizontally and trying to step up to a 2-inch adapter at the vertical riser.
Neither of these workarounds meets plumbing codes. Reducing a drain pipe in the direction of flow creates a lip inside the pipe where hair, soap scum, and debris collect. Over time, this leads to chronic clogs and standing water in the shower. Furthermore, expanding or reducing pipe size horizontally creates air pockets that disrupt proper drainage hydraulics and proper trap venting. The 2-inch diameter pipe must remain continuous from the shower strainer all the way to the larger branch line.
FINAL CONSIDERATIONS BEFORE REMODELING
Upgrading subsurface plumbing requires carefully evaluating structural framing and floor access. Cutting larger holes for 2-inch pipe through floor joists must be done within structural code guidelines to prevent weakening the floor assembly. Always check with your local municipal building department to obtain necessary permits and verify specific regional amendments to the model plumbing codes before beginning demolition.
THREE CRITICAL CONSTRUCTION TIPS FOR TUB-TO-SHOWER CONVERSIONS
Upgrade to a 2-Inch Continuous Drain Line: Always ensure the drain line and P-trap are upgraded to a full 2-inch diameter from the shower strainer all the way to the main branch connection. Connecting a shower to an 1-1/2-inch line violates building codes and drastically increases the risk of basin overflows and slow drainage.
Maintain Proper Slope on Horizontal Pipe Runs: Ensure all horizontal 2-inch drain lines maintain a consistent slope of at least 1/4-inch drop per foot toward the main stack. Insufficient slope leads to standing water and sediment accumulation inside the pipe, while excessive slope can cause liquid to run off faster than solids, leading to blockages.
Protect Floor Joists When Re-Routing Plumbing: When running a new 2-inch drain line through wooden floor joists, never notch the top or bottom flanges of engineered I-joists, and keep bored holes within the middle third of solid-sawn joist depth. Oversized or misplaced holes compromise the structural integrity of the floor system under the weight of the new shower installation.
BONUS QUESTIONS AND ANSWERS
While updating supply and drain lines is critical, several other structural and plumbing considerations impact a successful shower installation. Here are three additional expert Q&As covering essential code and engineering standards for tub-to-shower conversions.
QUESTION 1: CAN I KEEP MY EXISTING 1-1/2-INCH VENT PIPE WHEN UPGRADING THE DRAIN TO A 2-INCH PIPE?
Answer: Yes, in most residential jurisdictions, an 1-1/2-inch dry vent pipe is code-compliant for venting a 2-inch shower drain line. Under both the International Residential Code (IRC) and Uniform Plumbing Code (UPC), a 2-inch shower trap requires a minimum 1-1/2-inch vent.
The structural and mechanical reasoning centers on air pressure management within the DWV (Drain, Waste, and Vent) system. The vent's purpose is to allow sewer gases to escape while introducing atmospheric pressure into the system. This prevents a siphon from forming, which would otherwise pull water out of the P-trap as waste flows down the drain. While the waste pipe itself needs to be expanded to 2 inches to handle the liquid flow rate of a shower, an 1-1/2-inch air vent provides more than enough cross-sectional area to supply the air volume necessary to protect the 2-inch water seal in the trap.
QUESTION 2: WHAT IS THE MAXIMUM DISTANCE ALLOWED BETWEEN THE SHOWER DRAIN TRAP AND THE VENT STACK?
Answer: For a standard 2-inch shower drain pipe, the maximum allowable horizontal distance from the trap weir to the vent connection is 8 feet under the International Residential Code (IRC), or 5 feet under the Uniform Plumbing Code (UPC).
This restriction is governed by the hydraulic gradient of the drain line. Plumbing code requires horizontal drain lines to slope downward at 1/4 inch per foot toward the main stack. If a 2-inch pipe runs too far horizontally before reaching a vent, the vertical drop of the sloping pipe will eventually exceed the total internal diameter of the pipe itself (2 inches). When this happens, the pipe becomes completely submerged in water at the downstream end, cutting off air flow. This creates a self-siphoning condition that pulls the protective water barrier out of the P-trap, allowing hazardous sewer gases to enter the living space.
QUESTION 3: DO I NEED TO INSTALL WATERPROOF BACKER BOARD ALL THE WAY TO THE CEILING IN A SHOWER CONVERSION?
Answer: Yes, building codes require water-resistant framing backer materials behind tile or wall coverings to extend to a height of not less than 70 inches above the drain outlet, or 6 feet above the finished floor, though industry best practice is to carry it all the way to the ceiling.
Under IRC Section R307.2 and ANSI standards for tile installations, standard gypsum wallboard (regular drywall) is strictly prohibited as a backing material in wet areas like shower enclosures. Showers generate constant high humidity, water spray, and vapor pressure. Cementitious backer units (CBU), glass-mat water-resistant gypsum panels, or extruded polystyrene foam panels must be mechanically fastened to the studs and sealed at all joints with waterproof membranes or alkali-resistant tape and thin set. Installing code-compliant waterproof backing across the entire vertical height prevents water intrusion behind the wall cavity, which would otherwise rot the timber stud framing, weaken structural fasteners, and promote toxic mold growth.