HOW TO STOP BASE LEAKS BY USING TWO TOILET WAX RINGS
A leaking toilet base is one of the most common residential plumbing issues. Left unchecked, water seeping out around the bowl can damage subflooring, degrade ceiling drywall on lower levels, and create unsanitary conditions. While a worn seal is often blamed, the root cause of a recurring toilet leak frequently traces back to the position of the closet flange relative to the finished floor height.
Understanding the Function of the Closet Flange and Wax Ring
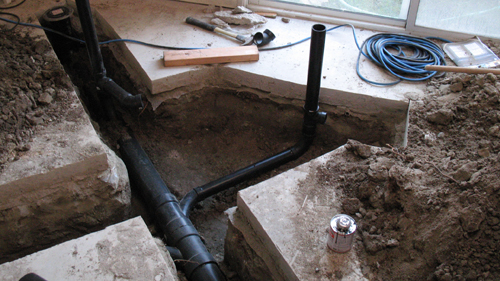
The closet flange (also known as the toilet flange) secures the toilet fixture to the drain pipe and anchors it to the subfloor or concrete foundation. In wood-frame construction, the flange must be mechanically fastened to the floor framing using corrosion-resistant screws to prevent movement. On slab-on-grade concrete foundations, the surrounding concrete and pipe assembly stabilize the fixture.
A standard toilet installation relies on a molded wax ring placed between the top of the closet flange and the horn underneath the toilet bowl. As the toilet is set into place, its weight compresses the wax, creating a airtight and watertight seal that prevents liquid, sewer gas, and odors from escaping.
Why Closet Flanges End Up Below Floor Level
For a single standard wax ring to seal effectively, the bottom lip of the closet flange should rest directly on top of the finished flooring, placing the upper surface of the flange slightly above the floor plane. However, flange depth issues frequently arise during initial construction or subsequent renovation projects.
The most common scenario occurs during bathroom remodeling. When homeowners or contractors install new tile, hardwood, or luxury vinyl plank over existing flooring without resetting the plumbing flange, the finished floor height increases by 1/4 inch to 3/4 inch.
This creates a recess where the top of the flange sits below the surface of the new floor. When a single wax ring is installed over a recessed flange, the gap between the toilet horn and the flange is too wide for the wax to compress properly, leading to persistent leaks.
Resolving Recessed Flange Leaks with Stacking Wax Rings
When the distance between the toilet horn and the recessed flange prevents a standard wax ring from compressing, stacking two wax rings provides an economical, immediate solution.
Inspect the Flange Height: After removing the toilet and clearing away old wax, measure the position of the flange relative to the finished floor. If the flange sits below the level of the finished flooring, a single standard wax ring will not provide a reliable compression seal.
Position the Primary Ring: Place the first wax ring directly onto the cleaned closet flange. For optimal stability, use a wax ring with a built-in plastic horn or sleeve facing downward into the drain line.
Apply the Secondary Ring: Place a standard plain wax ring (without a plastic sleeve) directly on top of the first ring. The secondary wax ring fills the additional vertical gap caused by the elevated floor surface.
Set the Toilet: Carefully lower the toilet straight down over the closet bolts onto the stacked wax assembly. Apply steady downward body weight to evenly compress the combined wax layers until the toilet rests flush against the floor. Avoid rocking or tilting the fixture after contact, as shifting can fracture the newly formed wax seal.
Secure and Test: Tighten the closet nuts evenly on both sides, taking care not to overtighten and crack the porcelain bowl. Connect the water supply, flush the toilet several times, and inspect the base thoroughly for leaks.
While rigid flange extenders are another valid mechanical method for raising low flanges, double-stacking wax rings remains a proven, cost-effective repair strategy for low-profile elevation differences.
THREE KEY CONSTRUCTION TIPS:
ALWAYS MOUNT FLANGES ON TOP OF FINISHED FLOORING: During primary installation or subfloor replacement, position the closet flange so that its bottom flange ring rests directly on top of the finished flooring, rather than flush with or below the subfloor.
AVOID ROCKING THE TOILET DURING INSTALLATION: Once a toilet bowl makes contact with a wax ring assembly, lower it strictly vertically. Rocking, twisting, or shifting the toilet breaks the wax bond, creating internal air channels that cause water and sewer gas leaks.
FASTEN WOOD FLOOR FLANGES SECURELY: When installing closet flanges over wood floor framing, always secure the flange using stainless steel or brass wood screws driven directly into solid subflooring or joists to eliminate fixture movement.
BONUS QUESTIONS AND ANSWERS:
Q1: Why is it critical to ensure the closet flange is mechanically fastened to the floor framing rather than relying solely on the drain pipe connection?
Transition: Ensuring the plumbing assembly remains stationary over time requires examining the structural connection beneath the fixture.
Explanation and Structural Reasoning: According to International Residential Code (IRC) plumbing provisions, water closets must be rigidly secured to the building structure. Relying on the PVC or ABS waste pipe alone to hold the flange in place allows micro-movements whenever weight is applied to the toilet.
Over time, this movement fractures the wax seal and places severe mechanical stress on the solvent-welded pipe joints, leading to subfloor rot, structural joist deterioration, and system leaks.
Q2: What is the minimum clear space required around a toilet bowl under standard residential building codes?
Transition: Proper flange positioning involves not only vertical elevation, but also adhering to code-mandated horizontal clearance dimensions.
Explanation and Structural Reasoning: Section R307.1 of the International Residential Code (IRC) dictates that toilets must have a minimum clearance of 15 inches measured from the centerline of the fixture to any side wall, vanity, or side obstruction. Additionally, a minimum of 21 inches of clear space must be provided in front of the toilet bowl. These code standards ensure adequate ergonomics, proper user accessibility, and adequate physical space to perform routine maintenance or seal repairs.
Q3: Can a toilet be installed over flexible or floating floor surfaces like Luxury Vinyl Plank (LVP) without creating long-term seal failure?
Transition: Remodeling often introduces modern flooring materials that interact differently with heavy fixture loads and wax seals.
Explanation and Structural Reasoning: Floating floors, such as click-lock luxury vinyl plank or laminate, are engineered to expand and contract freely across a subfloor. If a heavy toilet is bolted directly down onto a floating floor without proper perimeter expansion gaps around the flange, the toilet pins the flooring down, causing floor buckling, seam separation, and uneven setting. Standard building practices require installing the closet flange firmly to the structural subfloor, trimming the floating flooring back 1/4 inch around the flange perimeter to allow movement, and setting the toilet so its weight bears on the structural subfloor rather than compressing the floating floor core.