HOW TO SAFELY REMOVE A CAST IRON BATHTUB WITH A SLEDGEHAMMER
Removing a cast iron bathtub can seem like a daunting task during a bathroom demolition. Standard cast iron tubs typically weigh anywhere from 300 to over 500 pounds, making them nearly impossible for one or two people to maneuver out of a home in a single piece without causing damage to doorways, walls, and flooring. The most efficient and preferred method for removal is breaking the tub into smaller, manageable pieces directly on-site using a sledgehammer.
PREPARATION AND PLUMBING DISCONNECTION
Before attempting any demo work, proper site preparation is critical. Begin by turning off the water supply lines leading to the bathroom fixtures. Disconnect the tub from the overflow assembly and the drain underneath. Inspect the surrounding perimeter to ensure all fasteners, nails, or screws holding the tub flange to the wall studs have been removed.
PERSONAL PROTECTIVE EQUIPMENT (PPE) IS MANDATORY
When cast iron shatters, the porcelain enamel coating breaks into extremely sharp, glass-like shards. These sharp chips fly off at high speed upon impact and can easily cause severe lacerations. Proper personal safety gear is mandatory throughout the entire process:
Heavy-duty safety glasses or a full-face shield to guard against flying enamel chips.
Long-sleeve shirts and durable pants made of thick material.
Heavy leather work gloves.
Sturdy work boots.
A hat or hard hat to protect your head from stray debris.
STEP-BY-STEP BREAKING PROCEDURE
PROTECT SURROUNDING SURFACES: Lay heavy drop cloths or tarps over floor surfaces outside the bathroom to catch stray porcelain fragments. Cover any sharp edges or protruding metal parts of the tub frame to prevent accidental contact while swinging your tools.
STRIKE WITH CONTROLLED FORCE: Using a standard sledgehammer, begin striking the body of the tub. Target the flat apron (front wall) or the bottom basin first. Cast iron is brittle, and after a few firm strikes, cracks will propagate across the surface, causing sections to fracture. Avoid wild, full-body swings that could compromise your balance or result in a missed hit against adjacent wall framing.
CLEAN UP AS YOU PROGRESS: Enamel and metal shards bounce off surfaces and spread quickly. Vacuum or sweep up loose debris after breaking down each section before moving to the next. Keeping a clean workspace prevents sharp chips from getting caught underfoot or flying up when you strike subsequent sections.
REMOVE IN SECTIONS: Continue breaking the tub into two or three large pieces that can be easily lifted and carried out by hand. Once the main body is segmented, carefully lift the pieces into a heavy-duty trash container or directly out to a disposal site.
FINAL CLEANUP: Thoroughly vacuum the entire work zone, adjacent hallways, and nearby rooms. Porcelain fragments migrate remarkably far from the work area during demolition. Inspect your boots and clothing before walking through the rest of the house to avoid tracking sharp particles into carpeted or finished living spaces.
By following a deliberate, safety-first approach and clearing debris continuously, you can complete a cast iron tub removal in under 30 minutes without risking personal injury or home damage.
THREE KEY TIPS:
Cover the tub with a heavy canvas drop cloth or moving blanket before striking it with a sledgehammer. This dramatically reduces the velocity and distance of flying porcelain and iron shards during impact.
Always verify that the tub drain and overflow plumbing are completely disconnected from the waste pipe before striking the tub. Striking a tub while still attached to the plumbing stack can crack or break below-floor drainage lines, leading to costly subfloor repairs.
Keep a shop vacuum running nearby and clean up loose glass-like enamel shards immediately between hammer strikes. This stops debris from migrating into neighboring rooms and prevents sharp fragments from bouncing into exposed skin.
BONUS QUESTIONS AND ANSWERS:
TRANSITION: While breaking up a heavy tub is straightforward, managing the surrounding plumbing and structural support requires an understanding of building codes and safety standards.
Q: What should be done with the exposed open drain pipe once the tub and trap are disconnected?
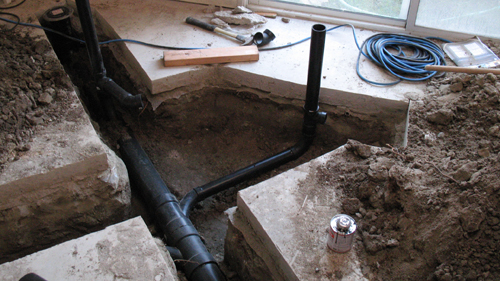
A: When a bathtub is removed, the open drain pipe leading to the DWV (Drain, Waste, and Vent) system must be temporarily stuffed with a rag and sealed or capped off immediately. According to standard plumbing codes (including IRC Chapter 31), open waste lines allow hazardous sewer gas (containing hydrogen sulfide and methane) to enter the living space. Additionally, capping the pipe prevents demolition debris, porcelain chips, or tools from falling down the line and causing severe main-line blockages.
TRANSITION: Removing a massive 400-pound tub also changes how you evaluate the floor structure underneath the bathroom.
Q: How do building codes regulate floor joist support under heavy plumbing fixtures like cast iron or stone bathtubs?
A: Under IRC Chapter 5 (Floors), residential floor framing must be designed to carry a minimum uniform live load of 40 pounds per square foot (psf), but concentrated loads from heavy fixtures require specific structural considerations. A cast iron bathtub filled with water and an occupant can easily exceed 800 to 1,000 pounds total weight. Standard framing practice requires double floor joists directly under the outer edge or parallel sides of a bathtub to distribute this concentrated load back to load-bearing walls or girders without causing structural deflection or tile cracking.
TRANSITION: Once the tub is out, framing repairs around the wet-wall area often come next.
Q: Is a vapor retarder or waterproof membrane required behind wall coverings in a replacement tub or shower enclosure?
A: Yes. According to IRC Section R702.4, wet areas such as tub and shower enclosures require a water-resistant backing material (such as cement board or fiber-cement fiber mat panels) installed over the framing. Furthermore, code mandates a continuous waterproof membrane or vapor retarder applied behind or over the backer board before tiling. This prevents moisture from penetrating the wall cavity, which would otherwise lead to wood rot, mold growth, and eventual structural failure of the wall studs.