FRAMING SCISSOR TRUSSES FOR AN ANGLED WALL
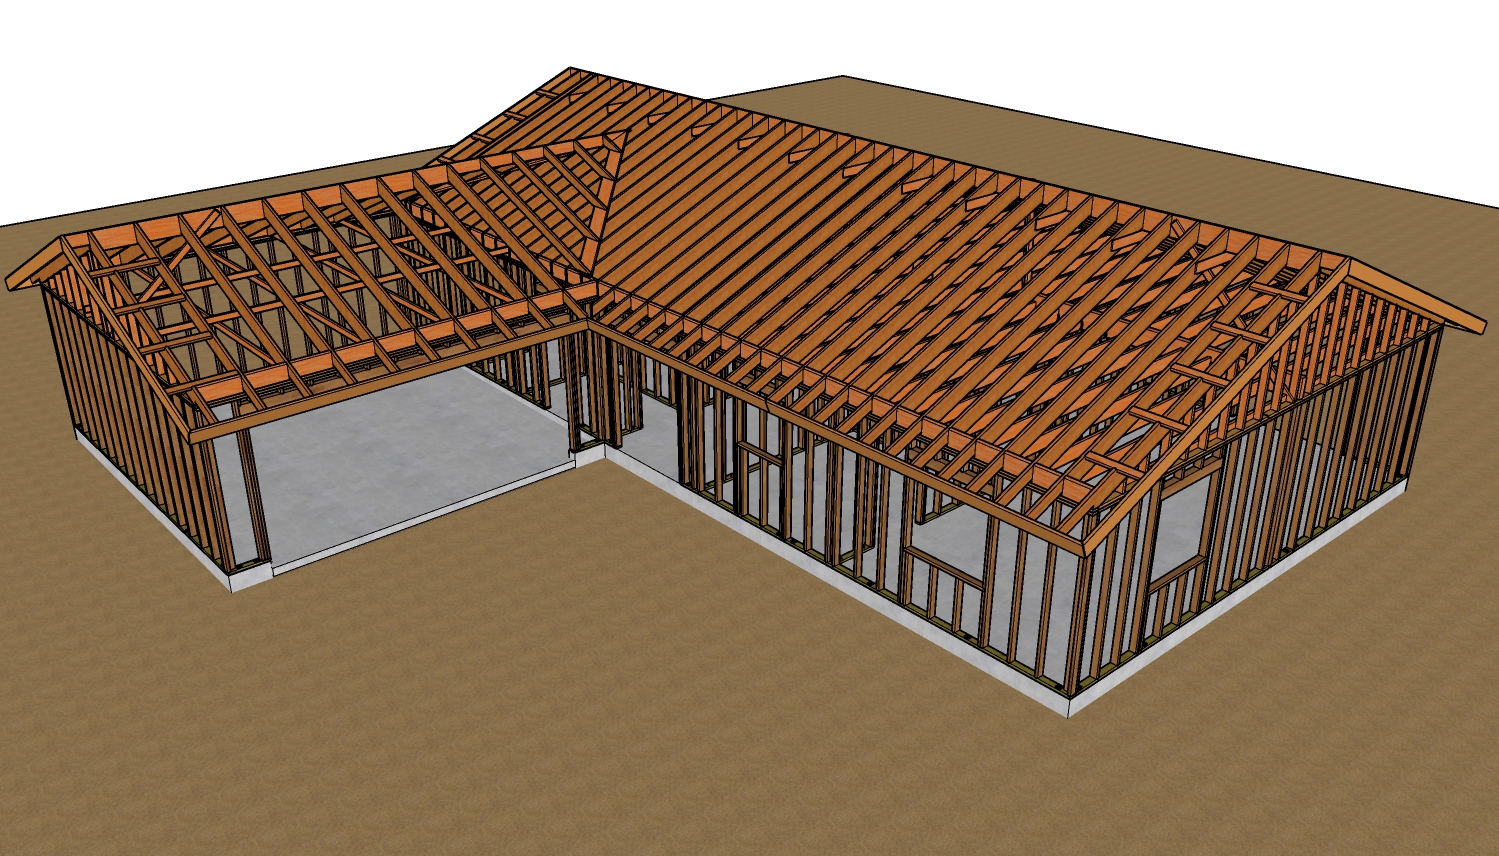
Intersecting a standard scissor truss roof system with a 45-degree angled wall presents a unique structural challenge for framers and builders. In a standard layout, the fascia board would simply run parallel to the wall line. However, when introducing an angled wall, standard trusses will push the fascia board directly through the roof plane if not properly modified. Navigating this intersection requires precise framing techniques, structural modifications, and careful load path planning to ensure the roof remains stable and code-compliant.
UNDERSTANDING THE STRUCTURAL MODIFICATIONS
The first step in making a scissor truss work over a 45-degree rake wall is addressing the truss ends. Truss manufacturing companies typically cut the tails of the trusses square. It is highly unlikely they will arrive pre-cut at a 45-degree angle. Framers must anticipate this and adjust their framing plan accordingly. In a typical scenario with a 4/12 top roof pitch and a 2/12 bottom ceiling pitch, the rake walls should be framed to match the 2/12 interior ceiling pitch to support the drywall and maintain the intended vaulted ceiling profile.
SUPPORTING THE OVERHANG AND FASCIA
Roof overhangs and fascia boards require solid backing, especially at the transition of the angle. Unlike conventionally framed roofs where a continuous structural ridge board extends out to carry the overhang, truss roofs rely entirely on the engineered top chords. To support the fascia where the roof turns the 45-degree corner, framers must install horizontal lookouts. While the trusses provide sufficient bearing for the lower sections of the fascia, the upper section near the peak requires additional outriggers or lookouts tying back to the inboard trusses to prevent sagging.
BLOCKING AND STRAPPING TECHNIQUES
Proper blocking is essential for transferring shear loads from the roof diaphragm down to the wall plates. For angled walls, shaped blocks cut with a slight three-to-four-degree bevel on the top and bottom edges provide excellent perimeter boundary nailing. If shaping custom blocks is too labor-intensive, standard rectangular dimensional lumber can often suffice depending on the severity of the pitch. At the corners, blocking should be mitered at 22.5 degrees to accommodate the smooth 45-degree turn.
Furthermore, the point where the straight wall plates meet the 45-degree angled wall plates acts as a hinge point. Framers must install structural steel tension straps across these top plate intersections to tie the wall systems together securely and prevent lateral separation under high wind or seismic loads.
CONCLUSION
Framing a 45-degree wall under a scissor truss roof requires forethought and precision. Because standard 16-inch or 24-inch on-center layouts are interrupted by the angle, carpenters must often adapt their block placements and lookout depths on site. Always consult your truss manufacturer for site-specific engineering details, as the structural integrity of the roof depends on proper load transfer at these complex intersections.
THREE KEY CONSTRUCTION TIPS
INSTALL LOOKOUTS NEAR THE PEAK: Because a truss roof lacks a continuous cantilevered ridge beam, the overhangs near the top of the gable must be supported by lookouts tied back into the first inboard truss.
PREPARE FOR SQUARE TRUSS TAILS: Truss plants generally manufacture tails with square cuts. You will need to calculate your fascia and sub-fascia intersections based on square ends rather than relying on factory-mitered 45-degree tails.
MAINTAIN CONTINUOUS BOUNDARY NAILING: Use properly shaped and securely fastened blocking between the trusses directly over the top plate. This ensures roof sheathing has a continuous nailing surface, which is a mandatory requirement for transferring lateral shear forces into the wall system.
FREQUENTLY ASKED QUESTIONS ABOUT ANGLED TRUSS FRAMING
While the techniques outlined above cover the primary layout and blocking strategies for your angled wall, complex roof intersections often raise additional code and engineering concerns. Below are a few common questions regarding the structural mechanics of skewed truss connections.
DO I NEED SPECIAL HURRICANE TIES FOR TRUSSES RESTING ON AN ANGLED TOP PLATE?
Yes, standard vertical hurricane ties are designed for perpendicular intersections and will not sit properly flush against a skewed top plate. According to the International Residential Code requirements for roof tie-downs, you must maintain a continuous load path for wind uplift. For a 45-degree wall, you must use skewed or variable-pitch hurricane ties, or flexible twist straps, that are specifically manufactured and load-rated for angled connections.
HOW DOES THE ANGLED WALL IMPACT THE REQUIRED TRUSS BRACING?
Standard lateral bracing guidelines provided by truss engineers assume parallel trusses spaced evenly at 16 or 24 inches on center. When a wall cuts across at a 45-degree angle, the truss spacing at the bearing points is staggered, altering the continuous run of the bottom chords. You must follow the Building Component Safety Information guidelines for skewed bearing conditions, which often requires installing supplemental web bracing and custom gable end bracing to prevent the trusses from rolling laterally under load.
CAN I MODIFY THE BOTTOM CHORD OF THE SCISSOR TRUSS TO FIT THE ANGLED PLATE?
No, you cannot alter the truss on site without written engineering approval. The International Residential Code strictly prohibits cutting, notching, or drilling any structural truss member. Because scissor trusses rely on bottom chord tension to prevent the bearing walls from bowing outward, cutting the bottom chord to sit flush on a misaligned angled plate destroys the structural integrity of the truss. If a truss does not align properly with the angle, you must order a custom-engineered profile from the manufacturer rather than modifying a standard truss.