FRAMING A LAPPED RAFTER ROOF WITH A BUILT-UP RIDGE
INTRODUCTION
Framing a custom roof requires precision, careful planning, and a strict adherence to structural principles. Building a modified lapped-rafter roof system is an excellent method for creating unique ceiling profiles. This guide breaks down the process of laying out, cutting, and assembling this specific roof structure, ensuring that your framing is both accurate and structurally sound.
CALCULATING ROOF PITCH AND LOCATING CENTER SUPPORT
The first step in framing your roof is establishing a level center support wall. This temporary or permanent structure must be located dead center in your building span. To determine the height of this wall, you must calculate your desired roof pitch. For example, if you are building a 20-foot by 20-foot structure, half of that span is 10 feet. If you want a 4/12 roof pitch, you multiply the pitch factor (4) by the half-span in feet (10). This results in a center support wall that is 40 inches tall above the plate height. Ensure your wall studs are laid out properly and heavily braced so they do not shift during rafter installation.
MARKING AND CUTTING THE RAFTERS
To simplify the layout process, attach a temporary block near the top of your center wall to help rest the rafter while marking your bottom seat cut, also known as the birdsmouth. The seat cut allows the rafter to sit flush on the top plate of your exterior wall. Standard building practices dictate that this bearing surface must be adequate, but you must avoid over-notching the wood, which weakens the rafter. Once your first rafter is accurately marked and test-fitted, label it as your pattern. Use this master pattern to mark the remaining rafters to guarantee uniform cuts across the entire roof structure.
INSTALLING THE RAFTERS AND SUPPORT BOARDS
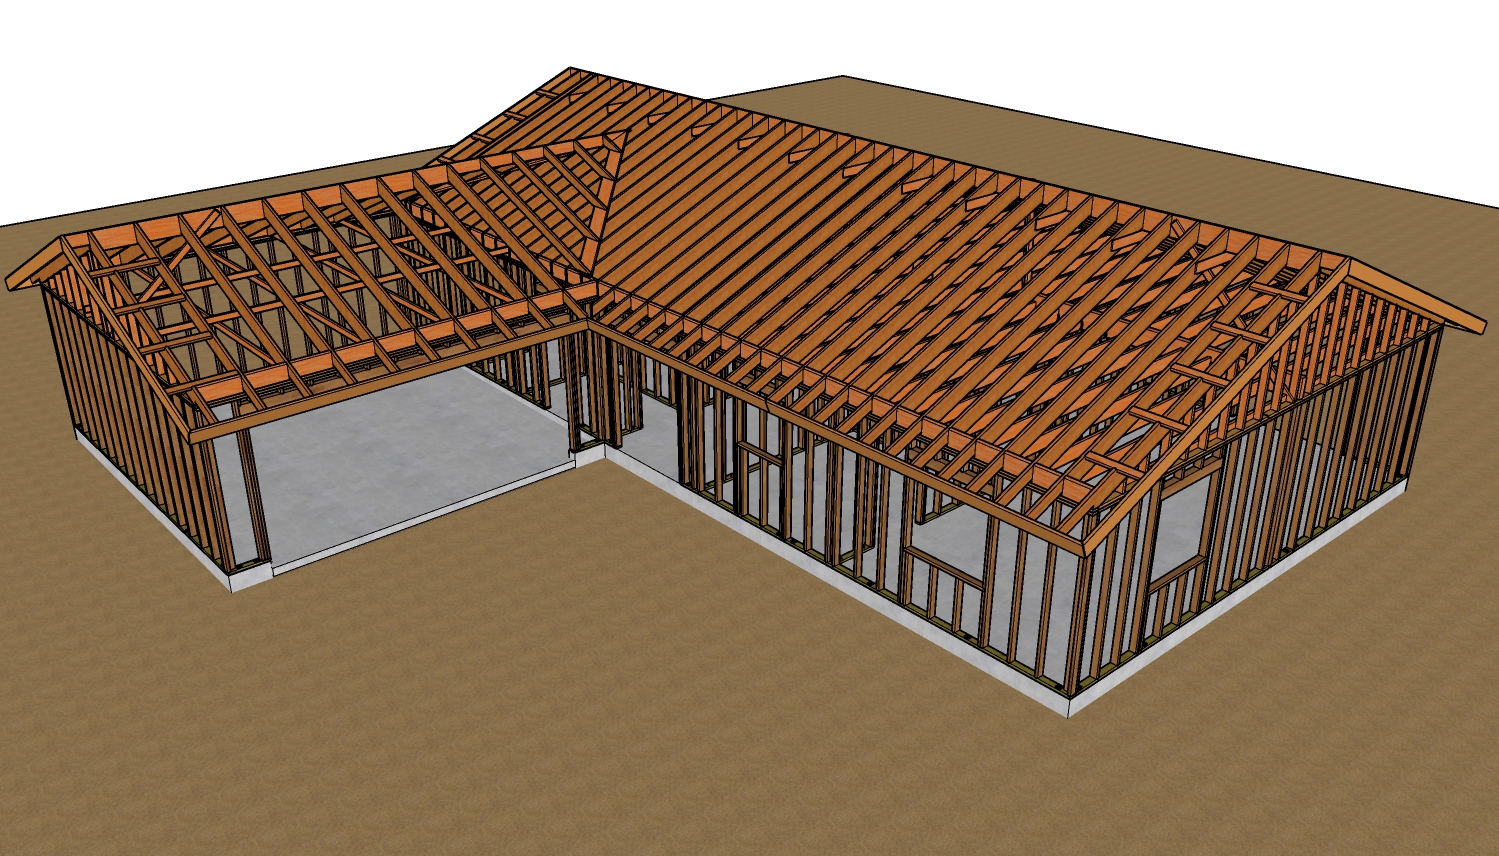
As you set the rafters, they will lap at the peak over the center support. Because they overlap, the rafters on one side of the structure must be offset by an inch and a half to accommodate the thickness of the opposing boards. Once the lower rafters are secured, you can establish a flat plane by snapping a chalk line across the overlapping peaks and cutting them uniform. A flat support board is then installed across these cuts, followed by smaller upper fill rafters and a standard ridge board to complete the peak. If you plan to leave the ceiling open as a cathedral ceiling without traditional rafter ties, you must consult a structural engineer, as the central ridge must be designed as a load-bearing structural beam to prevent the exterior walls from spreading.
SHEATHING, BLOCKING, AND STRUCTURAL INTEGRITY
Proper blocking is crucial for the overall structural integrity of the roof system. Installing blocks along the ridge and at the perimeter of the roof provides necessary nailing surfaces for your plywood or OSB sheathing. An engineer will generally require continuous perimeter nailing to create shear transfer, which distributes lateral loads across the building into the walls. By installing 2x4 blocks properly between the rafters and nailing them securely, you create a continuous load path that fortifies the entire roof against wind and shifting.
CONCLUSION
Constructing a lapped-rafter roof with a built-up ridge requires a methodical approach, from calculating the exact pitch to ensuring proper shear transfer through blocking. By taking the time to cut a precise pattern rafter and understanding the structural requirements of your ceiling design, you can execute this advanced framing technique with confidence and accuracy.
THREE KEY CONSTRUCTION TIPS
ALWAYS USE A PATTERN RAFTER: Mark and cut one perfect rafter, test its fit on the exterior wall plate and center support, and clearly label it as your pattern. Using a single master pattern prevents the compounding measurement errors that occur when you trace a copy of a copy.
MAINTAIN PROPER BEARING ON SEAT CUTS: When cutting your birdsmouth, ensure there is at least 1.5 inches of solid bearing on the wood top plate to comply with building codes. However, you must never notch the rafter deeper than one-quarter of its total depth, as over-notching will severely compromise its structural capacity.
UNDERSTAND CATHEDRAL CEILING REQUIREMENTS: If you are building an open cathedral ceiling, standard rafter ties or ceiling joists are absent. In these cases, the International Residential Code (IRC) requires a properly sized, engineer-approved structural ridge beam supported by posts at both ends to prevent the roof weight from pushing the exterior walls outward.
BONUS QUESTIONS AND ANSWERS
To further ensure your framing project meets professional standards, here are a few advanced considerations that naturally follow the structural framing phase.
WHAT IS THE DIFFERENCE BETWEEN COLLAR TIES AND RAFTER TIES?
Collar ties and rafter ties serve two completely different structural functions in roof framing. Rafter ties are installed in the bottom third of the roof pitch and are required by code to keep the exterior walls from spreading outward under the weight of the roof. Collar ties are installed in the upper third of the roof assembly and are designed specifically to prevent the rafters from separating at the ridge during high wind uplift events.
HOW DO I ENSURE PROPER VENTILATION IN A BUILT-UP ROOF SYSTEM?
Proper airflow is a critical building science requirement to prevent moisture accumulation and rot. In a standard roof assembly, the International Residential Code (IRC) requires cross-ventilation for enclosed attic or rafter spaces. When framing a modified or enclosed vaulted roof without an open attic, you must leave a continuous minimum airspace of 1 inch between the bottom of the roof sheathing and the top of the insulation. This allows air to flow freely from the soffit vents at the eaves up and out through a continuous ridge vent.
ARE HURRICANE TIES REQUIRED FOR FASTENING RAFTERS TO WALL PLATES?
While traditional toenailing has been used historically, modern building codes in many jurisdictions, especially high-wind or seismic areas, mandate the use of engineered metal connectors like hurricane ties. Even in local jurisdictions where they are not strictly required by the code enforcement office, installing metal uplift connectors is the universally accepted best practice. They provide a far superior mechanical connection compared to nails alone, ensuring the roof remains safely anchored to the wall structure during extreme weather.