DESIGNING HOME ADDITION ROOFLINES: HOW WALL HEIGHT IMPACTS EXTERIOR AESTHETICS AND STRUCTURE
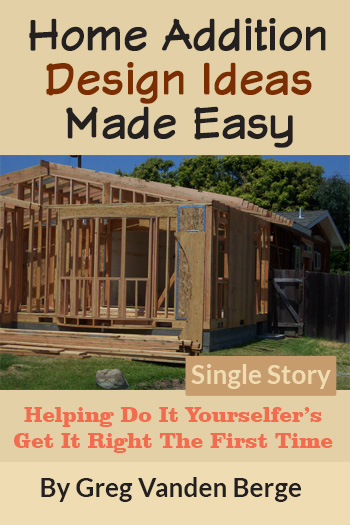
Adding square footage to a home is one of the most effective ways to increase living space and boost overall property value. However, one of the most critical structural and design decisions involves determining wall height. The exterior wall height of your new addition directly dictates your roofline geometry, flashing requirements, tie-in complexity, and overall architectural symmetry.
When planning a room expansion, homeowners typically encounter three primary framing scenarios: matching existing wall heights, building lower wall heights, or framing taller wall heights. Understanding how each option alters the exterior elevation helps ensure a seamless transition between the existing structure and the new addition.
EQUAL WALL HEIGHTS: MATCHING EXISTING ELEVATIONS
When the new addition shares the exact same top plate wall height as the original house such as matching eight-foot or ten-foot wall framing the rooflines align uniformly. From an architectural standpoint, the fascia boards, soffits, and eave lines form a continuous, horizontal band around the perimeter of the structure.
In a standard gable-to-gable connection with equal plate heights, the new roof ridge intersects the main roof plane cleanly, creating symmetrical valley framing on both sides. This setup streamlines construction, simplifies exterior siding transitions, and minimizes complex waterproofing detailing along vertical wall intersections.
LOWER WALL HEIGHTS: DROPPING THE ADDITION ROOFLINE
In cases where the addition utilizes lower walls than the existing structure for example, attaching an eight-foot addition to a ten-foot main house the overall roof profile sits lower. The lower top plate drops the fascia line and forces the ridge of the addition to intersect the main roof slope at a lower elevation.
Because the new roof plane terminates under the main roof overhang or lower down the main slope, the valley boards do not extend as far up the original roof. This configuration creates a distinct step-down look on the exterior elevation. While lower additions are often chosen to match lower ceiling requirements or preserve upper-story windows, care must be taken to maintain proper roof slope for adequate drainage.
TALLER WALL HEIGHTS: ELEVATING THE NEW STRUCTURE
Framing an addition with taller walls such as a ten-foot addition joined to an eight-foot original structure pushes the addition roof higher than the original roof plane. This creates two distinct structural intersection conditions.
First, the upper portion of the new roof ridge extends higher than the existing roof, requiring the addition roof plane to over-frame atop the original roof deck. Second, where the taller addition walls extend above the lower existing roofline, the lower roof slope terminates directly against the side wall of the new addition. This vertical wall-to-roof junction demands rigorous weatherproofing to prevent water infiltration into the framing beneath.
CONCLUSION
Whether you choose matching, lower, or taller wall heights for your home addition, each approach alters your home's exterior silhouette and structural framing requirements. Consulting with a qualified structural designer or builder early in the planning stage ensures your chosen wall height delivers both architectural appeal and lasting weather protection.
THREE KEY CONSTRUCTION TIPS
Maintain Continuous Eave and Fascia Lines Whenever Possible: When matching wall heights, ensure top plate elevations are precisely leveled between the existing structure and new framing. Uniform eave lines simplify gutter installation, prevent awkward soffit steps, and maintain clean visual continuity across the entire building façade.
Plan Water Drainage Routes for Step-Down and Taller Rooflines: When an addition creates lower or higher roof intersections, always evaluate where rainwater will flow. Concentrated runoff from upper roof valleys onto lower roof decks requires heavy-duty valley underlayment, proper drip edges, and correctly sized gutters to prevent water backup.
Account for Existing Window and Eave Clearances: Before selecting an addition wall height, verify the location of existing second-story windows, eave overhangs, and exterior utilities. A taller addition wall must not block existing window openings or interfere with attic ventilation pathways.
BONUS QUESTIONS AND ANSWERS
QUESTION 1: HOW DO YOU PROPERLY WATERPROOF THE INTERSECTION WHERE A TALLER ADDITION WALL MEETS AN EXISTING LOWER ROOF SLOPE?
Transitioning smoothly from framing to weatherproofing requires strict adherence to building code standards for sidewall flashing.
Under the International Residential Code (IRC Section R905.2.8.3), step flashing is mandatory wherever a vertical wall meets a sloped roof plane. Builders must install individual metal step flashing pieces woven into each course of shingles, with a minimum vertical leg of four inches extending up the wall framing. Counterflashing or weather-resistive barrier (house wrap) integrated over the vertical leg ensures gravity sheds water down onto the shingles rather than behind the wall, preventing structural decay.
QUESTION 2: DOES TYING A NEW ADDITION ROOF INTO AN EXISTING ROOF REQUIRE REINFORCING THE ORIGINAL RAFTERS OR TRUSSES?
Transitioning from simple framing layouts to complex roof intersections often increases structural loads on the existing building framework.
According to structural design standards under IRC Section R802, existing roof framing must be capable of supporting both live loads and dead loads transferred by new construction. When an addition roof over-frames onto an existing roof deck, concentrated valley loads are redirected onto the original rafters or trusses. A structural engineer must verify that the existing members can handle the additional point loads without exceeding allowable deflection limits, often requiring sistering of rafters or addition of structural support headers beneath the intersection.
QUESTION 3: WHAT IS THE MINIMUM CEILING HEIGHT REQUIREMENT FOR HABITABLE SPACE IN A RESIDENTIAL HOME ADDITION?
Transitioning your design concepts into code-compliant living areas requires careful attention to interior vertical dimensions.
Per Section R305.1 of the International Residential Code (IRC), all habitable spaces, hallways, and bathrooms in a residential structure must have a minimum ceiling height of seven feet (84 inches). If the addition incorporates sloped ceilings, at least 50 percent of the required floor area must meet the seven-foot height threshold, and no portion of the required floor area may have a ceiling height below five feet. Adhering to these minimums ensures safety, adequate light, and proper ventilation throughout the new living space.