NAVIGATING COMPLEX ROOF FRAMING FOR HOME ADDITIONS
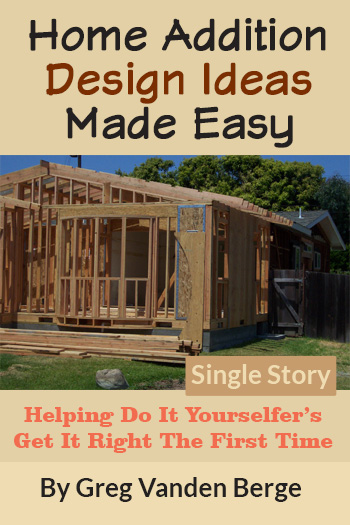
Adding a room addition to an existing residence often presents structural design challenges, particularly when tying new roof lines into complex existing structures that feature gables, valleys, and hips. Modifying a roof layout requires careful planning to maintain structural integrity, ensure proper weatherproofing, and achieve a cohesive visual profile. By evaluating different roof framing strategies prior to construction, builders and homeowners can determine the most efficient, cost-effective, and aesthetically pleasing method for framing a new addition.
PREPARING THE EXISTING ROOF STRUCTURE
Before erecting new wall framing or installing rafters, the original roofing materials must be removed from the tie-in area. Stripping away existing shingles, underlayment, and roof sheathing down to the framing exposes the structural top plates and existing rafters. This step allows builders to tie new framing members directly into the existing load-bearing structure, establishing a sound mechanical connection and establishing a continuous drainage plane.
STRATEGY 1: DOUBLE GABLE ROOF CONFIGURATION
One common method for framing an addition involves building a double gable layout. In this design, two parallel gable roofs extend over the addition, creating new valleys where the roof planes intersect.
When opting for a double gable design, pitch adjustments are frequently required. For example, if the footprint of the addition is wider than the original building section, maintaining a standard roof pitch (such as 5:12) will push the new ridge line higher than the existing main ridge. To prevent the new roof from protruding above the primary ridge line, carpenters can reduce the pitch on the addition to keep the ridge lines flush or lower.
ROOF CRICKETS AND WATER MANAGEMENT
Where two gable ends meet or where roof planes converge to form an enclosed angle, water collection becomes a significant concern. Installing a roof cricket a elevated, sloping sub-structure built between roof planes is essential for diverting rainwater around the obstruction and toward the primary drainage slopes. Failing to build a properly pitched cricket results in water pooling, premature shingle failure, and potential leaks along the intersection.
STRATEGY 2: LOW-SLOPING CONNECTING ROOF
For budget-conscious projects, a low-sloping roof extension can bridge the area between existing roof lines. This design utilizes a reduced pitch to allow water to shed across a continuous plane. While economical, low-slope roofs require specialized weatherproofing materials and careful valley framing to prevent standing water, particularly where non-parallel walls meet.
STRATEGY 3: DOUBLE GABLE WITH EXTENDED HIP ROOF
A more intricate option combines a double gable profile with a hip conversion. Builders can extend the hip rafter continuously up to the primary ridge, eliminating awkward gable overhangs and creating a uniform roof line. While this option increases framing complexity and material costs, it provides superior wind resistance and an architecturally integrated appearance.
STRATEGY 4: OFFSET ROOF PITCHES (ASYMMETRICAL GABLES)
When matching existing ridge heights is impossible due to varying wall spans, an asymmetrical or offset roof pitch provides an effective solution. This approach uses two different slope ratios on opposite sides of the same gable peak such as a 5:12 pitch on one side and a 3:12 pitch on the other. Offset pitches allow the ridge to be positioned precisely where required while maintaining appropriate clearance over exterior walls.
STRATEGY 5: FILL-IN RAFTER EXTENSIONS
The simplest structural tie-in involves framing rafter extensions directly into the existing valley or roof slope. By attaching a valley board along the existing roof sheathing and running new rafters up to meet it, builders create a clean transition with minimal disruption to the main roof framework.
CONCLUSION
Selecting the right roof framing strategy for an addition depends on the existing building geometry, local climatic conditions, material budget, and desired aesthetics. Whether utilizing a double gable, a low-slope connection, or an offset pitch, careful layout and proper water management remain critical to building a durable, code-compliant roof system.
THREE KEY ACCURATE CONSTRUCTION TIPS
Always install a structural valley board over existing roof sheathing before laying new rafter tails onto an existing roof plane. The valley board distributes the line load of the new rafters across the existing structural framing members rather than transferring point loads directly onto unsupported plywood or OSB sheathing.
Maintain a minimum roof slope of 2:12 for standard asphalt shingle installations, and ensure double-layer underlayment is installed on all slopes between 2:12 and 4:12 in accordance with standard residential building codes. For roof slopes under 2:12, transition to a dedicated low-slope membrane such as modified bitumen, TPO, or EPDM to prevent capillary water intrusion.
Construct roof crickets using a slope equal to or greater than the intersecting roof surfaces to guarantee positive drainage. Ensure that step flashing and continuous valley flashing are fully integrated with the weather-resistive barrier along all wall-to-roof intersections.
BONUS QUESTIONS AND ANSWERS
QUESTION 1: If an asymmetrical or offset roof pitch is used for a room addition, how does this affect the structural load transfer to the supporting walls?
TRANSITION: While offset roof pitches solve vertical clearance issues, they also introduce unique structural load considerations that builders must address during framing.
ANSWER: Asymmetrical roof slopes create unequal horizontal thrust and vertical loads on opposing exterior walls. According to standard structural engineering principles and the International Residential Code (IRC Section R802), conventional rafter systems rely on balanced triangular geometry where opposing rafter pairs cancel out horizontal thrust at the ridge. When pitches differ (such as a 5:12 side opposing a 3:12 side), the steeper rafter transfers a higher vertical load, while the lower slope exerts greater lateral thrust against the wall top plate. To prevent wall deflection or ridge sagging, asymmetrical gables typically require a full structural ridge beam designed to carry the total dead and live loads independently, supported by dedicated load paths down to the foundation, rather than relying on a non-structural ridge board with ceiling joist ties.
QUESTION 2: What are the building code requirements for framing around a roof cricket or saddle when tying an addition into an existing roof line?
TRANSITION: Proper water diversion is not just a practical recommendation; building codes strictly regulate the installation of roof saddles and crickets to protect structural components from moisture damage.
ANSWER: Under the International Residential Code (IRC Section R903.2.2 and R905.2.8.2), crickets or saddles are mandatory on the ridge side of any roof penetration or intersection wider than 30 inches that obstructs normal water flow. The code mandates that the cricket must be constructed from structural sheathing supported by framing members and clad with continuous metal flashing or ice-and-water shield membrane that extends at least 4 inches up vertical wall intersections and 8 inches up the roof slope. This structural detail prevents ponding water, which can breach shingle laps and rot roof sheathing or underlying rafters over time.
QUESTION 3: Can rafter ties or ceiling joists be omitted when framing a vaulted ceiling inside a new double gable room addition?
TRANSITION: Homeowners frequently desire open, vaulted ceilings in new additions, which changes the framing requirements for the supporting roof structure.
ANSWER: Under IRC Section R802.5.2, ceiling joists or continuous rafter ties are required at the wall top plate level to resist the outward lateral force exerted by conventional rafters. If ceiling joists are omitted to create a vaulted ceiling, a structural ridge beam engineered to span the entire distance between support posts must be installed. A non-structural ridge board cannot be used in vaulted framing because without rafter ties, the weight of the roof load will cause the ridge to drop and the exterior walls to push outward, leading to structural failure. The structural ridge beam must be sized per local snow load and live load requirements to transfer all ceiling and roof loads straight down into the end posts and foundation.