FRAMING A HIP ROOF ADDITION: DESIGN GEOMETRY AND OVER-FRAMING TECHNIQUES
INTRODUCTION
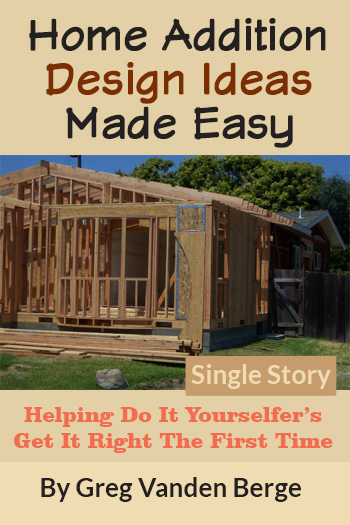
Expanding an existing home with a room addition often presents complex framing challenges, particularly when integrating new rooflines with existing hip roof structures. A hip roof features slopes on all sides, converging at hips and ridges. When adding a new wing or pop-out section to an existing hip roof, the framing design must seamlessly join new hip rafters, valley rafters, and ridges into the original structure. Understanding how to properly plan the roof geometry and execute roof fill framing ensures structural integrity, efficient drainage, and a cohesive architectural appearance.
UNDERSTANDING HIP ROOF ADDITION GEOMETRY
Adding a structure to the rear or side of a hip-roofed building alters the existing drainage paths and rooflines. The addition requires extending the main ridge or adding a secondary ridge that intersects the original roof plane.
Where the new roof planes intersect the existing slope, valley rafters or valley sleeper boards must be established. As the new ridge extends toward the existing structure, the hip rafters from the new addition meet at new peak points, while valleys form along the junction where the new roof plane slopes down to meet the original roof deck. This intersection creates a fill area over the existing roof sheathing, where secondary framing members are installed to carry the new roof loads down to the existing structural bearing walls.
EXECUTING ROOF FILL FRAMING AND RIDGE ALIGNMENT
Roof fill framing, often referred to as over-framing or lay-over framing, involves building the new roof structure directly on top of the existing roof deck rather than removing the entire original roof framing.
To execute over-framing successfully:
Establish the new ridge height and location, ensuring it aligns flush with or ties accurately into the existing roof structure.
Install valley sleeper boards (lay-over boards) directly over the existing roof sheathing along the line of intersection. These boards provide a solid nailer for the new jack rafters and distribute tributary loads across the existing rafter system.
Frame fill jack rafters from the new ridge down to the valley sleeper boards, matching the pitch of the existing roof to maintain consistent planes.
Verify that point loads created by high-ridge connections or valley intersections line up over underlying load-bearing walls or reinforced header assemblies.
CONCLUSION
Modifying a hip roof for a home addition requires careful geometric planning and solid framing practices. By utilizing over-framing techniques with properly sized valley sleepers, you can tie a new addition into an existing roofline efficiently while preserving the structural strength and weather tightness of the entire building.
THREE KEY CONSTRUCTION TIPS
Install Continuous Valley Sleeper Boards: When over-framing a new roof section onto an existing roof deck, always lay a continuous 2x sleeper board (flat-framing member) along the valley intersection line. This transfers the structural loads of the new jack rafters evenly across the existing rafter or truss network below rather than bearing directly on unsupported plywood sheathing.
Maintain Uniform Rafter and Ridge Sizing: Ensure that all new valley rafters and ridge boards meet or exceed the depth of the incoming cut rafters. In accordance with standard framing practices, ridge boards and valley rafters must be at least as deep as the cut end of the rafters bearing against them to ensure full end-bearing contact and proper load transfer.
Remove Existing Roofing Materials Before Over-Framing: Prior to framing the new fill section over an existing roof plane, remove all existing asphalt shingles, underlayment, and flashings down to the bare structural sheathing. Framing directly over old roofing materials prevents proper fastener penetration, traps moisture, and creates an uneven bearing surface for sleeper boards.
BONUS QUESTIONS AND ANSWERS
QUESTION 1: Do I need to double up the existing roof rafters underneath a new valley sleeper board when over-framing a roof addition?
Moving beyond the general framing layout, a crucial structural consideration is how the original roof framing beneath the addition supports these new localized forces.
Yes, in most structural applications, the existing rafters directly below a new valley sleeper board must be evaluated and often reinforced or sistered. Under Section R802 of the International Residential Code (IRC), roof framing members must be designed to support all tributary live and dead loads. When a new roof section over-frames onto an existing roof deck, the valley sleeper concentrates the load of the new jack rafters onto specific points of the existing rafter span. If the existing rafters were only sized for standard roof loads, adding the weight of the new roof fill can cause excessive deflection or structural failure. Reinforcing the existing rafters by sistering equivalent dimensional lumber directly underneath the load path ensures compliance with deflection limits (typically L/180 for roof rafters) and maintains structural capacity.
QUESTION 2: What are the building code requirements for fastening valley sleeper boards to the existing roof structure?
Connecting the new over-framed roof section securely to the existing house framing raises important questions regarding uplift resistance and shear transfer.
According to IRC Section R602 and Table R602.3(1), structural framing connections must withstand both gravity loads and wind uplift forces. When securing a valley sleeper board through existing roof sheathing, fasteners must penetrate directly into the underlying rafter or truss top chord, not just the sheathing material. Standard code-compliant fastening requires minimum 16d common nails or engineered structural wood screws spaced at specific intervals (typically 12 to 16 inches on center) driven directly into the center of the underlying structural framing members. This direct attachment ensures that wind uplift loads on the new roof addition are properly transferred down into the main structure's lateral load path.
Q AND A 3: STRUCTURAL CONNECTIONS
To wrap up our discussion on complex roof framing, let us look at what happens after the cuts are made and it is time to secure the structure.
QUESTION: What are the building code requirements for fastening hip and valley rafters to the ridge board and wall plates?
ANSWER: Once your compound angles are cut, securing them properly is just as critical as the math. The International Residential Code dictates strict fastening schedules to resist wind uplift and gravitational shear forces. For hip and valley rafters, you cannot simply toe-nail them and move on.
The code generally requires a minimum of three 16d common nails when toe-nailing a rafter to a ridge or valley board.
Engineered structural connectors, like metal hurricane ties and framing anchors, are increasingly required by local amendments in high-wind or seismic zones.
These requirements exist to provide a continuous load path. Structurally, this ensures that the severe lateral and uplift forces acting on the broad surface area of a complex roof are safely transferred down into the wall framing and foundation, preventing catastrophic roof separation during extreme weather events.