Building A Custom Rebar And Lumber Fence
Combining the natural warmth of lumber with the industrial strength of steel rebar creates a visually striking and highly durable fence for your property. While traditional privacy fences rely entirely on wood pickets, a rebar and lumber design offers a modern, semi-open aesthetic that allows for airflow and visibility while establishing a strong perimeter. Building this style of fence requires careful planning, precise measurement, and a solid understanding of structural support to ensure the heavy materials do not fail over time.
Establishing A Solid Foundation
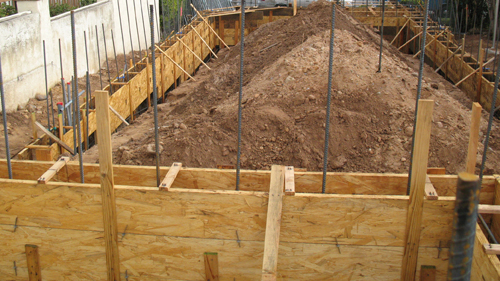
The integrity of any fence begins below the ground. When setting the vertical fence posts, utilizing concrete footings is highly recommended over simply burying the wood in the dirt. Concrete footings provide the necessary rigid support to bear the weight of heavy lumber and steel rebar panels, preventing leaning and shifting as the ground settles or goes through seasonal moisture cycles.
Measuring And Spacing For Consistency
A custom fence looks best when the panels are uniform. By ensuring the distance between your primary fence posts is exactly the same across the entire property line, you can build identical panels, making the assembly process highly efficient. However, because posts can shift slightly as the concrete cures, it is critical to measure the space between every single set of posts before cutting your horizontal rails. Never pre-cut all your lumber based on theoretical math. Measuring twice for each section will prevent wasted material and ensure a tight, professional fit.
Structural Rail Sizing To Prevent Sagging
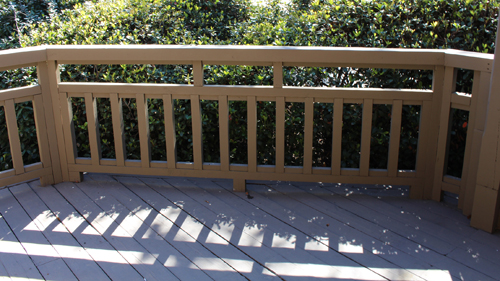
One of the most common failure points in a rebar fence is a sagging bottom rail. Steel rebar is significantly heavier than standard wood pickets. If you use a standard two-by-four for the bottom horizontal support, the combined weight of the steel rods will eventually cause the board to bow downward, ruining the structural integrity and appearance of the fence. To prevent this, always upgrade the bottom support to a four-by-four, four-by-six, or six-by-six timber.
Rebar Placement And Depth Control
When assembling the panels, accuracy in drilling is essential. The spacing of the rebar should be calculated by taking the total distance between the posts and dividing it by the number of desired spaces. Once spaced, draw a centerline down your horizontal rails and mark the exact drilling points to avoid leaving permanent pencil lines on the exposed wood.
For the bottom rail, the holes should only be drilled three-quarters of an inch to one inch deep. Do not drill completely through the bottom board, as the rebar needs a solid wood base to rest on. For the top rail, you can drill partially through the bottom so the rail caps the steel, or drill entirely through and cover the exposed rebar with a one-by-six decorative top cap. Never leave sharp rebar exposed at the top of a fence, as this creates a serious safety hazard.
Understanding Local Building Codes
Before purchasing materials or digging holes, it is imperative to check your local building codes. Many municipalities have strict regulations regarding the maximum allowable gap between fence balusters. A common standard dictates that a four-inch sphere cannot pass through any opening. If your local authority enforces this rule, spacing your rebar three and seven-eighths of an inch apart will keep you compliant and prevent the need for costly teardowns.
THREE KEY TIPS
Upgrade The Bottom Rail: Never use a two-by-four for the bottom horizontal support. The immense weight of steel rebar will cause a standard two-by-four to sag over time. Always use a four-by-four or larger timber for the base rail to ensure long-term structural rigidity.
Control Your Drill Depth: When preparing the bottom rail to accept the vertical rebar, only drill your holes three-quarters of an inch to one inch deep. Drilling all the way through will remove the structural base that holds the steel in place, allowing the heavy rods to slip downward.
Measure Between Every Post: Even with careful planning, fence posts can shift slightly out of plumb when concrete footings are poured and cured. Do not pre-cut all your horizontal rails to a uniform length. Measure the specific top and bottom distance between each set of posts individually before cutting your lumber.
BONUS QUESTIONS AND ANSWERS
To further ensure your fence project meets professional standards and stands the test of time, here are answers to vital structural and code-compliance questions that go beyond basic assembly.
How Deep Should The Concrete Footings For The Fence Posts Be Poured?
The depth of your concrete footings depends entirely on your local climate, but the building code universally requires footings to extend below the local frost line. According to standard structural engineering practices and IRC R403, footings must reach below the frost depth to prevent frost heave, a powerful phenomenon where freezing groundwater expands and pushes the concrete post upward, destroying the alignment of your fence. Always verify your specific local frost line depth with your municipal building department.
Should I Coat Or Treat The Exposed Rebar To Prevent Rust?
Yes, treating the rebar is highly recommended if you want to avoid rust stains bleeding onto your lumber. Standard uncoated steel rebar will immediately begin to oxidize when exposed to rain and humidity. While this surface rust does not structurally compromise the thick steel in the short term, the runoff will deeply stain your bottom wood rail. To prevent this, thoroughly clean the rebar with a degreaser and coat it with a rust-inhibiting exterior metal enamel or epoxy spray paint prior to assembling the panels.
Why Do Zoning Codes Limit Front Yard Fence Heights To Three Or Four Feet?
While backyard fences can typically be built to a height of six feet without special permits, front yard fences face strict height restrictions primarily for municipal safety and visibility. City planning and zoning codes prioritize a safety concept called the clear sight triangle at street intersections and residential driveways. If a tall, solid wood fence is placed right on the front property line, it blocks the line of sight for motorists backing out and pedestrians walking by. Jurisdictions enforce these lowered height limits and specific setback distances to prevent blind spots, ensuring vehicles can safely maneuver into the roadway.