HOW TO FLASH EXTERIOR DOOR THRESHOLDS TO PREVENT FRAMING ROT
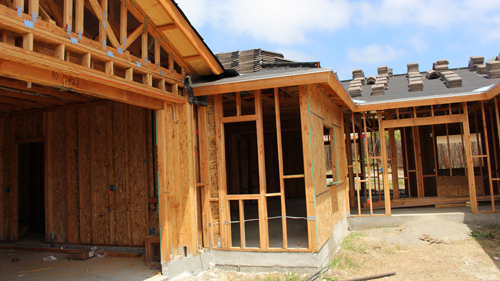
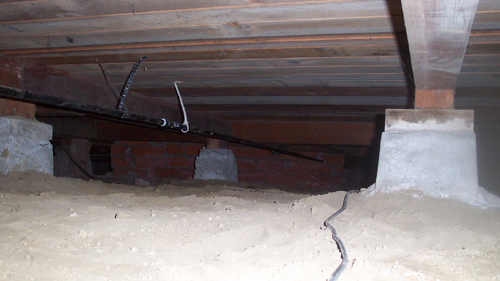
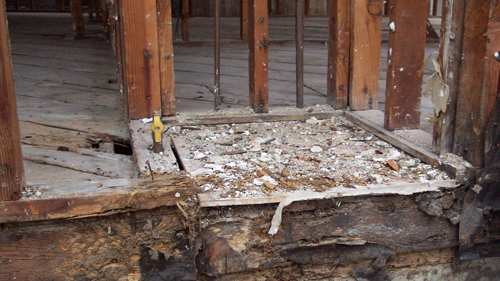
Exterior doors are among the most vulnerable areas of a home when it comes to water infiltration. While concrete foundations offer some natural resistance to moisture damage, homes built with wood-framed floors are highly susceptible to severe structural rot if water breaches the entryway. Wind-driven rain, improper door installations, missing flashing, or even poorly aimed lawn sprinklers can quickly destroy subfloor sheathing and floor joists.
Repairing rotted structural framing is incredibly labor-intensive and expensive. Fortunately, integrating proper metal flashing and a dedicated sill pan during the door installation process provides a highly effective, low-cost line of defense. By understanding how to direct water away from your framing, you can ensure your subfloor remains dry and structurally sound for decades.
THE ROLE OF METAL FLASHING AT THE ENTRYWAY
To protect wood framing, a barrier must be established before the door threshold is set. A standard piece of L-shaped metal flashing, which can be sourced from any home improvement center or lumber yard, is ideal for this application. Common dimensions like 4x4 inch or 6x6 inch flashing work well, depending on the thickness of your flooring system and the depth of the rim joist.
The metal flashing is positioned directly over the subfloor sheathing and bent down over the exterior face of the rim joist or framing. The metal can extend back into the rough opening by a few inches or cover the entire depth of the sill. By introducing this impermeable metal layer, any water that manages to bypass the primary exterior seal will hit the metal and drain downward, completely bypassing the vulnerable wood framing beneath it.
STRATEGIC SEALANT PLACEMENT
When installing flashing and thresholds, the placement of your sealant is critical. A common mistake is sealing every single edge of the flashing, which can inadvertently trap water.
Before setting the door threshold down onto the metal flashing, apply a continuous, generous bead of high-quality construction sealant or caulking across the front section of the metal. When the threshold is set in place, it will compress the sealant, creating a watertight barrier at the exterior face.
Avoid applying sealant to the back or underside drainage paths of the flashing assembly. If moisture somehow gets trapped behind a completely sealed piece of metal, it cannot evaporate or drain, which accelerates the wood rotting process. The goal is to block water at the front exterior edge while leaving an escape route for any incidental moisture to drain safely outward.
INTEGRATING WITH THE WATER-RESISTIVE BARRIER
Flashing cannot work in isolation; it must be properly integrated into the home's overall weather-resistive barrier (WRB) or flashing paper. This relies on the shingle-lap principle, meaning the upper layers must always overlap the lower layers so that water running down the wall stays on the outside of the drainage plane.
When installing the side flashing paper around the door jambs, ensure it overlaps the metal threshold flashing. In construction, a standard side lap should ideally be 12 inches to prevent lateral water migration. However, because space is restricted at a door sill, you may only have an inch or two of overlap. To compensate for this tight tolerance, apply a vertical bead of sealant where the metal flashing meets the framing, then press the flashing paper down firmly into the sealant. This creates a secure, gasketed transition that prevents water from leaking sideways into the wall cavity.
ADVANCED PROTECTION: FABRICATING A SILL PAN
For commercial projects, architectural specifications, or high-exposure residential entryways, standard L-flashing may not offer enough protection. In these scenarios, a custom three-sided sill pan (or pan flashing) is the superior choice.
A custom sill pan is a fabricated piece of metal shaped specifically to fit the door's rough opening. Unlike flat flashing, a sill pan features an upward 90-degree bend at the back (a rear dam) and upward folds on both sides (end dams or diverters). All corners of the pan are either soldered or completely sealed with a durable commercial sealant.
When a sill pan is utilized, any water that migrates under the threshold is completely contained by the back and side dams. The water has no choice but to flow forward, away from the interior conditioned space, and drain harmlessly onto the exterior siding or stucco.
To ensure a custom sill pan fits perfectly, you must take precise measurements of the door jamb and wall thickness prior to fabrication. The door jambs usually protrude past the framing to account for the thickness of the interior drywall (typically 1/2 inch or 5/8 inch) and the exterior sheathing. The sill pan must be deep enough to account for this entire assembly so that the outer lip extends safely past the exterior drainage plane.
CONCLUSION
Investing a few minutes and a small amount of money into proper threshold flashing is one of the smartest decisions you can make during a build or remodel. Replacing a piece of exterior trim or a threshold is a simple task, but replacing rotted floor joists, rim joists, and subfloor sheathing requires extensive structural engineering and massive labor costs. By utilizing metal flashing, strategic sealant placement, or a custom-fabricated sill pan, you create a permanent barrier that routes water safely away from your home's skeletal structure.
THREE KEY TIPS FOR SUCCESSFUL THRESHOLD FLASHING
Maintain the Shingle-Lap Principle: Always layer your weather-resistive barriers, flashing papers, and metal components so that the higher piece overlaps the lower piece, forcing water to flow downward and outward away from the structure.
Protect the Drainage Path: When applying sealant under the threshold or sill pan, focus heavily on the front exterior edge to block water entry. Never seal the bottom weep paths or exit points where trapped condensation or minor leaks need to escape.
Account for Total Wall Thickness: Before fabricating or purchasing flashing, measure the complete depth of the wall assembly, including the interior drywall, studs, exterior sheathing, and siding. The flashing or sill pan must extend fully beneath the entire width of the door jamb to prevent water bypass.
BONUS QUESTIONS AND ANSWERS
While understanding the basic installation of threshold flashing protects the immediate framing, executing a completely code-compliant entryway requires looking closely at real-world building science and material limitations.
QUESTION: Why must an exterior door sill or pan flashing feature a positive slope toward the exterior?
ANSWER: The International Residential Code (IRC) Section R703.4 requires all flashings to be installed in a manner that directs moisture to the exterior surface of the wall clad. A positive slope, typically a minimum of 1/4 inch per foot, utilizes gravity to actively move water away from the door bottom. If a sill pan is perfectly flat, water can pool statically within the pan. Over time, standing water will break down even high-grade construction sealants, eventually finding microscopic pathways through fasteners or joints into the subfloor.
Transitioning from the physical geometry of the sill to the written rules of home building helps clarify exactly what inspectors look for on the job site.
QUESTION: Does the International Residential Code explicitly require sill pans for all exterior doors?
ANSWER: Yes. According to IRC Section R703.4.1, pan flashing is mandatory at all exterior window and door openings. The code specifies that the pan flashing must be installed at the sill of exterior window and door openings, and it must incorporate an upward lip or dam turned up on the interior side to prevent water from being driven backward into the wall cavity by wind pressure. Implementing a sill pan is not just a building best practice; it is a strict structural requirement for modern, code-compliant residential construction.
Selecting the correct design for your doorway is highly important, but ensuring that your materials do not chemically destroy each other over time is vital for long-term durability.
QUESTION: Can standard raw aluminum flashing be placed directly against pressure-treated lumber at a door threshold?
ANSWER: No, raw aluminum flashing should never come into direct contact with modern pressure-treated wood framing. Standard treated lumber is infused with high concentrations of copper (such as ACQ or MCQ), which creates a severe galvanic reaction when moisture is present. The copper causes the aluminum to rapidly corrode, pit, and fail, completely destroying the water barrier within a few seasons. Per IRC Section R317.3, all flashings in contact with preservative-treated wood must be made of hot-dipped galvanized steel, stainless steel, copper, or protected by a self-adhering isolation membrane to prevent premature material degradation.