UNDERSTANDING PREHUNG DOOR PACKAGING: A GUIDE TO SIZING AND SWING
When you are walking down the aisle of a home improvement center or preparing to place a special order with a lumberyard, the strings of numbers printed on prehung door packaging can look like a foreign language. However, decoding these measurements accurately is a critical step in any renovation or construction project. Ordering the incorrect size or swing orientation results in costly return fees, project delays, and structural headaches. By understanding exactly how manufacturers label their products, you can ensure a flawless installation on the first attempt.
ACCURATELY MEASURING THE DOOR WIDTH
The prominent figure listed on a standard prehung door tag represents the nominal width of the door slab itself. For example, a label indicating 30 inches specifies the horizontal width of the door panel from edge to edge. It is vital to note that this number does not represent the height of the unit or the total rough opening required in the wall framing. Before purchasing, always measure the existing door panel or the clear opening of the frame. Write these dimensions down and bring them to the supplier rather than relying on guesswork.
DETERMINING THE DOOR SWING ORIENTATION
One of the most common mistakes in finish carpentry is purchasing a door that swings the wrong direction. Prehung assemblies are explicitly built as either right-hand or left-hand units. To determine the swing using the industry standard standard method, stand with your back flat against the hinge jamb where the door slab attaches to the frame. Extend your arms out. The direction that the door panel swings open dictates the hand of the door. If it swings to your right, it is a right-hand door; if it opens to your left, it is a left-hand door. Getting this orientation correct during the ordering process prevents spatial conflicts with light switches, cabinets, and adjacent walls.
DECODING DOOR HEIGHT AND ACTUAL DIMENSIONS
Following the width, packaging labels will list the nominal height of the door, which is typically 80 inches for a standard residential door. However, actual manufactured measurements can fluctuate slightly between brands. The labeled height may refer strictly to the door slab or it may incorporate the overall height of the outer jamb assembly. Do not assume nominal measurements match real-world dimensions precisely. Pull a tape measure across the actual height, width, and rough opening allowance of the prehung unit in the store to verify it will fit comfortably into your framed opening.
WALL AND DOOR JAMB THICKNESS
The final critical dimension to examine on prehung door packaging is the jamb width, which must match the total thickness of your finished wall. Standard prehung units generally feature a jamb width ranging from 4 and 1/2 inches to 4 and 5/8 inches. This size is specifically designed to fit a standard 2x4 wood stud wall layered with 1/2-inch drywall on both sides. If your home features older construction, 2x6 framing, or thicker wall finishes like plaster or shiplap, a standard jamb will be too narrow. Identifying your wall thickness beforehand allows you to purchase jamb extensions or order custom-width jambs to prevent structural alignment issues during trim installation.
CONCLUSION
Taking the time to read and verify every number on a prehung door package ensures a seamless installation process. By mastering the core dimensions of width, height, swing direction, and jamb depth, you protect your construction timeline and budget from preventable errors. Always cross-reference retail labels with your physical jobsite measurements before finalizing your purchase.
THREE KEY TIPS FOR PREHUNG DOOR SELECTION AND INSTALLATION
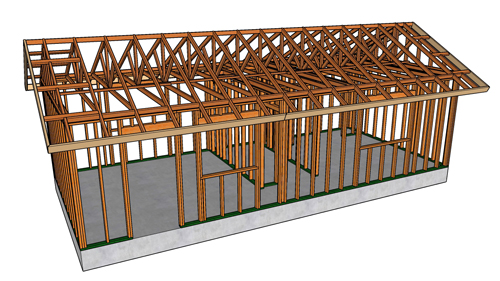
Verify the Rough Opening Size Before Ordering: Do not buy a prehung door based solely on the slab size. The structural rough opening framed into the wall must be wider and taller than the prehung unit itself. The universal best practice is to ensure the rough opening is 2 inches wider and 2 and 1/2 inches taller than the nominal door slab size to allow adequate room for plumbing, leveling, and shimming the frame.
Factor in Finished Flooring Clearance: When checking the height of your rough opening and the door unit, always account for the thickness of the future finished flooring. If you fail to calculate the height of thick hardwood, tile, or carpeting, the bottom edge of the door slab may drag across the floor, requiring you to remove the door and trim the bottom rail.
Assess Wall Thickness Prior to Purchase: Measure the total thickness of the wall including the framing and the interior wall coverings on both sides. Standard 2x4 framing with 1/2-inch drywall requires a 4 and 9/16-inch jamb, while 2x6 framing requires a 6 and 9/16-inch jamb. Matching this dimension accurately ensures that your casing trims will sit perfectly flat against the wall surfaces.
BONUS QUESTIONS AND ANSWERS FOR BUILDERS
While sizing a door correctly prevents ordering mistakes, meeting structural and residential safety standards requires a deeper understanding of building code mandates.
QUESTIONS AND ANSWERS
QUESTION: What is the minimum clear width and height required for a primary residential exit door according to building codes?
ANSWER: Under Section R311.2 of the International Residential Code (IRC), at least one primary egress door serving a dwelling unit must provide a clear, unobstructed opening width of not less than 32 inches when the door is opened to a 90-degree angle. Additionally, the clear opening height must be a minimum of 78 inches. To comfortably satisfy this strict regulatory safety standard, builders universally install a nominal 36-inch by 80-inch (3-0 by 6-8) door assembly for the main exterior exit.
To ensure your interior openings maintain appropriate structural integrity and function safely, you must also understand how doors interact with underlying load-bearing framing.
QUESTION: Why do building codes require a specific gap size between a door frame and the structural rough opening studs?
ANSWER: The International Residential Code (IRC) dictates that window and door openings in load-bearing walls must be framed with structural headers to transfer overhead weight around the opening. The required 1/2-inch to 3/4-inch shim space between the prehung door jamb and the structural studs is not just for plumbing the unit. This gap acts as a critical isolation joint. If a building undergoes minor structural settling, seasonal thermal expansion, or wind loading, the structural framing can deflect slightly without putting direct pressure on the door jamb, which would otherwise warp the frame and bind the door.
Understanding safety rules for secondary rooms is just as critical as managing primary exits during a home build or remodel.
QUESTION: What are the building code requirements regarding door sizes and swings for residential bathrooms?
ANSWER: The International Residential Code (IRC) does not mandate a specific minimum width for standard interior bathroom doors, meaning a 24-inch or 28-inch door is technically permissible by code. However, to comply with the Americans with Disabilities Act (ADA) guidelines or general universal design best practices, a clear opening width of 32 inches (requiring a 34-inch or 36-inch door slab) is highly recommended. Furthermore, regarding the swing direction, bathroom doors should ideally swing outward into the hallway or be designed as pocket doors if the bathroom footprint is small. This prevents the door panel from blocking access to emergency personnel if an occupant collapses inside the room directly behind the door leaf.