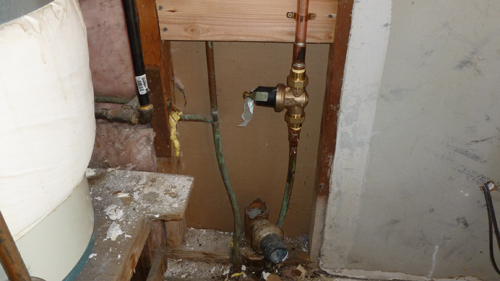
One of the most challenging aspects of bathroom remodeling is installing drywall around complex plumbing fixtures. When you are dealing with pipes that run at angles, cluster closely together, or feature pre-installed shut-off valves, fitting a solid sheet of gypsum board can seem nearly impossible. In new construction, plumbers typically leave straight pipe stubs protruding from the wall, which makes measuring and drilling simple clearance holes quite straightforward. However, during a renovation, you must often navigate around existing, fully assembled water supply lines.
CUTTING AND FITTING DRYWALL AROUND VALVES
When confronting a finished water shut-off valve, attempting to slip a perfectly sized hole over the assembly is rarely an option. Instead, the most efficient approach is to cut a larger access section out of the drywall sheet. By removing a rectangular block corresponding to the pipe's location, you can slide the entire drywall panel down and over the plumbing obstacle. Once the panel is seated firmly against the bottom plate and wall studs, you can address the cutout area.
If the piece you removed remains intact, you can slide it back into place behind the valve. Regardless of whether you reuse the original cutout or fabricate a new patch, it is critical to ensure that the drywall has adequate structural backing. If a wall stud is not immediately adjacent to the seam, install a piece of wood blocking behind the joint. This provides a rigid substrate for the drywall patch, preventing movement that leads to severe cracking later.
TAPING, MUDDING, AND FINISHING
Once the drywall and backing are secured, the finishing process begins. Large gaps around plumbing penetrations require generous taping and mudding. Apply a high-quality drywall tape across all seams and encircle the pipe penetrations. Fill the remaining voids with drywall joint compound.
Because joint compound shrinks as its moisture evaporates, expect the initial coat to crack when filling deep or wide gaps. This is a normal part of the process. Allow the first application to dry completely, then fill the resulting cracks with subsequent, thinner layers of joint compound. It typically requires three to four applications to build up a flush surface. Once dry, use a drywall knife or sanding sponge to knock down any high spots or rough edges before applying the final wall texture.
STRATEGIC PLACEMENT AND ACCEPTABLE TOLERANCES
It is helpful to remember the final layout of your bathroom when finishing these difficult areas. The majority of dense plumbing configurations, such as toilet supply lines and sink drains, are ultimately concealed inside vanity cabinets or behind fixtures. While you should always strive for a flat, structurally sound wall, minor surface imperfections located deep inside a dark cabinet do not compromise the integrity of the installation.
When obstacles are simply too large or complex for a single sheet to navigate, professional installers rely on strategic seam placement. Rather than struggling with an awkward cutout, you can cut the drywall panel completely in half, either horizontally or vertically, intersecting the plumbing location. You can then install the panel in two separate pieces, allowing them to join directly behind the pipe.
THREE KEY TIPS FOR DRYWALLING AROUND PLUMBING
INSTALL PROPER BACKING: Never allow a drywall seam or patch to float unsupported. Always install wood blocking behind cutouts to provide structural rigidity and prevent the joint compound from cracking under pressure.
EXPECT AND MANAGE COMPOUND SHRINKAGE: Deep voids around pipes cannot be filled in a single pass. Apply joint compound in multiple stages, allowing each coat to dry and crack as it shrinks, then top-coating until the surface is flush and stable.
STRATEGICALLY DIVIDE PANELS: When facing immovable obstacles, do not force a single sheet to do all the work. Cut the drywall into two separate sections that meet precisely at the plumbing penetration for a much easier installation.
FREQUENTLY ASKED QUESTIONS
As you plan your bathroom renovation, you may have additional questions about building standards and material selection. The following guidelines will help ensure your project remains compliant and structurally sound.
HOW MUCH CLEARANCE SHOULD BE LEFT BETWEEN THE DRYWALL AND THE PLUMBING PIPE?
It is crucial not to fit the drywall too tightly against water supply lines or drain pipes. Building science dictates that plumbing pipes require a small annular space (typically around 1/4 inch) to allow for thermal expansion and contraction. When hot water flows through a pipe, the material expands; if the drywall is bound tightly against it, the movement can create squeaking noises inside the wall or cause the joint compound to crack. This gap can then be properly sealed with an approved acoustic or fire-rated sealant rather than hard drywall mud.
WHY IS IT IMPORTANT TO SEAL THE GAPS IN THE DRYWALL BEHIND A VANITY CABINET?
Even if a plumbing penetration is hidden entirely from view inside a bathroom cabinet, the gap around the pipe must still be sealed. Leaving large, open holes in the wall cavity violates structural draftstopping and fireblocking principles. The International Residential Code requires concealed wall cavities to be separated from room spaces to prevent the rapid spread of smoke and fire. Additionally, unsealed gaps around plumbing penetrations provide a direct pathway for pests, rodents, and uncontrolled drafts. Always fill these voids with approved expanding foam or proper drywall backing and sealant, regardless of aesthetic visibility.