PERFECTING YOUR DRYWALL FINISH: THE PROFESSIONAL LIGHTING INSPECTION METHOD
INTRODUCTION
Achieving a flawless drywall finish requires more than just applying joint compound and wall texture. Even the most carefully prepared walls can hide subtle imperfections that only become visibly apparent once the final coat of paint is applied. To prevent these unwanted surprises and ensure a high-quality surface, professional finishers rely on critical lighting techniques to inspect and correct wall surfaces before the final finishing stages.
THE RAKING LIGHT METHOD FOR DRYWALL INSPECTION
The most effective way to identify drywall defects is by using a specialized inspection light. By shining a bright light at a harsh, oblique angle across the wall surface, you cast shadows over any high spots, gouges, or uneven taping joints. It is crucial to move the light source around and illuminate the wall from multiple directions. Without this directional lighting, minor imperfections blend into the surface and are nearly impossible to detect with the naked eye. As you move the light across the drywall, use a pencil to circle every defect you find so no spot is missed during the repair phase.
UNDERSTANDING TEXTURE TYPES AND DEFECT VISIBILITY
The type of wall texture you choose heavily influences how visible underlying drywall defects will be. Smooth wall finishes and light orange peel textures are notoriously unforgiving. These finishes require meticulous preparation because any gouge or trowel mark will telegraph through the final coat. Conversely, a heavy knockdown finish provides significantly more coverage. The thicker application of a knockdown texture naturally spans and fills in minor surface irregularities, making it an excellent choice for hiding underlying framing variations or minor drywall finishing imperfections.
PATCHING AND RETEXTURING
Once all defects are clearly marked with a pencil, the correction process begins. Apply a high-quality joint compound or plaster to fill the circled gouges, trowel marks, and low spots. Feather the edges smoothly to blend the patch into the surrounding wall. After the compound has properly dried and been lightly sanded, you must retexture those specific areas to match the rest of the wall. Taking the time to patch and carefully retexture these isolated spots ensures a uniform, professional appearance across the entire room.
CONCLUSION
Proper drywall inspection separates amateur work from professional craftsmanship. By utilizing directional lighting to find hidden defects and understanding how different wall textures interact with surface imperfections, you can achieve a superior, blemish-free wall finish that is ready for paint.
THREE KEY TIPS FOR DRYWALL INSPECTION
USE DIRECTIONAL LIGHTING: Always inspect freshly textured or sanded walls using a strong light held flush against the wall. Change the angle and direction of the light frequently to expose different shadows and hidden defects.
MARK IMPERFECTIONS IMMEDIATELY: As you scan the wall with your light, use a pencil to physically circle every gouge, pinhole, or trowel mark. This ensures you do not lose track of the defects once the inspection light is turned off or moved.
CHOOSE TEXTURE BASED ON WALL CONDITION: If your walls have underlying irregularities that are difficult to fix, opt for a heavy knockdown texture rather than an orange peel or smooth finish. The thicker knockdown material naturally hides minor defects.
FREQUENTLY ASKED QUESTIONS
To help you better understand the structural and code-related aspects of drywall installation that go beyond surface textures, we have compiled answers to a few technical questions regarding drywall finishing and structural integrity.
WHY DO DRYWALL TAPE JOINTS SOMETIMES CRACK MONTHS AFTER FINISHING?
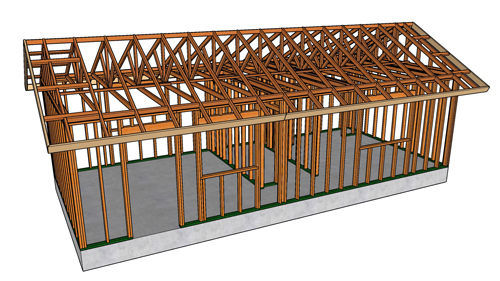
Even if your wall looks perfect under an inspection light, cracks can develop later due to structural movement or improper fastener spacing. The International Residential Code (IRC Section R702.3.5) mandates specific maximum spacing for drywall screws, typically 16 inches on center for wall framing and 12 inches on center for ceilings depending on the board thickness. If fasteners are placed too far apart, or if the underlying green lumber dries and shrinks, the drywall panels can shift and break the finished joint. Additionally, a phenomenon called truss uplift can occur in the winter, where the bottom chord of a roof truss bows upward due to temperature and moisture differences, causing the drywall joint at the wall-to-ceiling intersection to crack. Proper fastening schedules and the use of drywall clips at ceiling intersections can mitigate this structural issue.
HOW DO BUILDING CODES AFFECT CEILING DRYWALL WHEN APPLYING HEAVY TEXTURES?
When choosing a heavy texture like knockdown to hide defects, you must consider the weight and moisture being added to the drywall, particularly on ceilings. The IRC (Table R702.3.5) outlines the minimum thickness and maximum span for gypsum board. Standard half-inch drywall is generally acceptable for ceilings with framing spaced at 16 inches on center. However, if ceiling joists or trusses are spaced at 24 inches on center and a water-based texture is applied, standard half-inch drywall is highly susceptible to sagging under the added moisture and weight. In these cases, building codes dictate using either half-inch sag-resistant ceiling board or five-eighths-inch thick drywall to maintain structural integrity and prevent ceiling failure.