Adding a loft apartment or living space above a two-car garage requires careful planning, especially when it comes to installing the rough plumbing. Properly routing water supply lines, drainage pipes, and vents is critical for ensuring long-term functionality and maintaining the structural integrity of the building. This guide breaks down the essential components of a residential rough plumbing installation, covering everything from framing considerations to pipe sizing strategies.
Protecting Framing Integrity During Plumbing Installation
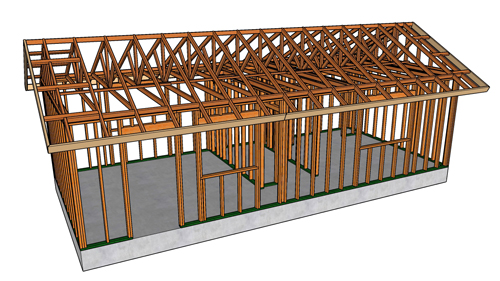
One of the most critical aspects of installing rough plumbing is navigating the structural framing of the walls and floors. Plumbers must route pipes safely without compromising the strength of the lumber. When routing pipes near windows or exterior openings, you must avoid drilling through king studs and jack studs. Drilling through these load-bearing members can severely weaken the structural header support over the window. Instead, route vent and supply pipes around these framing members.
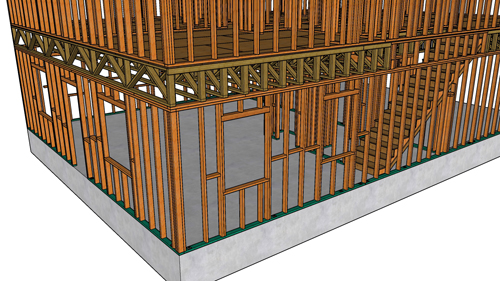
When running water supply lines through the floor, you have two primary options. The traditional method involves drilling precisely measured holes through the center third of the floor joists to conceal the pipes entirely within the floor cavity. However, excessive drilling can weaken floor joists.
An alternative method, particularly useful in garage spaces, is to run the supply pipes below the floor joists and secure them with strapping. You can then frame a small dropped ceiling or soffit to conceal the pipes. This preserves the maximum structural strength of the floor framing while keeping the pipes protected.
Water Supply Lines And Pipe Sizing Strategies
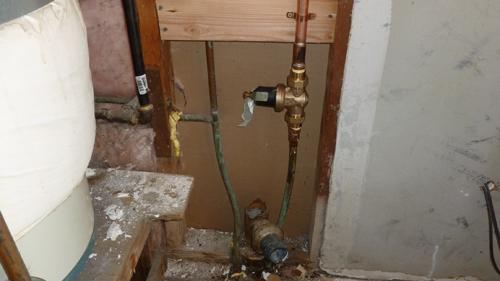
A well-designed water supply system ensures adequate water pressure and prevents uncomfortable temperature fluctuations. The main water supply should enter the structure through a primary shut-off valve, such as a gate valve, allowing you to easily isolate the garage and apartment from the main property during maintenance.
To maintain strong water volume, run three-quarter-inch pipe for the main trunk lines carrying both hot and cold water. These larger pipes should feed high-demand fixtures and the water heater. You can then reduce the pipe size to one-half-inch for individual branches feeding the kitchen sink and bathroom sink.
Careful placement of these pipe reducers is an excellent way to prevent temperature shock in the shower. By keeping the cold water line at three-quarter-inch past the toilet branch and only reducing it afterward, you ensure that flushing the toilet does not steal the necessary water volume from the shower.
For the fixture connections, stub out the pipes past the wall framing. These stub outs will remain capped while the system is pressurized and tested for leaks. Only after the drywall is finished and the cabinets are installed should these pipes be cut to their final length to receive the fixture shut-off valves. When roughing in sinks, always position the hot water supply on the left side and the cold water on the right.
Drainage And Venting Best Practices
The drainage and venting system utilizes gravity and atmospheric pressure to safely remove wastewater and sewer gases. Below the floor framing or concrete slab, the main drainage branches require specific pipe diameters based on the fixtures they serve. A toilet requires a minimum three-inch drain line, which is connected using long-sweep fittings to maintain smooth waste flow. Bathroom sinks and bathtubs typically utilize one-and-a-half-inch drain pipes, while a washing machine standpipe requires a dedicated two-inch drain.
Every drain must be properly vented to prevent the water traps from being siphoned empty. The toilet relies on a two-inch vent, the washing machine requires a two-inch vent, and the smaller sinks can utilize one-and-a-half-inch vents. While vents can be tied together in the attic space to minimize roof penetrations, routing individual vents straight up through the roof sheathing is an acceptable and sometimes simpler alternative, provided the roof penetrations are properly flashed against the weather. Finally, ensure accessible cleanouts are installed on main drainage lines, particularly near the toilet and bathtub tie-ins, to allow for future maintenance and clearing of blockages.
Three Key Construction Tips
Never drill through king studs or jack studs to route plumbing pipes. Doing so compromises the structural load path of the wall header, which violates standard building codes and can lead to sagging or structural failure around windows and doors.
Run three-quarter-inch water supply lines as far into the system as possible before reducing to one-half-inch branches. Specifically, branch off to the toilet before reducing the main line size to prevent sudden drops in shower water pressure and temperature when the toilet is flushed.
Consider running plumbing below the floor joists in the garage ceiling and covering it with a framed soffit. This technique drastically reduces the amount of drilling required through dimensional lumber or engineered floor joists, maintaining the maximum structural integrity of the floor assembly.
Bonus Questions And Answers
What Is The Correct Pitch Or Slope For Horizontal Drainage Pipes?
Proper drainage relies heavily on the correct gravitational slope of the pipes beneath the floor. According to standard plumbing codes, horizontal drainage pipe that is two and a half inches in diameter or smaller must be installed with a minimum slope of one-quarter inch per foot. For pipes three inches to six inches in diameter, the minimum required slope is one-eighth inch per foot. This specific grading ensures that liquids and solids flow at the correct velocity; if the slope is too steep, water will outpace the solids, leaving them behind to cause a clog.
Do Washing Machine Supply Lines Require Water Hammer Arrestors?
Modern plumbing systems must account for the rapid changes in water flow caused by specific appliances. Standard building and plumbing codes require the installation of water hammer arrestors on water supply lines serving quick-closing valves, such as those found in washing machines and dishwashers. When a washing machine valve suddenly shuts off, the momentum of the moving water creates a shockwave that can violently rattle pipes and damage fittings. Arrestors absorb this hydraulic shock, protecting the structural integrity of the copper or PEX water lines.
How Far Must A Plumbing Vent Pipe Extend Above The Roofline?
When routing individual vent pipes straight through the roof sheathing, they must terminate at a safe height to dissipate sewer gases effectively. The International Residential Code dictates that vent pipes must extend a minimum of six inches above the roof surface. However, in regions prone to heavy snowfall, local municipal codes may require the vent to extend well above the average anticipated snowline to prevent the pipe from freezing over or being blocked by snow accumulation, which would dangerously trap sewer gases inside the dwelling.