Understanding Sand And Visqueen In Concrete Foundation Construction
When preparing to pour a residential concrete foundation, managing ground moisture is one of the most critical steps in the entire construction process. Builders frequently refer to the use of sand and visqueen, a foundational system designed to prevent subsurface water from migrating upward into the living space. Understanding how these materials interact with the soil and the concrete slab is essential for maintaining the structural integrity and indoor air quality of a home.
The Role Of The Moisture Barrier
Visqueen is a widely used industry term for a polyethylene plastic sheeting that acts as a vapor retarder. In standard residential construction, building codes require this plastic membrane to be a minimum of 6-mil thick (0.006 inches). While this thickness may seem minimal, a 6-mil vapor retarder creates a highly effective impermeable boundary between the damp earth below and the porous concrete above.
Without this moisture barrier, a concrete slab will act like a sponge, drawing water up from saturated soil through capillary action. This moisture can easily migrate through the concrete and ruin interior floor coverings, causing carpet stains, warping hardwood floors, or loosening tile grout. By installing a continuous layer of plastic over the graded dirt, builders effectively sever this capillary draw, protecting the finished home from ground moisture.
The Purpose Of The Sand Layer
In many traditional foundation designs, a layer of sand is placed directly on top of the plastic vapor retarder before the concrete is poured. This sand layer serves two distinct purposes during the construction phase. First, it physically protects the relatively fragile plastic sheeting from being punctured or torn by work boots, tools, and heavy concrete placement hoses. A continuous barrier is only effective if it remains completely intact.
Second, the sand can assist in the curing process of the concrete. By providing a slightly absorbent blotter layer beneath the slab, the sand helps draw excess bleed water out of the bottom of the concrete mix at a rate similar to how water evaporates from the top surface. This balanced drying process can help prevent the edges of the concrete slab from curling as it cures.
Important Considerations For Concrete Footings
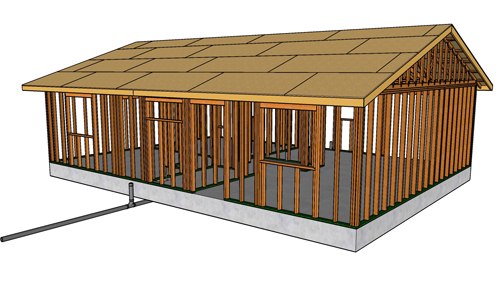
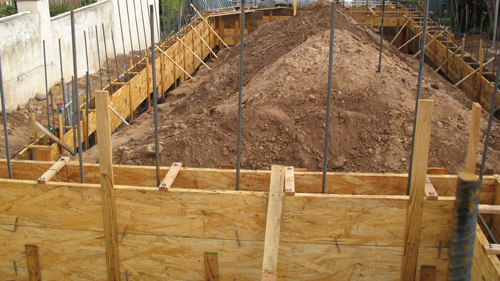
While the moisture barrier is critical beneath the main floor slab, it is strictly prohibited from running into the structural concrete footings. Footings are the thick, deep trenches of concrete that carry the heavy load-bearing weight of the walls down into the earth. Building codes require concrete footings to be poured in direct contact with undisturbed, load-bearing soil to maximize friction and prevent structural slipping. Running plastic sheeting into the footing trench would create a slip plane, severely compromising the stability of the entire foundation. Therefore, the vapor retarder must stop exactly where the slab meets the footing.
Three Key Tips
Verify plastic thickness: Always ensure the vapor retarder is at least 6-mil thick. Thinner plastics intended for painting drop cloths will degrade under the concrete and will not meet the standards of the International Residential Code (IRC) for under slab moisture protection.
Maintain footing contact: Never allow the plastic sheeting to extend down into load-bearing footings or grade beams. The structural integrity of the home relies on direct concrete-to-soil contact at the base of the footings.
Repair all punctures instantly: If the plastic vapor retarder is torn by a shovel, rebar, or a worker's boot during the layout phase, it must be patched with a compatible construction tape before the concrete is poured. Even small holes can allow significant moisture vapor intrusion over the lifespan of the home.
Bonus Questions And Answers
To further expand on best practices for foundation moisture control, here are a few common questions related to proper slab preparation.
Do All Concrete Slabs Require A Vapor Barrier?
No, not all slabs require a vapor barrier, but it depends entirely on the usage of the space above it. The International Residential Code (IRC) mandates a 6-mil minimum vapor retarder between the base course and the concrete slab for any habitable, conditioned space. However, unheated, non-habitable structures like detached garages, driveways, exterior patios, and carports are typically exempt from this requirement because interior moisture control is not a factor for those surfaces.
How Much Should Vapor Barrier Seams Overlap?
When joining multiple sheets of plastic beneath a slab, the edges cannot simply sit side-by-side. According to standard building codes, including IRC Section R506.2.3, the joints of the vapor retarder must overlap by a minimum of 6 inches. Furthermore, these lapped seams should be continuously sealed with an approved construction tape to prevent moisture vapor from bypassing the barrier at the joints.
Does Modern Building Science Still Recommend A Sand Layer Over Plastic?
While the video transcript highlights the traditional use of sand over a vapor barrier to protect the plastic and aid curing, modern building science has largely shifted away from this practice. The American Concrete Institute (ACI) now generally recommends pouring the concrete slab directly on top of the vapor retarder. The reason for this shift is the bathtub effect. If water from rain or the concrete mix itself becomes trapped in the sand layer between the plastic and the slab, it cannot drain. This trapped water will slowly transmit moisture upward through the slab for years. To prevent curling without using sand, modern concrete contractors instead rely on low water-to-cement ratios and proper surface curing techniques.