Designing and installing rough plumbing for a second-story home addition requires precision, spatial awareness, and a thorough understanding of building principles. When dealing exclusively with the waste and venting systems, the primary goal is to safely and efficiently move wastewater out of the home while protecting the water seals in the fixture traps. Proper routing ensures that pipes remain concealed within the framing without compromising structural integrity.
VENTING STRATEGIES AND WET VENTS
A well-designed venting system is critical for balancing pressure within the drainage lines. For a second-story bathroom featuring a sink, toilet, and bathtub, it is possible to consolidate roof penetrations. By connecting secondary vents into a primary vent line in the attic, you minimize the number of holes in the roof, reducing potential leak points.
In some configurations, a wet vent can be utilized. Wet venting allows a single pipe to serve as both a drain for one fixture and a vent for another, commonly used to connect a bathroom sink to a toilet drain. This method saves materials and space within tight wall cavities, provided it meets local code sizing requirements. It is vital to remember that vent pipes cannot run completely flat. Horizontal vent runs must maintain a continuous upward slope, typically a minimum of one-quarter inch per foot, to ensure any condensation or water that enters the vent can properly drain back into the waste system.
CLEANOUT PLACEMENT AND ACCESSIBILITY
Cleanouts are mandatory access points used to clear clogs within the drainage system. Selecting the right type of cleanout and placing it correctly will prevent significant damage to the home interior during maintenance. There are various cleanout designs, including protruding plugs and slotted flush plugs. Flush designs are often preferred when the cleanout must be hidden inside a bathroom vanity cabinet.
Elevation is a crucial factor when placing a cleanout. The access point should ideally be located above the flood level rim of the fixture it serves. If a cleanout is installed lower than the potential trapped water level, opening it to clear a blockage could result in wastewater spilling onto the bathroom floor. If a lower placement is unavoidable due to structural constraints, it should be positioned where any potential spillage causes the least amount of damage and is easily accessible.
NAVIGATING FRAMING AND STRUCTURAL ELEMENTS
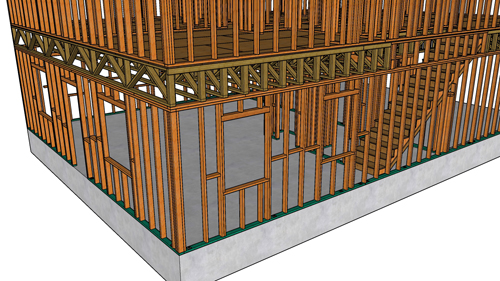
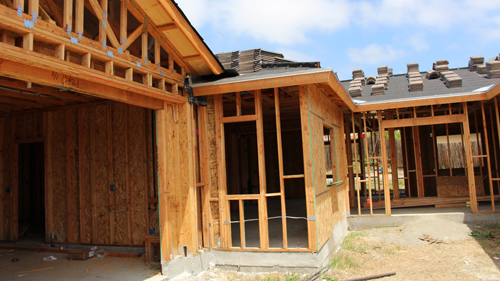
One of the greatest challenges in second-story rough plumbing is fitting large drainage pipes into standard wall and floor cavities. Pipes must remain inside the wall framing. If standard walls cannot accommodate large-diameter waste lines, the walls must be built wider or furred out.
Floor joists present another obstacle. Structural load-bearing beams cannot be arbitrarily cut or notched to make room for plumbing. In situations where plumbing must cross perpendicular to floor joists, or where a structural beam blocks the path, creating a dropped ceiling in the room below provides a safe cavity for the pipes. Dropping the ceiling eliminates the need to drill excessive holes through joists or cut framing plates, preserving the structural integrity of the home.
PIPE SIZING AND LAYOUT EFFICIENCY
Proper pipe sizing prevents blockages and ensures efficient drainage. A standard layout typically utilizes three-inch piping for toilets and two-inch piping for showers. While sinks can technically drain through one-and-a-half-inch pipe, upgrading sink drains to two-inch pipe is highly recommended. The larger diameter provides superior flow, reduces the likelihood of clogs from hair or soap buildup, and generally adds very little to the overall material cost.
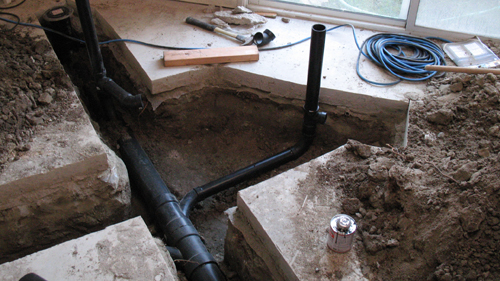
Careful planning during the initial layout phase prevents costly mistakes. Aligning the second-story bathroom layout with the ground floor or foundation plumbing can eliminate the need for extra fittings, such as offset couplings or additional directional changes. A straight, direct drop from the second floor to the main sewer line is always the most effective and efficient design.
THREE KEY TIPS
Elevate Cleanouts Properly: Always position plumbing cleanouts above the flood level rim of the highest fixture they serve, or ensure they are placed in a location where sudden water release will not damage finished floors or cabinetry.
Upsize Sink Drains: Even if building codes permit one-and-a-half-inch pipe for bathroom sinks, using two-inch pipe significantly reduces the chance of future clogs and improves overall drainage efficiency.
Protect Structural Framing: Never compromise load-bearing beams or heavily notch floor joists to hide plumbing. Instead, use a dropped ceiling in the space below or build thicker walls to safely conceal the waste lines.
BONUS QUESTIONS AND ANSWERS
WHAT IS THE MAXIMUM DISTANCE A TRAP CAN BE FROM ITS VENT?
When designing a bathroom layout, the distance between the fixture trap and its vent is strictly regulated to prevent the trap from siphoning dry. Under the International Residential Code, the maximum allowable distance depends on the pipe diameter. For a standard one-and-a-half-inch pipe, the distance generally cannot exceed six feet, while a two-inch pipe can travel up to eight feet before tying into a vent. Exceeding these limits can cause a vacuum effect that pulls the water seal out of the trap, allowing sewer gases into the home.
WHY IS IT IMPORTANT TO USE A SANITARY TEE VERSUS A STANDARD WYE FITTING?
The orientation and type of fitting dictate how water and air flow through the system. A sanitary tee is designed specifically for transitioning from a horizontal drain to a vertical drop. It features a sweeping curve that guides waste downward while keeping the vent path open. However, a sanitary tee cannot be used on its back for horizontal-to-horizontal drainage changes, as it restricts flow and causes clogs. In those scenarios, a combination wye and eighth-bend fitting must be used to provide a smooth, elongated transition.