Structural Framing And Beam Installation For Home Additions
Constructing a room addition requires precise planning, especially when integrating new structural elements with an existing home. When transitioning from a finished concrete slab to framing the walls and roof, taking the right steps in the correct order ensures the structural integrity of the entire building. The following guide covers professional best practices for tying into an existing structure, safely removing exterior bearing walls, and installing load-bearing beam assemblies.
Preparing The Existing Structure And Roof Tie-In
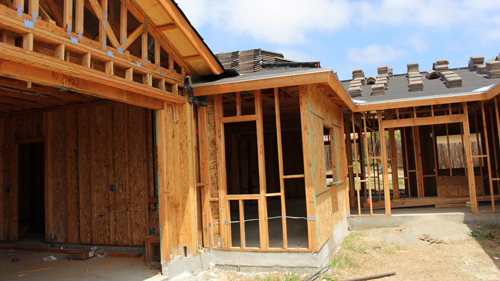
Before new walls can be framed, you must prepare the existing exterior of the home to accept the new structure. This typically involves removing sections of the existing fascia board and roof sheathing that intersect with the footprint of the addition. The most crucial rule during this phase is to avoid over-demolition. Only remove the roofing materials and framing members that are directly in the way of the new wall plates and rafters.
Leaving existing rafter tails and lookout blocks intact wherever possible can provide valuable structural support and natural tie-in points for the new roof framing. When dealing with angled intersections between the old roof and the new addition, it is often more efficient to leave the existing fascia slightly long during the initial demolition. Once the new walls and initial rafters are erected, you can mark and cut the fascia in place to guarantee a perfect structural fit without relying on complex preliminary calculations.
Implementing Temporary Roof Support
Removing an existing load-bearing exterior wall is one of the most critical phases of building an addition. Before any wall studs are removed, temporary shoring must be installed to support the existing roof trusses or rafters. Temporary support walls or braced posts should be erected at a safe distance from the existing framing so they do not interfere with the installation of the new structural beam.
When building temporary supports, secure structural lumber directly to the overhead trusses using heavy-duty construction screws or lag bolts. The size of the temporary support lumber and the quantity of fasteners depend entirely on the weight of the existing roof structure. Heavier roofing materials, such as concrete tiles, require significantly stronger temporary shoring compared to lighter composition shingles. Once the support system is fully secured and bears the weight of the roof, the original wall framing and corner sections can be safely removed.
Installing The Support Beam And Post Assembly
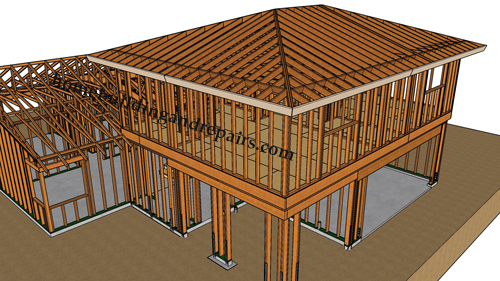
With the existing wall removed, the new support beam can be maneuvered into place. Depending on the architectural design and ceiling heights, this may be a dropped beam supported by posts or a flush beam installed seamlessly into the ceiling joist space. When sizing and cutting the beam, it is highly advantageous to run the beam completely through to the next existing framing stud within the wall cavity, rather than stopping it exactly at the edge of the opening. Allowing the beam to extend further into the adjacent wall provides superior load distribution and overall structural rigidity.
The beam must be supported at both ends by structural posts, commonly oversized dimensional lumber such as four-by-fours or six-by-sixes, which transfer the roof load directly down to the foundation. This complete assembly must be erected and secured as swiftly as possible to minimize the time the existing structure relies solely on temporary shoring.
Wall Framing And Structural Connections
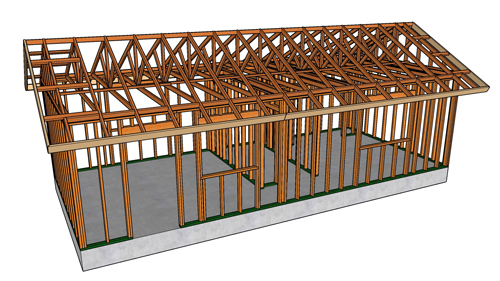
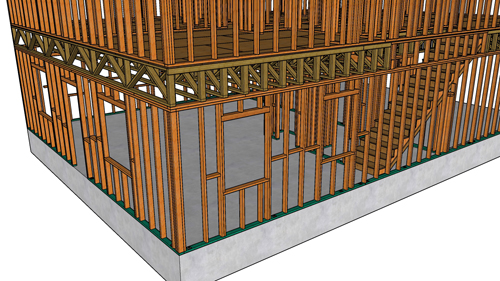
Once the beam is set, standard wall framing can commence. Wall plates, studs, and window trimmers must be accurately measured and secured. Mid-span blocking is installed between the vertical studs to provide wall rigidity and act as fire blocking. When planning the blocking layout, consider the location of future electrical boxes. Slightly lowering the row of mid-span blocks prevents them from interfering with standard light switch placements near doorways, ensuring the framing supports the wall without obstructing utility installations.
Securing the structural connections is vital for resisting uplift and lateral forces. Heavy-gauge metal strapping must be utilized to tie the new top framing plates to the support beam, and the beam to the vertical support posts. While framing nailers are used for basic stud assembly, engineered hardware like column caps and extended metal straps ensure a continuous load path. Always consult your project engineer for the exact size and fastening schedule of these straps, as high-wind or seismic zones will dictate rigorous hardware requirements.
Securing The Bottom Plate To The Foundation
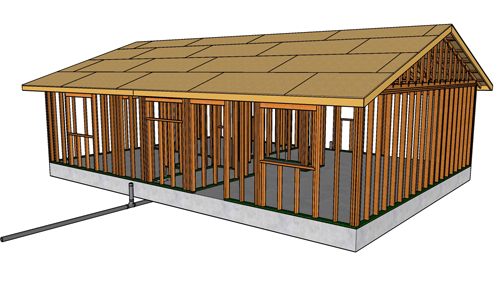
The connection between the new framing and the concrete slab relies entirely on properly spaced anchor bolts. Building codes require anchor bolts to be placed within a specific distance from the end of every sill plate segment, as well as spaced at maximum intervals along the length of the wall.
When walls are broken up by large doorways or custom layouts, you may find that a cut sill plate no longer has an anchor bolt near its termination point. In these instances, you must drill into the concrete slab and install an approved aftermarket epoxy anchor bolt to satisfy code requirements and ensure the wall remains securely fastened to the foundation.
Three Key Construction Tips
Modify blocking for utilities: When installing horizontal mid-span blocks between your wall studs, adjust their height slightly lower or higher than standard switch box height. This prevents framing members from obstructing the installation of electrical boxes and wiring next to doors and entryways.
Preserve existing roof framing: Do not blindly cut away existing rafter lookouts or overhangs when removing fascia. Whenever possible, leave these elements intact to provide additional structural support and convenient anchor points for the new roof framing.
Monitor anchor bolt proximity: Standard building codes mandate that an anchor bolt must be located within twelve inches of the end of every sill plate segment. If a plate is cut for a doorway and lacks a bolt near the edge, you must retrofit a new bolt using a structural concrete epoxy system.
Bonus Construction Insights For Room Additions
Why must the bottom plate of the new framed wall be made of a specific type of wood?
To prevent rot and structural degradation, building codes mandate that any framing lumber in direct contact with concrete or masonry must be naturally durable wood or preservative-treated lumber. Concrete is porous and constantly wicks moisture from the ground. If standard untreated dimensional lumber is used for the bottom sill plate, this moisture transfer will quickly lead to fungal decay and termite infestation, ultimately compromising the foundation-to-wall connection.
How is the correct size of the load-bearing beam determined when opening up the existing wall?
The dimensions and material of a load-bearing beam cannot be guessed; they must be precisely calculated based on the span of the opening and the structural loads it must carry. This includes the dead load (the physical weight of the roof materials) and the live load (temporary forces such as snow accumulation or wind). These calculations are governed by strict span tables found in the International Residential Code or must be explicitly calculated and stamped by a licensed structural engineer to ensure the beam will not sag or fail under pressure.
What is the purpose of using engineered metal hardware instead of just nailing the structural posts to the beam?
While standard toe-nailing was once common, modern building science requires a continuous load path to protect the structure against uplift from high winds and lateral shifting from seismic activity. Engineered metal column caps, post bases, and heavy-duty strapping physically lock the roof framing, beam, posts, and foundation together into a single cohesive unit. This ensures that extreme environmental forces are transferred safely from the roof straight down into the concrete slab, preventing the roof from detaching or the walls from collapsing.