Planning Water Supply Lines For A Two-Story Addition
When constructing a two-story home addition, mapping out the plumbing water supply requires more than just connecting pipes from the main line to the new fixtures. It demands a strategic approach that respects the home's structural framing, optimizes water pressure for multiple users, and adheres strictly to modern building codes. A well-planned plumbing rough-in ensures long-term reliability and prevents expensive structural repairs or frustrating water pressure issues down the line.
Protecting Structural Integrity During Rough-In
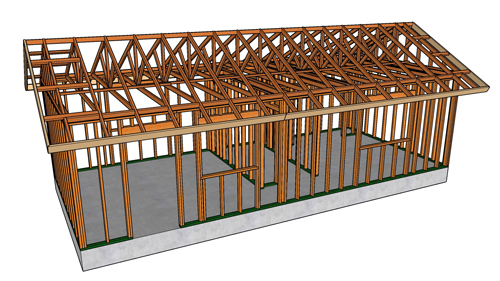
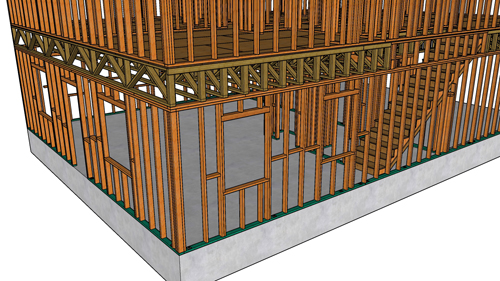
One of the most critical aspects of adding plumbing to a second story is finding pathways for the pipes without compromising the home's structural integrity. Plumbers and builders must avoid excessively notching or boring through essential load-bearing components like top plates, structural beams, and stair headers. Instead of cutting through these vital framing members, alternative routing strategies should be utilized. For example, dropping the ceiling slightly in a localized area, such as a ground-floor closet, provides a safe and accessible cavity to run overhead pipes. Similarly, running flexible supply lines through attic spaces and scissor trusses allows you to bypass dense structural doublers entirely, ensuring the structural framing remains untouched and fully intact.
Pipe Sizing Strategies For Optimal Water Pressure
Proper pipe sizing is essential for maintaining consistent water pressure and temperature, particularly in bathrooms with multiple fixtures. The cold water supply entering the home is typically a three-quarter-inch line. A common mistake is reducing this main line to a half-inch pipe too early in the system.
To prevent the notorious temperature shock that occurs when someone flushes a toilet while another person is showering, the three-quarter-inch trunk line should be maintained as close to the toilet as possible before branching off. By only reducing to a half-inch line directly at the toilet and sink, you ensure adequate volume and pressure remain available for the shower valve, mitigating sudden temperature fluctuations.
Strategic Routing For Hot And Cold Water
When laying out the supply lines, standard conventions must be followed to ensure safety and usability. Hot water lines should always be routed to the left side of the fixture, with cold water on the right. When connecting to a modern tankless water heater, careful planning is required to map the cold water intake and the hot water distribution lines efficiently. Depending on the layout, it is often necessary to elevate cold water lines over hot water lines where they intersect to maintain a clean, organized rough-in that fits properly within standard wall depths. Furthermore, pipes located inside wall cavities should be positioned deep enough to avoid interference with future cabinetry, such as bathroom vanities.
Essential Drainage And Venting Considerations
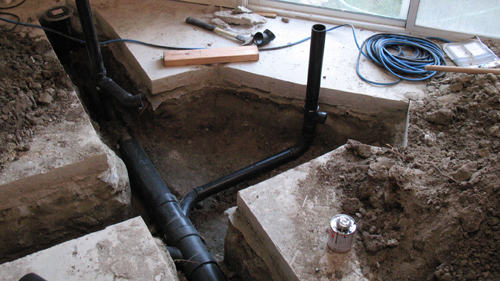
Supply lines are only half the equation; proper drainage and venting are equally regulated by building codes. For fixtures like washing machines that discharge large volumes of water rapidly, a two-inch drain line is required, typically paired with a one-and-a-half-inch vent extending through the roof. Additionally, the slope of drainage pipes is highly critical. If a horizontal drain line, such as the one serving a toilet, is pitched at an angle that is too steep, the velocity of the rushing water can create a vacuum. This vacuum can siphon the water out of the trap seal, allowing dangerous and unpleasant sewer gases to enter the living space. Ensuring the exact code-approved slope prevents trap siphonage and ensures a safe, sanitary plumbing system.
Three Key Tips
Preserve structural headers and load-bearing beams by utilizing drop ceilings or alternative attic routes instead of boring through dense framing doublers.
Maintain a three-quarter-inch cold water trunk line as close to the toilet branch as possible before reducing to a half-inch line to prevent sudden water temperature changes in the shower.
Ensure your washing machine standpipe and drain line are a minimum of two inches in diameter to meet modern building codes and safely handle high-volume water discharge.
Bonus Questions And Answers
Do Water Supply Lines In An Attic Need Special Insulation?
Routing pipes overhead through an attic is a great way to avoid structural damage, but it introduces environmental challenges regarding temperature control. According to the International Residential Code, any plumbing pipes located in unconditioned spaces, such as an attic or a crawlspace, must be protected from freezing. If you live in a climate where temperatures drop below freezing, these pipes must be heavily insulated or routed beneath the building's thermal envelope (the insulation layer) to prevent the lines from freezing, expanding, and ultimately bursting.
Why Are Steel Nail Plates Required When Running Pipes Through Wall Framing?
Once your plumbing rough-in is perfectly routed and sized, protecting those pipes during the subsequent drywall phase is a critical code requirement. Building codes dictate that if a plumbing pipe is installed within one and a quarter inches of the edge of a wood framing member, a steel shield plate must be installed over the stud. This heavy-duty steel plate prevents drywall installers or future homeowners from accidentally driving a screw or nail directly into the hidden water or drain line, which would cause a catastrophic hidden leak inside the wall cavity.