HOW TO FRAME A HIP ROOF ADDITION AND TIE INTO AN EXISTING ROOF
Expanding a home footprint often requires seamlessly integrating a new roof structure into the existing framework. When dealing with a hip roof, this process requires careful geometric alignment, rigorous structural load transfers, and a thorough understanding of residential construction practices. A successful roof tie-in looks like it was part of the original architectural design, completely avoiding awkward transitions or structural weak points.
Preparing The Connection Point
Before installing any new roof framing components, the existing structure must be prepared to receive the new loads. This process begins by modifying the overhang of the existing rafters to allow the new addition walls to connect directly to the existing house framing. To ensure structural integrity, steel strapping is often installed at these intersections to tie the wall plates together.
Because the load from the existing roof sheathing must transfer securely to the new wall framing, solid blocking must be installed along the top plate of the new wall. This provides a solid nailing surface. The existing roof sheathing is then fastened directly into this blocking through perimeter nailing. The specific nailing schedule and the required spacing of these fasteners should always be verified by a structural engineer or the local building authority to guarantee the shear transfer meets regional building codes.
Framing The Hip And Valley System
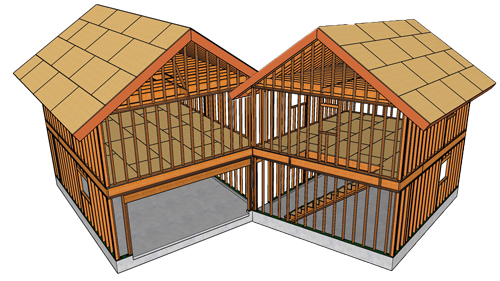
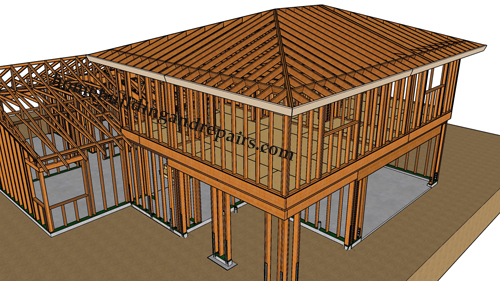
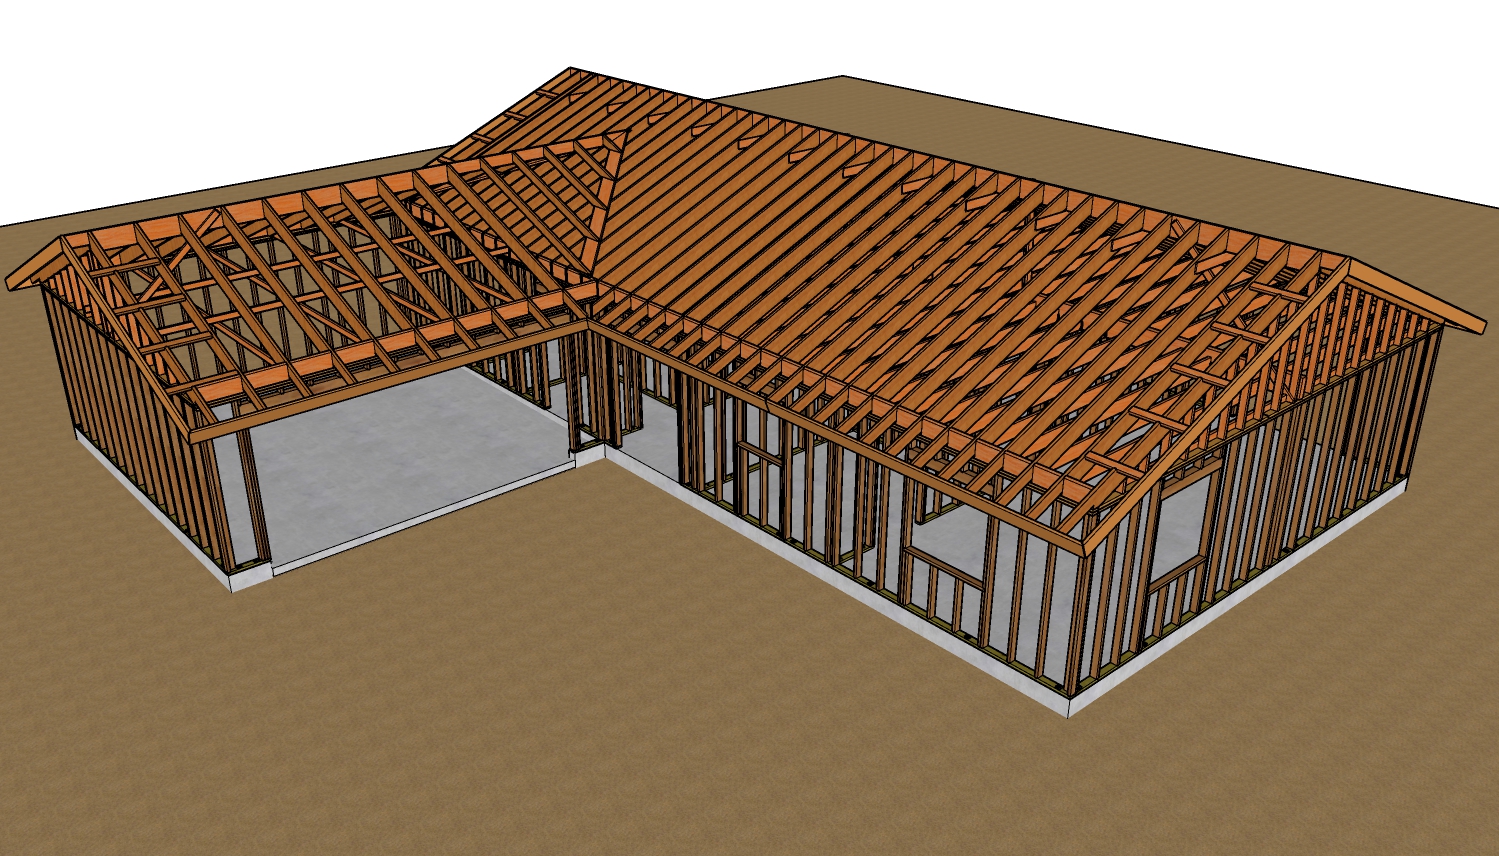
Once the walls are tied together and the load path is established, the framing of the new roof components begins. This includes installing the new hip rafters, ridge boards, common rafters, and the valley extension. To ensure accuracy, builders often construct the primary ridge and install ceiling joists first, using the new ridge to carefully measure and cut the fill rafters, also known as jack rafters, for the adjoining valleys.
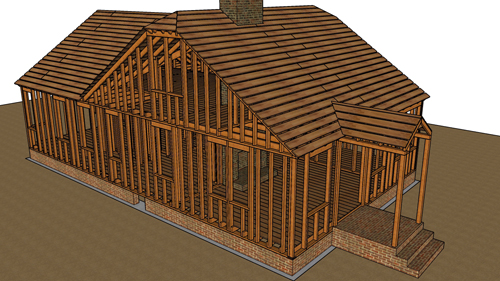
A critical objective during this phase is creating a perfectly flat plane where the new addition meets the existing house. Errors in rafter sizing or incorrect angles will result in a noticeable hump or dip in the roofline. To guarantee a flat transition, the new framing components must perfectly plane into the existing rafters below. In many cases, it is necessary to temporarily remove sections of the existing roof sheathing to expose the framing, establish a straight structural line, and properly seat the new valley components before re-sheathing the entire assembly.
Bearing And Alignment Considerations
The structural strength of a hip roof heavily relies on how well the primary load-bearing components transfer weight to the walls below. The bottom of the hip rafter must have full and adequate bearing on the top framing plates. If the rafter is cut too far back, it compromises the structural integrity of the entire corner assembly.
To maintain alignment and simplify the overhang framing, installing the fascia board early in the process is highly recommended. The fascia board acts as a rigid guide, removing the guesswork from determining exactly where the rafter tails will terminate. When cutting the fill rafters that meet the new valley, keep in mind that opposing sides will utilize reversed angle cuts, though the bottom pitch angle will perfectly match the slope of the roof.
Installing Ceiling Joists And Structural Sheathing
When installing ceiling joists for the addition, you may need to notch them around the bottom of the hip or common rafters to maintain a flush ceiling line. While solid pressure blocking is a traditional method used between joists to prevent rotation, modern building codes increasingly favor approved structural hardware, such as joist hangers, for a more secure and predictable connection.
Finally, the installation of the roof sheathing serves as the ultimate structural tie between the new addition and the existing home. Rather than leaving a vertical seam where the two structures meet, running continuous pieces of sheathing across the transition point significantly reinforces the connection. Keep in mind that building codes mandate minimum dimensions for roof sheathing panels to maintain diaphragm strength, often requiring pieces to span across multiple framing members. In regions subject to heavy snow loads, rafter dimensions must be upsized and structural hardware is mandatory to resist the added downward pressure.
THREE KEY CONSTRUCTION TIPS
Ensure Full Bearing On Top Plates
The hip rafter carries a significant portion of the roof load. The birds mouth cut at the base of the hip rafter must be accurately measured to provide full bearing across the entire width of the wall top plates. Failing to provide adequate wood-to-wood contact at this critical junction can lead to structural sagging or failure over time.
Interweave The Roof Sheathing
Do not let the edge of the new roof sheathing terminate exactly where the old sheathing ends. Staggering or interweaving the structural panels across the transition line creates a continuous diaphragm. This structural tie shares shear loads evenly across the roof, significantly reducing the likelihood of cracking in the drywall or roofing materials caused by differential settling.
Calculate Fill Rafters Symmetrically
When cutting jack rafters for a hip or valley, the framing math relies on symmetry. The compound miter cut on one side of the valley will be the exact mirror image of the cut on the opposite side. However, the plumb cut angle at the base will always remain identical to the primary roof pitch.
BONUS QUESTIONS AND ANSWERS
Why Is Adequate Roof Ventilation Critical When Tying A New Hip Roof Into An Existing One?
Beyond the structural framework, managing airflow within the new attic space is crucial for the longevity of the roof assembly. The International Residential Code requires specific minimums for net free ventilating area to prevent moisture accumulation and regulate temperature. When you alter the roofline, you risk trapping moist, stagnant air in the new geometric pockets created by the intersecting valleys. Proper ventilation pathways, such as continuous soffit and ridge vents, must be integrated across the transition to prevent wood rot, mold growth, and winter ice dams.
Do I Need A Structural Engineer To Design The Valley Connections For A Roof Addition?
As you plan the structural transitions of your roof, you may wonder about the necessity of professional engineering oversight. While building codes provide prescriptive framing tables for simple, uniform structures, the intersection of two distinct rooflines frequently creates concentrated point loads that standard tables do not cover. The valley rafter transfers the weight of the new intersecting roof directly onto the structural members below it. In almost all jurisdictions, calculating the necessary support for this point load requires a licensed structural engineer to specify the correct beam sizes, blocking, and hardware.
How Does Local Wind Speed Impact The Hardware Used To Tie In The New Roof?
Securing the framing visually is just the first step; resisting environmental forces is a strict code requirement. Building codes mandate a continuous load path that securely connects the roof framework down to the foundation to resist uplift forces caused by high winds. When tying in a new addition, simple toenailing is rarely sufficient to meet modern wind-resistance standards. Depending on the basic wind speed of your geographical region, you will likely be required to use specific structural steel connectors, such as hurricane ties, at every point where a rafter or truss meets the top plate.