Best Practices For Joining New Stucco To Existing Walls
When constructing a room addition, one of the most critical exterior details is how the new stucco seamlessly integrates with the existing wall finish. A proper tie-in ensures both a watertight building envelope and a visually flawless transition. However, failure to accurately prepare the transition zone can lead to long-term structural issues, including severe cracking and poor material bonding.
The Importance Of Edge Preparation
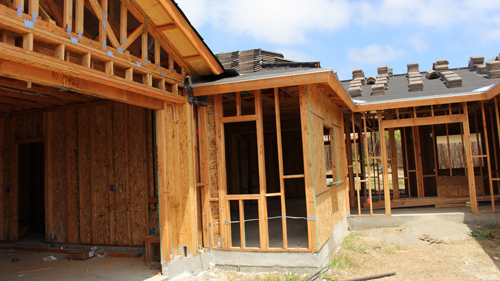
During the demolition phase of a home addition, contractors must cut back the original stucco to expose the underlying framing and barrier paper. This process creates an edge where the fresh cement mix will eventually meet the old application. It is incredibly common to find jagged sections, loose chunks, and hairline cracks along this remaining edge. While tiny, stable fragments of old material might simply mix with the new stucco similar to aggregate in a concrete mix, leaving larger, unstable pieces behind is a recipe for future structural failure.
Preventing Cracks And Ensuring A Solid Bond
If large, loose sections of the original stucco are left intact, the new color coat or base coat will struggle to establish a proper bond. This weak connection inevitably leads to cracking as the house settles or experiences natural thermal expansion and contraction. Even small, seemingly insignificant nuggets of old mortar should be chipped away. Taking the extra time to clean the transition line thoroughly provides a solid, uniform substrate for the new lath and stucco application, drastically reducing the chances of surface separation.
Achieving A Professional Finish
Ultimately, a high-quality stucco tie-in comes down to meticulous edge preparation. By removing compromised material and establishing a clean, solid boundary, contractors can guarantee a much stronger connection between the old and new surfaces. This attention to detail protects the building envelope from moisture intrusion and delivers a professional, durable exterior finish for any home addition.
Three Key Tips
Remove All Loose Material: Always chip away loose nuggets, jagged chunks, and compromised sections of the existing stucco along the transition line to ensure the new exterior application has a stable surface to bond with.
Inspect For Existing Cracks: Before applying the new mix, rigorously examine the remaining edge of the old stucco for deep fractures. Any severely cracked sections should be completely removed, as they will compromise the structural integrity of the new joint.
Prioritize A Clean Transition: Do not rely on the new stucco mix to act as a filler for large gaps of unstable material. Invest the time to create a clean, solid boundary to minimize the risk of hairline cracks forming as the materials cure.
Bonus Questions And Answers
To further expand on the best practices for exterior wall transitions, let us explore some advanced considerations and code requirements that professional builders must follow.
What Are The Building Code Requirements For Weather Resistant Barriers At Stucco Tie Ins
According to the International Residential Code, specifically Section R703, exterior plaster requires a continuous water-resistive barrier behind the exterior veneer. When joining new stucco to an older wall, the existing barrier must be carefully exposed and properly lapped with the newly installed barrier. The building code mandates a minimum horizontal lap of two inches and a vertical lap of six inches. This shingling effect is structurally crucial because stucco is a porous material, meaning the barrier underneath acts as the true line of defense against moisture intrusion and wood rot.
How Should Metal Lath Be Spliced Between The Old And New Stucco Sections
A successful structural transition relies heavily on how the metal lath is integrated across the cold joint. The International Residential Code requires that metal plaster bases be overlapped to ensure continuous structural support and minimize cracking. When patching into an existing exterior wall, contractors must overlap the new lath onto the existing lath by at least one inch, or wire-tie the structural edges together securely. If the lath is not properly tied into the existing framework, the two sections will move independently during thermal expansion, causing an immediate vertical crack down the wall.
Do Expansion Joints Need To Be Installed Where The Addition Meets The Original Structure
Yes, integrating an expansion joint or a casing bead at the transition is highly recommended and often required by modern building standards. While not strictly detailed for every minor patch, ASTM C1063, which governs the installation of lathing and furring, dictates that control joints must be installed to delineate plaster panels and accommodate building movement. Since a new room addition sits on a newly poured foundation, it will inevitably settle at a different rate than the older structure. Installing an expansion joint at this exact transition point provides a dedicated space for this differential movement to occur, preventing the stucco from tearing itself apart as the soil settles.