ESSENTIAL STEPS FOR CONCRETE POND CONSTRUCTION: REBAR, FORMS, AND LEVELING
INTRODUCTION
Building a durable concrete pond requires more than just pouring a mix into a hole. The structural integrity and functional success of a water feature depend heavily on the preparation steps that happen before the concrete truck ever arrives.
Proper sequencing, robust reinforcement, precision formwork, and dead-accurate leveling are the hallmarks of a professional-grade installation. By carefully executing these foundational stages, you can prevent structural cracking, uneven water lines, and catastrophic leaks.
REBAR INSTALLATION AND SEQUENCING
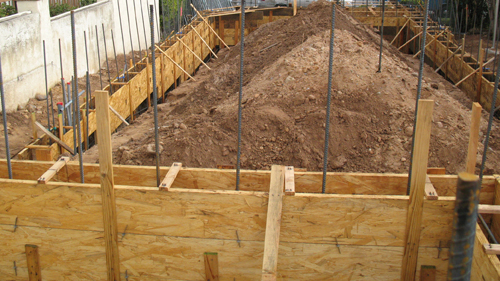
One of the most critical rules in construction is to never build yourself into a corner. When erecting complex structures like a pond, sequence dictates success. The steel reinforcement grid, commonly known as rebar, must be installed in the lower levels and structural basin before erecting the upper, restrictive formwork. Attempting to maneuver and tie rigid steel bars within a confined, fully formed trench is inefficient and often compromises the quality of the reinforcement grid.
The spacing of the rebar directly influences the concrete's tensile strength and its ability to resist shrinkage cracks. While a wide 16-inch on-center grid might seem sufficient for minor hardscaping, water-holding structures experience immense hydrostatic pressure and soil movement. To minimize hairline cracks and structural failure, tighter grids are strongly recommended.
A 12-inch or 8-inch on-center layout offers significantly better crack control. For larger ponds or those resembling swimming pools in scale, engineers typically specify a 4-inch to 6-inch on-center grid. Investing in tighter rebar spacing during the rough-in phase pays dividends in the lifespan and watertightness of the final structure.
CRAFTING CIRCULAR CONCRETE FORMS
Water features often utilize sweeping, organic curves rather than rigid angles. Creating reliable circular forms requires modifying standard building materials to achieve the necessary flexibility. Standard 3/8-inch plywood can be adapted for this purpose through a technique called kerfing.
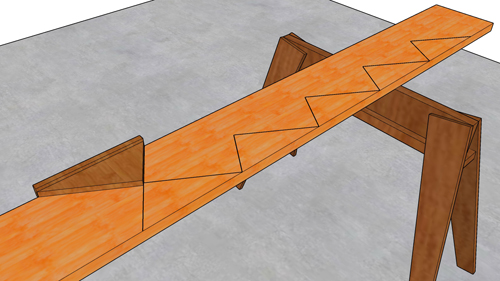
By cutting a series of closely spaced notches into the back of the plywood, the board can bend to accommodate a radius. Making cuts approximately every 1.5 inches, while leaving roughly 1/8-inch of the wood's face intact, allows the material to curve smoothly without snapping. Because kerfing weakens the plywood, the best practice is to double up the kerfed boards, layering them together to restore structural rigidity so they can withstand the outward pressure of the wet concrete.
ACHIEVING A PERFECT WATER LEVEL
When constructing a basin that will hold water, precision leveling is not a suggestion; it is a structural mandate. A standard two-foot spirit level is inadequate for transferring elevations across the wide span of a pond. Any discrepancies will become glaringly obvious the moment the pond is filled, as water will always seek a perfect horizontal plane and overflow at the lowest point.
The most reliable tool for this phase is a water level, which utilizes simple physics to guarantee accuracy. By filling a long length of clear plastic tubing with water and removing all air bubbles, the water meniscus at both ends of the tube will always rest at the exact same elevation, regardless of the distance between them. This allows for precise calibration of the upper formwork. Furthermore, forms must be re-checked prior to the pour. The physical act of climbing in and out of the workspace can inadvertently shift the wood, pushing a section down. Maintaining a perfectly flat upper concrete edge is the only way to ensure the water level will sit evenly along the entire perimeter.
THREE KEY CONSTRUCTION TIPS
SEQUENCE REBAR BEFORE OBSTRUCTIVE FORMS: Always tie your steel reinforcement grid in the lower basin before erecting tight, restrictive forms around the perimeter. This ensures you have the physical clearance required to tie the steel tightly and securely.
USE KERF CUTS FOR RADIUS FORMS: To bend 3/8-inch plywood for circular forms, cut vertical kerf notches approximately 1.5 inches apart, leaving 1/8-inch of the face material intact. Double up the modified plywood to ensure it can support the weight and hydrostatic pressure of wet concrete.
VERIFY ELEVATIONS WITH A WATER LEVEL: Do not rely on short spirit levels to establish the top perimeter of the pond. Use a clear plastic tubing water level to guarantee the top edge is perfectly flat across long distances, preventing the pond from overflowing at a low spot.
BONUS QUESTIONS AND ANSWERS
While properly spacing the rebar is a vital step for structural strength, how deep that steel sits within the concrete is an equally important consideration.
QUESTION: What is the correct depth, or clearance, for rebar in a concrete pond?
ANSWER: According to standard structural engineering practices and the American Concrete Institute (ACI 318), concrete cast against and permanently exposed to earth must have a minimum of 3 inches of concrete cover over the steel reinforcement. This thick protective barrier is required because soil holds moisture and corrosive elements. If the rebar is placed too close to the outer edge of the concrete, water will penetrate the pores, causing the steel to rust, expand, and eventually blow out or spall the concrete from the inside.
Ensuring your forms are perfectly level dictates how the water sits, but the concrete itself must be specifically formulated to hold that water indefinitely.
QUESTION: What is the required concrete PSI and mix design for a water-retaining pond?
ANSWER: Standard residential concrete used for sidewalks usually sits around 2500 to 3000 PSI, which is too porous for a pond. For water-retaining structures, building codes and structural engineers generally require a minimum compressive strength of 4000 PSI to 4500 PSI. A higher PSI means a denser concrete matrix, which significantly reduces permeability. Furthermore, for a truly watertight basin, the concrete mix should be heavily vibrated during placement to remove air voids, and often includes specialized waterproofing admixtures that crystallize in the presence of water to seal microscopic capillary tracts.
Even with tight rebar grids and high-PSI concrete, managing the inevitable shrinkage of the material is necessary to stop leaks at the construction seams.
QUESTION: How do you prevent water from leaking through the joints where two separate concrete pours meet?
ANSWER: When a pond is poured in multiple phases such as pouring the flat floor one day and the vertical walls the next a cold joint is created. Concrete does not chemically bond to concrete that has already cured. To prevent water from migrating through this seam, a hydrophilic water stop must be installed. This is a specialized strip of material embedded halfway into the first pour directly in the center of the wall's path. When the second pour is cast over it, the water
stop becomes locked inside the joint. If any water attempts to penetrate the seam, the strip expands to completely block the water's path.