INTRODUCTION: BUILDING TWO-TIER CONCRETE POND FORMS
Constructing a durable, multi-tier concrete pond requires precision and a solid understanding of formwork geometry. While a single-depth pond only requires one circular form, integrating a seating ledge or a second tier necessitates a two-form system. Proper planning during the formwork stage ensures the concrete cures into a stable, structurally sound feature that will hold water safely and resist soil pressures over time.
CUTTING AND SCRIBING THE PLYWOOD
The foundation of a perfect circular concrete structure lies in the precise cutting of the form material. Using two sheets of 3/8-inch plywood allows for flexibility while maintaining enough rigidity to withstand the hydraulic pressure of wet concrete. When snapping your radius lines, adjust the spacing based on the pond's diameter. A larger diameter such as a 9-foot radius allows for wider spacing between structural cuts, whereas a tighter radius requires cuts placed closer together to bend the wood without snapping it.
ASSEMBLING THE CURVED JOINTS AND BRACING
When overlapping the plywood seams to create a continuous circle, standard straight blocking will result in flat spots or protruding edges that compromise the final concrete finish. To maintain a true radius, cut 2x4 blocks to match the curve of your form.
It is critical to calculate your dimensions accurately by accounting for the thickness of the form material itself. If you are aiming for a precise 9-foot diameter and using two layers of 3/8-inch plywood (totaling 3/4 inch per side, or 1.5 inches overall), you must subtract 1.5 inches from your internal 2x4 blocking structure to prevent the form from expanding beyond your target dimensions.
STRATEGIC BRACING FOR EFFICIENT FORM STRIPPING
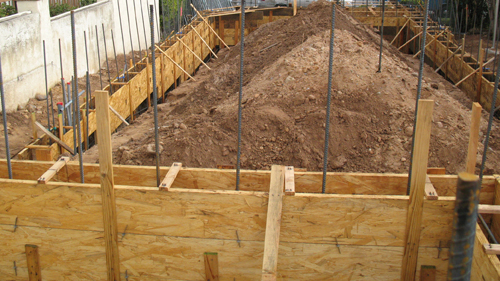
A common pitfall in concrete formwork is over-bracing to the point where the forms become trapped once the concrete cures. When setting your internal 90-degree cross braces, stack and align them vertically whenever possible. This leaves more open space inside the form, granting you the clearance needed to pour, vibrate, and trowel the concrete effectively.
Always engineer your formwork in reverse. The least amount of lumber used to achieve the required structural integrity is ideal. Consider exactly how each screw and brace will be accessed and removed once the concrete begins to set up. Fast, efficient stripping is essential to finishing the concrete surface before it fully cures.
THREE KEY CONSTRUCTION TIPS
FACTOR IN MATERIAL THICKNESS: Always subtract the total thickness of your form walls (e.g., two layers of 3/8-inch plywood equals 3/4-inch per side) from your internal framing measurements to ensure the final concrete pour matches your intended radius.
USE RADIUS-CUT BLOCKING AT SEAMS: Reinforce plywood overlaps with 2x4 blocks cut to the exact curve of the pond. This prevents blowout under pressure and eliminates flat spots on the interior concrete wall.
ENGINEER FOR REMOVAL: Design your formwork with the stripping process in mind. Stack cross braces vertically to maximize pouring space and ensure all fasteners remain accessible after the concrete has been placed.
FREQUENTLY ASKED QUESTIONS
HOW DO I PREVENT THE WET CONCRETE FROM STICKING TO THE PLYWOOD FORMS?
To ensure the plywood can be removed cleanly without spalling the new concrete, it is highly recommended to apply a high-quality form release agent before the pour. According to standard concrete finishing practices, untreated porous materials like plywood will absorb moisture from the wet concrete, which can weaken the surface layer of the pond wall and cause the wood to bond to the structure. A proper release agent creates a chemical barrier, ensuring a smooth finish and extending the lifespan of your formwork for future use.
WHAT REINFORCEMENT IS REQUIRED FOR A 900-GALLON CONCRETE POND?
Because water exerts significant hydrostatic pressure (roughly 62.4 pounds per cubic foot) and the surrounding soil exerts lateral earth pressure, unreinforced concrete is highly susceptible to cracking. While the transcript focuses on the wood forms, standard structural engineering principles dictate that a continuous grid of steel rebar (typically #3 or #4 bar) must be tied and suspended within the form cavity prior to pouring. The International Building Code (IBC) requires reinforcement in concrete structures subjected to these types of load stresses to provide necessary tensile strength.
HOW LONG SHOULD THE CONCRETE CURE BEFORE I STRIP THE FORMS?
While you may need to remove superficial bracing early to finish the top edge of the pond, the primary load-bearing forms should remain in place until the concrete has achieved sufficient early strength. For most standard concrete mixes, this takes between 24 to 48 hours depending on ambient temperature and humidity. Removing forms too early before the concrete reaches adequate compressive strength risks structural collapse or severe cracking, especially in a vertical wall holding back soil.