CONVERTING STRAIGHT STAIRS TO WINDER STAIRS
Modifying a straight staircase by replacing the bottom section with winder stairs is a highly effective way to alter a floor plan, redirect foot traffic, or save valuable square footage. While the concept of removing the lower straight treads and building a turning landing seems straightforward, the execution requires precise carpentry, a solid understanding of load-bearing support, and strict adherence to local residential building codes.
TEMPORARY SUPPORT AND STRINGER MODIFICATION
Before removing any lower treads, you must stabilize the remaining upper staircase. The stringers carry the live and dead loads of the structure, so cutting them requires transferring that weight. Constructing a temporary stud wall directly beneath the uncut portion of the stringers ensures the upper stairs remain entirely supported while the lower section is modified.
In some scenarios, you may not need to cut the center stringers at all, but the outer stringers will typically require notching or partial removal to accommodate the new winder geometry. Always verify that the upper floor framing remains properly supported during this transition.
WINDER LAYOUT AND CODE COMPLIANCE
Proper mathematical layout is the most critical phase of building winder steps. A standard 90-degree turn is usually divided into three individual pie-shaped steps, each radiating at a 30-degree angle from a central pivot point. When laying out the framing, it is essential to map out the front of the risers rather than the edge of the overhanging treads.
While minimum stair widths can vary, standard residential building codes generally require a clear width of 36 inches. More importantly, winder treads must navigate the turn safely. Most jurisdictions require a minimum tread depth of 6 inches at the narrowest inside point, and a minimum tread depth of 10 inches at the designated walk line, which is typically measured 12 inches away from the narrowest edge. Always consult your local building authority, as these minimums can vary by municipality.
FRAMING THE WINDER BOXES
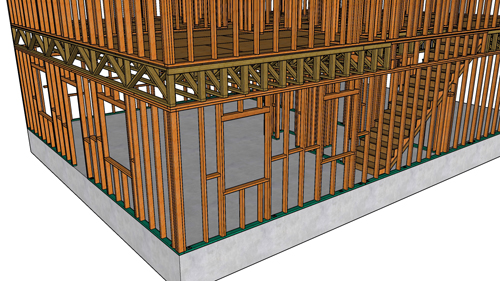
Building the structural boxes for the winder treads is usually done step-by-step from the ground up. Framing base plates are secured directly to the floor. When fastening treated lumber to a concrete slab, careful planning is required. Concrete pins or anchors must be positioned so they do not interfere with the vertical framing studs that will support the risers.
As you build each stepped box using dimensional lumber, ensure the top edge of each joist provides a perfectly level surface for the structural sheathing. Standard framing practices apply here: use appropriate metal joist hangers or secure support blocks when tying into existing wall studs.
Additionally, wood backing must be installed in the corners to support the final drywall installation. Every framing component must sit perfectly flush within the flat plane of the wall; any protruding lumber will cause severe aesthetic and structural issues when it is time to install the drywall finish.
FINISHING THE TREADS AND NOSING
Once the skeletal framing is complete, heavy-duty plywood or specialized stair sheathing is cut to match the exact dimensions of the winder layout. To match traditional straight stairs, winder treads typically feature a nosing overhang of 3/4 to 1-1/4 inches past the riser. If the existing staircase features flush treads without an overhang, the winder boxes must be built flush to match.
THREE KEY CONSTRUCTION TIPS
Plan Anchor Placement Carefully: When attaching the bottom framing plates to a concrete slab, mark the exact locations of your vertical riser supports before drilling. Placing powder-actuated pins or concrete anchors randomly will inevitably result in hardware obstructing your vertical studs.
Measure The Walk Line Accurately: When calculating your 30-degree winder angles, do not just measure the outside and inside edges. You must verify the walk line. Measure exactly 12 inches out from the narrowest side of the stair; the tread depth at this specific point must be a minimum of 10 inches to meet standard residential safety codes.
Maintain The Wall Plane: As you install corner blocking and drywall backing, run a straight edge across the existing wall studs. If any portion of your new winder framing protrudes past this plane, the drywall will bow, making it nearly impossible to install baseboards or skirt boards cleanly.
FREQUENTLY ASKED QUESTIONS
To help you navigate the complexities of stair construction, here are a few additional structural considerations when converting to winder steps.
How Are Handrails Handled On A Winder Staircase?
Because winder stairs change the direction of travel, the handrail must smoothly transition through the turn without interruption. According to standard residential building codes, a continuous handrail must be installed on at least one side of the stairway. The height of this handrail must be maintained between 34 and 38 inches, measured vertically from the sloped plane adjoining the tread nosing. Graspability and continuity are strictly enforced by building inspectors to prevent fall hazards at the narrowest point of the turn.
What Is The Minimum Headroom Required Above Winder Stairs?
Adding winder stairs can sometimes push the bottom of the staircase further out into a room, which changes the overhead clearance dynamics. Standard building codes mandate a minimum headroom of 6 feet 8 inches (80 inches) for the entire run of the staircase. This distance is measured vertically from the sloped line adjoining the edge of the nosings up to the lowest point of the ceiling or floor framing above. You must verify this measurement before cutting stringers, as modifying the footprint can inadvertently create a code-violating headroom hazard.
Can The Height Of The Winder Steps Differ From The Straight Steps?
No, consistent riser height is arguably the most heavily scrutinized building code in stair construction. Standard codes allow a maximum riser height of 7-3/4 inches, but more importantly, the greatest riser height within any single flight of stairs shall not exceed the smallest by more than 3/8 of an inch. When transitioning from existing straight stairs to new winder boxes, your new winder risers must mathematically match the existing riser height to maintain muscle memory and prevent tripping.