Locating And Repairing Concealed In-Wall Plumbing Leaks
Hidden plumbing leaks inside wall cavities represent one of the most common causes of concealed structural and cosmetic damage in residential construction. When pressurized supply lines or drainage pipes fail behind finished surfaces, water quickly migrates across framing members, insulation, and gypsum wallboard.
Resolving this issue requires systematic containment: accurately exposing the damaged piping, eliminating the leak source, properly drying out the structural framing, and prepping the surrounding substrate for a seamless, code-compliant restoration.
Exposing The Leak And Inspecting Wall Cavities
Water naturally follows the path of least resistance, which means surface moisture or paint blistering on drywall often appears several inches or feet away from the actual pipe puncture. To identify the exact point of failure, you must cut an access opening into the drywall directly over the suspected area.
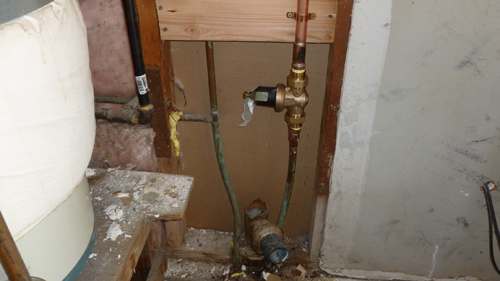
Enlarge the opening systematically until the entire wet section of pipe, adjacent framing studs, and base plates are completely visible. Carefully inspect the exposed cavity for signs of active spraying, pinhole corrosion, fitting separation, or localized dripping.
Managing Saturated Framing And Moisture Removal
Once the plumbing repair is completed, you must address the moisture trapped inside the wall before installing new drywall. Saturated dimensional framing such as 2x4 and 2x6 studs will retain moisture long after the leak stops. Enclosing wet lumber prematurely creates an ideal environment for fungal growth, wood decay, and future fastener failure. The wall cavity must remain open and ventilated until the moisture content of the wood drops to acceptable industry levels.
Preparing The Drywall Opening For Patching
Proper preparation of the gypsum board opening dictates the structural integrity and visual quality of the final repair. Rough, jagged openings are difficult to tape and finish cleanly. Cut back any water-damaged, soft, or crumbly drywall back to solid, dry material. Use a straight edge and utility knife or drywall saw to create clean, square, and plumb edges around the entire perimeter of the opening. Establishing square corners and straight lines allows replacement gypsum panels to fit tightly, minimizing joint compound buildup and preventing joint cracks later.
Conclusion
Remediating a plumbing leak inside a wall demands more than simply patching a pipe. By creating an adequate opening, ensuring complete moisture remediation of wood framing, and cutting clean geometric lines in the existing drywall, you protect the structural envelope of the home and lay the groundwork for an undetectable wall repair.
THREE KEY TIPS
Always square off drywall cutouts using a level and straight edge so replacement sheetrock fits flush and requires minimal joint compound to finish.
Allow damp wood framing to thoroughly air dry down to safe moisture levels before sealing the cavity to prevent hidden mold growth and structural rot.
Remove all water-damaged drywall past the point of visible dampness until you reach sound, dry core material that can properly anchor new fasteners.
BONUS QUESTIONS AND ANSWERS
Why Is It Critical To Verify The Moisture Content Of Wood Studs Before Closing A Wall Cavity?
To ensure long-term structural durability and indoor air quality, the condition of the hidden framing must be verified prior to reinstalling wallboard. Wood studs exposed to active plumbing leaks absorb free water into their cellular structure. Standard building science principles dictate that dimensional lumber should reach a moisture content of 16 percent or lower (ideally under 12 percent) before being sealed inside a wall assembly. Enclosing wet framing traps humidity within the enclosed cavity, which accelerates fungal decay (dry rot) and promotes mold proliferation behind the vapor barrier or finish surfaces.
How Far Back Should You Cut Drywall Away From Structural Studs When Making A Repair Opening?
When you finish exposing a leak, you must properly support the edges of both the existing drywall and the replacement patch. Professional installation standards dictate cutting back the drywall to expose half of the adjacent wood stud (leaving roughly 3/4 inch of the 1.5-inch stud face exposed). This provides a solid structural nailing or screwing flange for both the existing wallboard edge and the new drywall patch, eliminating the need to install supplemental backer wood (cleats) inside the wall cavity.