How To Repair A Water Damaged Bathroom Subfloor
Water damage in a bathroom frequently compromises the structural integrity of the wood subfloor. When a leak occurs in the center of the room, isolating and replacing the rotted section is critical to prevent further structural degradation and to provide a solid foundation for new flooring finish materials. Executing a structural patch requires careful removal of the compromised material and the installation of proper framing block supports. This ensures the repaired section seamlessly transfers weight to the floor joists without sagging or deflection.
Safely Cutting And Removing Damaged Plywood
The first step in a subfloor repair is establishing clean, straight lines around the damaged material. Draw layout lines perpendicular and parallel to the existing floor joists to create a perfect square or rectangle. Maintaining a square perimeter is essential for cutting a precise replacement panel later. Before making long cuts, carefully calibrate your saw blade depth.
If the existing subfloor is three-quarters of an inch thick, set the blade depth to exactly seven-eighths of an inch. Plunging a reciprocating saw or circular saw indiscriminately into a floor cavity is highly dangerous, as bathrooms contain concentrated networks of plumbing pipes and electrical wiring. To safely assess the joist bay, cut and remove a small four-inch by four-inch inspection hole first. Use a flashlight to verify the area below is clear of utilities and structural beams before completing your perimeter cuts.
Installing Perimeter Blocking And Nailers
A new subfloor panel cannot float; all edges must be fully supported by solid framing. If your cut exposes a floor joist within an inch of the opening, you must attach a structural nailer to it. Fastening a solid wood block, such as a two-by-four or two-by-six, directly to the side of the existing joist will create the necessary bearing ledge. If the joist is situated further back, you can double up the blocking material to extend the ledge, ensuring you provide at least three-quarters of an inch of surface area for the new plywood to rest on.
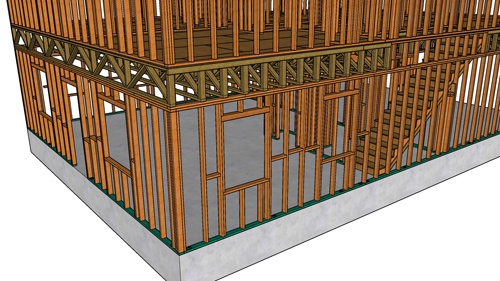
For the sides of the patch that run perpendicular to the floor joists, you must install blocking between the bays. Depending on your access, these blocks can be installed flat or at a standard ninety-degree vertical orientation. If there is no crawlspace access from below, pre-measure and assemble the blocking system from above, slip the assembly into the joist cavity, pull it upward flush against the existing floor framing, and secure it firmly into place.
Installing The New Subfloor Panel
Once a solid framing perimeter is established, measure and cut your replacement plywood panel. It is structurally imperative that the grain of the new plywood panel runs in the exact same direction as the existing flooring. The strength axis of structural panels is parallel to the face grain, which must always be oriented perpendicular to the floor joists to bear weight safely. Finally, secure the panel to the new framing assembly using appropriate hardware to prevent future floor squeaks or movement.
THREE KEY TIPS
Control Saw Blade Depth: Never blindly cut into a bathroom floor. Accurately setting the blade depth to just one-eighth of an inch deeper than the subfloor thickness prevents catastrophic damage to hidden plumbing lines and electrical wiring resting on top of the drywall ceiling below.
Observe Structural Panel Orientation: Plywood is manufactured with a strength axis. The grain on the face of your replacement patch must run perpendicular to the floor joists. Installing a panel parallel to the joists significantly reduces its load-bearing capacity and can lead to structural deflection.
Utilize Proper Fastener Specifications: Do not use brittle drywall screws for structural floor framing. Use heavy-duty framing screws or sixteen-penny nails to secure the blocking to the joists. For fastening the three-quarter-inch plywood to the framing, use one-and-five-eighths-inch structural wood screws or eight-penny ring-shank nails for maximum withdrawal resistance.
BONUS QUESTIONS AND ANSWERS
While replacing the plywood is straightforward once the area is open, you might wonder about the type of replacement material required for modern compliance.
Do I need to use tongue and groove plywood for a subfloor patch?
According to the International Residential Code, all edges of wood structural panels must be continuously supported. If you are patching a small section in the middle of a room with square-edge plywood, you must install solid wood blocking under every single seam where the new wood meets the old wood. Tongue and groove sheathing is designed to interlock and transfer weight across the seams without the need for underneath edge blocking between the joists, but for a standalone patch, heavy-duty blocking with standard square-edge exterior grade plywood is generally the most practical and structurally sound method.
Addressing the immediate physical damage is only part of the restoration process when moisture is involved.
Should I treat the existing floor joists for moisture or mold before closing the subfloor?
Yes, trapping elevated moisture inside a floor cavity guarantees future fungal growth and wood rot. Building science dictates that framing lumber must have a moisture content of nineteen percent or less before being enclosed. If the exposed joists are wet but structurally sound, thoroughly dry the cavity using commercial air movers and dehumidifiers. Once dry, applying a borate-based wood preservative or an EPA-registered antimicrobial treatment to the exposed framing will prevent mold propagation and protect the structural integrity of the floor system moving forward.
During your inspection of the exposed cavity, you may uncover issues that extend beyond the surface materials.
What if the floor joist itself is compromised by rot and not just the plywood?
If your moisture inspection reveals that the actual floor joist has sustained rot, decay, or structural notching from previous plumbing work, a simple subfloor patch is no longer sufficient. Under standard building codes, compromised structural members must be sistered. Sistering involves fastening a new piece of dimensional lumber of equal size directly alongside the damaged joist. The new joist must extend well past the damaged area on both sides and ideally span all the way to the original bearing points to effectively transfer the structural load and restore the floor system's weight capacity.