How To Repair A Crowned Floor Joist
A crowned floor joist occurs when structural framing lumber bows upward, creating an unwanted hump or high spot in the finished floor. While sagging joists are a frequent topic in home repair, a crowned joist presents a unique set of challenges.
Addressing this upward deflection requires careful structural modification to flatten the floor without compromising the load-bearing integrity of the framing system. Depending on access, you can approach this repair from above by removing the subfloor, or from below if you have access to a basement or crawlspace.
Repairing From Above By Planing The Crown
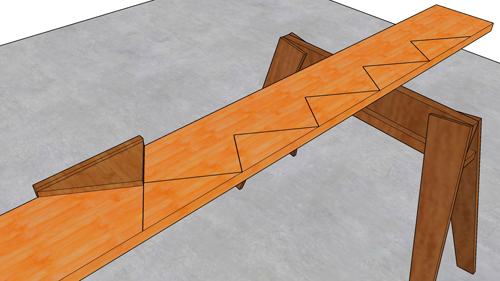
If you do not have open access from below, the primary method involves removing the floor sheathing to expose the joist. Once exposed, the crowned peak of the joist can be trimmed down using an electric hand planer or a circular saw. To determine the exact amount of material to remove, lay a rigid straightedge across the adjacent, level floor sheathing. Slide a scrap piece of matching sheathing beneath the straightedge and mark the high joist incrementally. This creates a precise cutline.
When removing subfloor panels, it is critical to preserve the structural strength of the floor diaphragm. Floor sheathing should always break over a joist. If you cut out a section, you must either cut it back to the center of the next adjacent joist or install new structural blocking to support the seams. Staggering the seams of plywood or oriented strand board helps maintain the shear strength of the floor system as required by standard residential building codes.
Repairing From Below Using Relief Cuts And Sistering
If removing the finished floor is not an option, you can level a crowned joist from below by utilizing relief cuts and a sistering technique. This involves making vertical relief cuts upward into the bottom of the crowned joist. Spacing these cuts evenly allows the rigid lumber to flex downward.
Because cutting into a joist eliminates its structural capacity, you must immediately sister a brand new, perfectly straight joist directly alongside it. Position the new joist, but do not permanently fasten the two pieces of lumber together immediately. Using a mechanical lever, a winch, or a bolted block system, apply downward pressure to pull the old, crowned joist down until it sits flush against the bottom of your subfloor. Only after the floor is flat should you permanently bolt or nail the old joist and the new sister joist together.
Navigating Bearing Minimums And Dimensional Variations
When installing a full-length sister joist, maneuvering the new lumber into place can be restricted by surrounding walls or foundation elements. Standard building codes mandate that any floor joist must have a minimum bearing surface of one and a half inches when resting on a wood or metal plate. If you must trim the end of the new joist to slide it into position, ensure that both ends still meet this absolute minimum bearing requirement.
Furthermore, dimensional lumber shrinks as it dries over time. A new joist may be slightly wider than the original framing. Always align the new joist with the underside of the floor sheathing, rather than matching the bottom edges. This ensures the floor above remains perfectly level, even if the bottoms of the joists do not perfectly align in the basement.
Three Key Construction Tips
Always measure your new sister joist from the top down. Older lumber shrinks as its moisture content drops. If you align a new joist flush with the bottom of an old joist, you may push the subfloor up and create a new hump.
Do not fasten a sister joist until the old joist has been mechanically pulled into its flat position. Nailing the boards together beforehand will cause them to bind, preventing you from pulling the floor down flat.
Maintain strict code compliance for joist bearing. Regardless of how you install a sister joist, the ends must sit on at least one and a half inches of wood bearing, or three inches of masonry bearing, to safely transfer the structural load.
Common Structural Questions For Floor Framing
If you are planning a comprehensive floor framing repair, you might encounter other structural challenges. Below are common questions related to joist integrity and residential building codes.
What Causes A Floor Joist To Crown After Installation?
Wood is a hygroscopic material, meaning it absorbs and releases moisture depending on the environment. If a joist was installed with a high moisture content and dries unevenly, or if it contains reaction wood from the original tree, it can warp or crown over time. Proper acclimation of lumber before framing helps prevent severe crowning.
Can I Notch A Warped Joist To Make It Fit Faster?
Notching should never be used as a shortcut to fix deformed lumber, as it drastically reduces the structural capacity of the joist. According to the International Residential Code Section R502.8, notches in the top or bottom of a solid sawn joist cannot exceed one-sixth of the joist depth, and they are strictly prohibited in the middle third of the joist span where bending stresses are highest. Any notch beyond these parameters creates a localized weak point that can lead to catastrophic shear failure under normal floor loads.
What Moisture Level Is Acceptable For Floor Framing Lumber?
Installing wet lumber is the primary cause of framing deformation, which is why moisture content is heavily regulated. The International Residential Code dictates that solid sawn lumber must be dried to a moisture content of 19 percent or less at the time of installation. If lumber with a higher moisture content is installed and enclosed within the conditioned space of a home, it will dry rapidly and unevenly, leading to severe shrinkage, twisting, and fastener pops as the wood fibers contract.
Should I Replace Deformed Solid Joists With Engineered Lumber?
Yes, replacing problematic solid lumber with engineered wood products like I-joists or Laminated Veneer Lumber is an excellent upgrade for dimensional stability. Because engineered lumber is manufactured with cross-directional grain and precise moisture controls, it is practically immune to warping, bowing, or twisting. However, you cannot simply swap a solid 2x10 for a 9.5-inch I-joist using standard solid sawn lumber codes; structural code requires you to follow the specific manufacturer span charts and web stiffener requirements, as engineered products handle shear and bending loads differently than traditional wood.
Does Drilling Holes For Plumbing Cause A Joist To Warp Or Fail?
Drilling holes can cause a joist to fail if not done according to rigorous building science parameters, though it generally causes sagging and cracking rather than traditional warping. To preserve the load-bearing integrity of the floor system, International Residential Code Section R502.8.1 mandates that holes bored through floor joists cannot be within 2 inches of the top or bottom edge. Furthermore, the diameter of the hole cannot exceed one-third the depth of the joist. Violating these rules removes too much material from the tension and compression zones of the joist, directly compromising its structural capacity.