Correcting Floor Sheathing Installed In The Wrong Direction
A sagging, bouncing, or excessively noisy floor is a frustrating problem for any homeowner or builder. While many assume that the floor joists are undersized or over-spanned, the root cause is often much simpler: the plywood or OSB subfloor was installed in the wrong direction. Understanding how building materials bear weight and learning how to properly retrofit a compromised floor system is essential for restoring structural integrity.
The Structural Importance Of Panel Orientation
Wood structural panels, such as plywood and Oriented Strand Board (OSB), are engineered with a strong axis and a weak axis. A standard four-by-eight-foot sheet derives its maximum spanning strength along its eight-foot length. For this reason, building standards dictate that the long dimension of the panel must run perpendicular to the floor joists. The shorter four-foot edges should align parallel to and rest squarely over the center of the framing members.
When sheathing is incorrectly installed parallel to the joists, the floor relies on the weak axis of the wood to span the gaps. This improper orientation severely reduces the load-bearing capacity of the floor system, leading to noticeable deflection, sagging, and a spongy feeling underfoot. Furthermore, if square-edge plywood is used without being securely blocked at all unsupported perimeter joints, the individual panels will shift independently under pressure, degrading the floor over time.
Method One Adding Solid Perpendicular Blocking
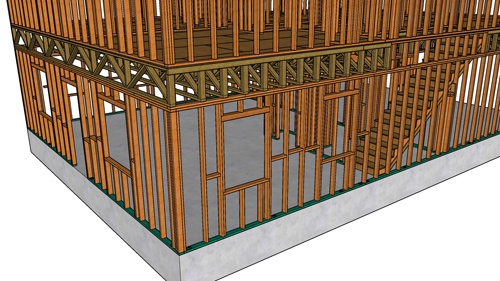
If replacing the subfloor is not feasible, reinforcing the existing installation from underneath is a highly effective alternative. This involves installing dimensional lumber blocks between the existing floor joists to act as supplementary, perpendicular supports.
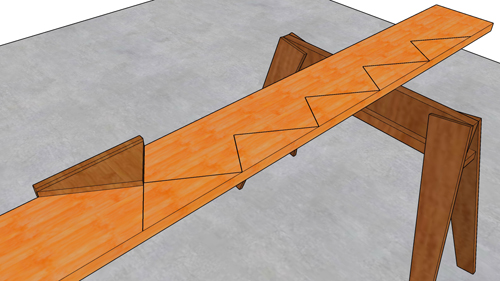
By inserting solid blocks directly beneath the panel seams and across the mid-spans, you effectively create a grid that supports the weak axis of the improperly laid sheathing. To secure these blocks, standard framing practices require driving nails through the existing joist into the end of the block. Because you cannot reach the far end of a block once the adjacent cavity is filled, toenailing becomes necessary. Driving specialized framing nails at a forty-five-degree angle ensures the blocks remain tightly bound to the joist layout.
Method Two Strategic Subfloor Replacement
When working from below is impossible, such as in a second-story room or over a finished basement, the most reliable repair is cutting out the defective flooring and installing new panels in the correct orientation.
Instead of gutting an entire house, efficiency dictates targeting high-traffic areas like hallways, entryways, and the center of large rooms. Less traveled zones, such as the back of a closet or beneath heavy built-in cabinetry, rarely suffer from the same aggressive wear and can often be left undisturbed. When patching in new sections of floor, extreme care must be taken to center the seams directly over the joists. The remaining perimeter must be backed by newly installed blocking to ensure the new wood and the existing wood have a solid, shared nailing surface.
Professional Considerations And Code Compliance
While layering a second sheet of OSB over the incorrectly installed floor is a common shortcut, it is generally not recommended. Without massive amounts of construction adhesive and structural fasteners driving deep into the joists below, a double-layered subfloor is highly prone to friction and squeaking. Regardless of the chosen repair path, all modifications must satisfy local building authorities. Always consult with a licensed structural engineer or local building inspector before committing to a structural repair plan, as localized codes dictate specific span ratings, hardware requirements, and fastening schedules.
Three Key Construction Tips
Always land panel edges on solid framing. When cutting out old subflooring, ensure the cuts fall exactly in the center of a joist, leaving three-quarters of an inch of exposed lumber on either side for the new and old panels to share.
Master proper toenailing techniques. When adding blocks between joists, drive nails at a forty-five-degree angle through the block and into the supporting member to ensure a tight, structurally sound connection that will not loosen over time.
Prioritize high-traffic zones. If a full subfloor replacement exceeds your budget or timeline, focus your repair efforts on primary walkways and room centers where structural deflection and floor bounce are actually felt.
Frequently Asked Structural Questions
To further clarify the building science behind strong and silent floor systems, we have outlined a few additional technical principles that go beyond basic panel orientation.
Why Do Building Codes Require Tongue And Groove Panels For Subfloors?
Standard building codes require tongue-and-groove edges on floor panels to prevent differential deflection. When weight is applied to a standard square edge, that single panel bows downward while the adjacent panel stays still, creating a tripping hazard and destroying the finished flooring above. The interlocking tongue-and-groove joint forces the panels to share the applied load, eliminating the need to install solid wooden blocks directly beneath every single seam.
Does Construction Adhesive Add Structural Strength To A Floor System?
Yes, applying heavy-duty subfloor adhesive along the top of the joists before laying the sheathing significantly increases the stiffness of the floor. When properly glued and nailed, the joist and the subfloor act together as a single unit, a principle known in engineering as composite action. This practice not only strengthens the floor but is the absolute best defense against squeaks caused by nails rubbing against loose wood.
What Is The Standard Nailing Schedule For Floor Sheathing?
According to residential building codes, structural floor panels must be fastened strictly according to a designated schedule to maintain shear strength and prevent uplift. The standard requirement is to place a fastener every six inches along the supported edges of the panel, and every twelve inches in the field, or the interior areas of the panel over the joists. Using ring-shank nails or specially designed subfloor screws provides the highest level of withdrawal resistance.