Assessing Bathroom Floor Water Damage And Subfloor Repairs
Water damage in a bathroom is a severe issue that can quickly compromise the structural integrity of your home. Before cutting into the floor, it is crucial to properly assess the extent of the rot to determine which plumbing fixtures and cabinetry must be removed. This guide breaks down the typical scenarios encountered during bathroom floor restoration and outlines the necessary steps to prepare the space for safe, code-compliant subfloor replacement.
Handling Central Floor Damage
The most straightforward repair scenario occurs when water damage is isolated strictly to the center of the bathroom floor. If the rotted subflooring has not spread beneath the perimeter fixtures, you generally do not need to uninstall the sink, vanity, toilet, or bathtub. The affected wood can be carefully cut out and replaced by blocking between the floor joists to support the new decking, making for a highly efficient structural repair.
Evaluating Vanities And Toilets
When moisture spreads closer to the walls, you will likely encounter damage beneath the bathroom cabinets or the toilet. Standard freestanding vanities and toilets sit directly on top of the finished floor and are relatively simple to remove. Toilets require shutting off the water supply and unbolting the unit from the floor flange. If you have a custom, built-in cabinet that is difficult to extract, you must assess whether the damage compromises the structural bearing of the cabinet. In some minor cases, repairs can be made right up to the base of the cabinet, securing the new subfloor tightly against the existing framing without removing the woodwork.
Addressing Bathtub And Wall Intersections
Bathtubs and shower pans present the greatest challenge during subfloor restoration. Unlike a toilet, a bathtub cannot simply be unbolted. Removing one often necessitates the destructive removal of waterproof tile surrounds and cement backer board. If the rotted wood is localized to a small area near the edge of the tub, you may be able to replace the damaged subfloor directly up to the tub skirt. However, water often travels, and it is incredibly common for damage to extend beneath the bathtub and even under the sole plates of adjacent partition walls.
When A Complete Tear Out Is Necessary
If the subfloor rot extends deeply beneath the bathtub, especially if it compromises the primary support footprint of the tub basin, the fixture must be removed. A heavy bathtub filled with water places immense dead and live loads on the floor framing. Without a structurally sound subfloor, the tub will sag, crack, or cause massive framing failures. In scenarios where water has caused widespread rot across the entire room, the only viable solution is a complete bathroom tear-out. This allows full access to the floor joists to perform critical framing repairs before rebuilding the space from the ground up.
Three Key Construction Tips
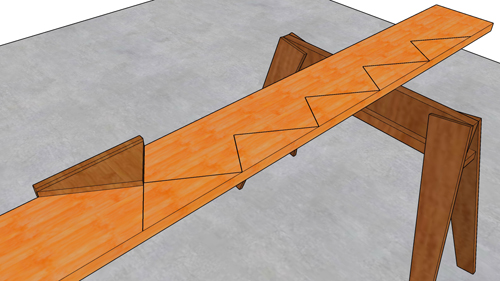
Always trace the moisture path into adjacent rooms. Water frequently wicks under bathroom walls and damages the subfloor or framing in neighboring hallways or bedrooms, requiring the new subfloor panel to be slid underneath the wall's bottom plate to restore continuous structural support.
Do not attempt to leave rotted subflooring beneath the main bearing points of a bathtub. If the wood supporting the front skirt or the base of the tub is compromised, the tub must be uninstalled to establish a structurally adequate bearing surface.
Evaluate built-in vanities before demolition. If a built-in cabinet is unaffected by rot, you can often cut out the damaged floor up to the toe kick and install structural blocking between the joists to support the seam of the new subfloor panel, saving time and preserving the cabinetry.
Bonus Questions And Answers
As you prepare to tackle your bathroom flooring project, you may uncover structural issues that go beyond the surface-level plywood. Here are a few advanced considerations to keep in mind once the damaged floor is exposed.
What Should I Do If The Water Damage Extends To The Floor Joists?
If the floor joists themselves are soft, crumbling, or discolored from prolonged exposure to moisture, simply replacing the subfloor is a severe safety hazard. According to the International Residential Code, floor framing must be capable of supporting designated live and dead loads. Damaged joists must be completely replaced or structurally sistered. Sistering involves fastening a new piece of dimensional lumber alongside the damaged joist, ensuring the new lumber spans past the damaged section and rests on proper bearing points, effectively restoring the floor's load-bearing capacity.
What Is The Best Material To Use When Replacing A Bathroom Subfloor?
When replacing a bathroom subfloor, standard interior plywood or particleboard is highly vulnerable to moisture. The optimal and code-compliant material for bathroom subfloors is 23/32-inch exterior-grade plywood or oriented strand board rated for subfloor use. This thickness provides the necessary rigidity, often referred to as deflection resistance, required to prevent floor tiles from cracking under foot traffic. The panels must be installed perpendicular to the floor joists and secured with construction adhesive and appropriately sized screws to prevent future floor squeaks.
How Does Subfloor Replacement Affect The Toilet Flange Installation?
A common mistake during floor repairs is leaving the toilet flange floating incorrectly. The toilet flange is the pipe fitting that connects the toilet to the drainage system. For a proper, leak-free seal, the underside of the toilet flange lip should ideally rest entirely on top of the finished floor level, not below it or flush with the raw subfloor. When you replace the subfloor and install new flooring, you must calculate the total thickness of the new floor assembly to ensure the plumbing flange is set at the correct height to compress the wax ring adequately.