How To Prevent Fascia Board Twisting Using Hidden Framing Anchors
Fascia boards are a critical component of a roof system, serving both an aesthetic and functional role by protecting the rafter tails and providing a secure mounting surface for gutters. However, solid wood fascia is highly susceptible to weathering and moisture fluctuations over time. This exposure often leads to significant warping and twisting, particularly where two boards meet at a seam. When the bottom edge of a fascia splice twists outward, it compromises the structural integrity of the roofline and leaves the eaves vulnerable to moisture intrusion. Implementing a simple, hidden structural reinforcement during installation can drastically reduce this risk and extend the lifespan of your exterior trim.
Reinforcing Butt Joints With Metal Framing Anchors
A highly effective method for stabilizing fascia board splices involves securing a metal framing connector across the back side of the joint. While standard nailing into the rafter tail holds the boards in place, adding a structural tie directly spans the seam, locking the two individual boards together into a rigid unit. This mechanical connection actively resists the torsional forces of the wood as it dries and cycles through seasonal temperature changes, preventing the boards from bowing outward.
Optimizing Connector Placement For Stability And Access
The placement of the framing anchor is critical for both structural performance and ease of installation. The metal connector should be positioned near the bottom edge of the fascia board. The upper portion of the fascia is naturally restrained by the roof sheathing and the fasteners driven through the roof deck along the eaves. The lower edge, lacking this continuous restraint, is where twisting is most severe. Furthermore, keeping the bracket lower on the board provides the necessary clearance to angle a screw gun or impact driver. Attempting to install the bracket higher up often results in interference with the roof overhang, making it impossible to drive the fasteners completely flush.
Material Selection And Joint Cutting Strategies
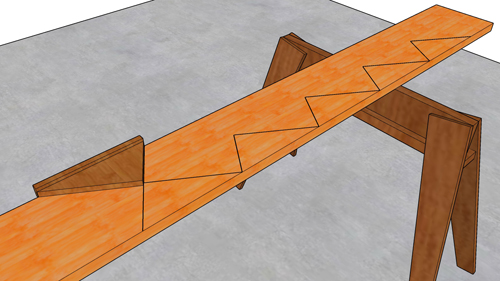
While utilizing short offcuts can reduce material costs, installing continuous, full-length lumber is always the preferred best practice for exterior carpentry. Fewer seams equate to fewer weak points in the roofline. When a joint is unavoidable, standard carpentry practice typically relies on a 45-degree scarf joint to overlap the wood, which sheds water effectively and hides shrinkage. However, in less visible areas, a square cut butt joint is acceptable provided it is adequately reinforced with a metal framing anchor on the backside to prevent future separation.
Three Essential Tips For Fascia Board Installation
Secure the bottom edge: Always focus your supplemental reinforcement near the lower half of the fascia seam, as the top edge is already constrained by the roof sheathing and framing above.
Plan for tool clearance: Verify your drill or screw gun can physically reach the fastener locations before placing the bracket, as tight roof overhangs can restrict tool access on the backside of the board.
Minimize seams: Whenever budget and site logistics allow, use full-length boards to span the roofline rather than piecing together shorter lumber, thereby reducing potential failure points.
Frequently Asked Questions About Fascia And Roofline Construction
While reinforcing joints is an excellent method for ensuring a straight roofline, proper installation requires attention to a few other essential building principles. Here are some critical aspects of exterior trim construction to keep your eaves secure.
What Type Of Fasteners Are Required For Exterior Fascia Installation?
To prevent structural failure caused by rust and corrosion, the International Residential Code dictates that all fasteners used in exterior weather-exposed applications must be inherently corrosion-resistant. This means you must utilize hot-dipped zinc-coated galvanized, stainless steel, or silicon bronze nails and screws. Standard interior framing nails will rust rapidly when exposed to atmospheric moisture, which not only causes unsightly black stains on the painted fascia but eventually leads to complete fastener degradation and the detachment of the board from the rafter tails.
Is A Metal Drip Edge Required Over The Fascia Board?
Yes, modern building codes require the installation of a metal drip edge along the eaves and rake edges of standard shingle roofs. The drip edge must extend down over the upper edge of the fascia board. This crucial flashing component is designed to bridge the gap between the roof deck and the exterior trim, actively directing rainwater away from the wood and into the gutter system. Without a properly installed drip edge, capillary action allows water to wick behind the fascia, leading to accelerated wood rot and structural damage to the roof framing.
Why Do Professionals Recommend Back-Priming Fascia Boards?
Wood acts like a sponge, absorbing moisture from the atmosphere and expanding, which is the primary cause of the twisting and cupping addressed during installation. Back-priming involves painting or sealing all six sides of the lumber, including the back face, long edges, and cut ends, before it is installed on the structure. While the outward-facing side is painted for aesthetic reasons, sealing the hidden sides slows the rate of moisture exchange. This vastly improves the dimensional stability of the board and protects the structural integrity of the roof overhang from long-term fungal decay.