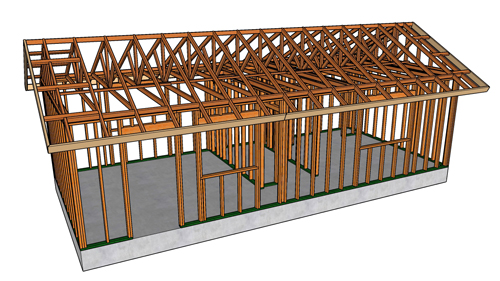
Safe Techniques For Temporary Structural Supports During Framing Repairs
When repairing wall framing, replacing damaged baseplates, or modifying load-bearing components, safely supporting the structure above is the most critical step of the project. Working on a solid concrete foundation allows for straightforward temporary shoring, but projects over subfloors and crawlspaces require advanced load distribution techniques. If the weight of the structure is not properly transferred through the floor framing to the earth below, the temporary supports can punch through the subfloor or severely damage the floor joists.
Proper Angle And Fastening Methods For Temporary Studs
The orientation and attachment of your temporary support studs dictate the stability of the entire system. Temporary vertical supports should always be placed as close to plumb as possible. While slight angling is sometimes necessary to create workspace, the angle should never exceed ten degrees from true vertical. Excessive angles introduce lateral forces that standard framing is not designed to resist, increasing the risk of the support kicking out under a heavy structural load.
When securing these temporary supports, always use structural screws and steel framing anchors rather than standard framing nails. Screws provide superior holding power against withdrawal forces and are significantly easier to back out when the temporary shoring is eventually removed. If framing anchors are unavailable, you can toenail the supports using structural screws driven at an angle directly into the top plates.
Strategic Load Distribution Over Floor Joists
Setting temporary supports directly on top of thin floor sheathing is a dangerous practice. The concentrated point load of a single support stud can easily break through the plywood or OSB. To safely distribute the weight, temporary supports must be aligned directly over the floor joists.
For maximum safety and stability, place a heavy timber beam, such as a four-by-ten or four-by-twelve, flat across the floor sheathing to act as a temporary bottom plate. This beam will distribute the heavy point loads across multiple floor joists rather than forcing a single joist to carry the entire burden. To prevent this distribution beam from shifting or sliding while you work, drive wooden stakes into the ground or subfloor behind it and secure the beam directly to the stakes with screws.
Addressing Loads Parallel To The Floor Joists
A unique structural challenge occurs when your temporary support beam runs parallel to the floor joists, placing the entire weight of the shoring system onto a single joist. A typical residential floor joist is not designed to act as a primary load-bearing beam.
To prevent the joist from deflecting or cracking, the load must be transferred completely down to the ground. This is achieved by entering the crawlspace and installing solid wood blocking or adjustable steel jacks directly beneath the burdened joist. By establishing a direct path for the weight to travel from the temporary shoring, through the floor system, and into the earth, you protect the structural integrity of the floor framing.
Continuous Beam Shoring And Lateral Bracing
In scenarios where wide sections of framing are completely removed, installing a full-length continuous drop beam may be necessary. This beam is placed parallel to the existing wall and supported at both ends by temporary posts that transfer the load down to solid concrete footings or a structural foundation.
When utilizing a full-length beam system, lateral bracing is absolutely mandatory. Because the vertical load is heavily concentrated, any horizontal movement can cause the entire shoring system to collapse like a house of cards. Diagonal lumber braces must be screwed from the support posts to a secure anchor point to lock the temporary beam in place and prevent it from leaning.
Planning For Clearance And Safety
Proper shoring requires meticulous planning before a single piece of lumber is removed. You must calculate exactly how much physical space your tools and replacement materials will require. Always set your temporary support base at least one inch away from the plates or framing members you intend to replace. Crowding the work area with temporary bracing often results in the inability to remove the damaged wood or slide the new framing into position.
Three Key Tips For Temporary Structural Shoring
Avoid Hydraulic Jacks For Static Loads
Never use hydraulic jacks to hold structural weight for prolonged periods. Hydraulic seals can slowly leak fluid, causing the jack to lose pressure and the structure to sag. Always use mechanical steel screw jacks, which rely on physical threads and cannot slip under a static load.
Ensure Adequate Working Clearance
Do not install temporary shoring flush against the framing you intend to remove. Leave a minimum of one inch of clearance at the baseplates to allow enough room for pry bars, reciprocating saw blades, and the insertion of the new lumber.
Restrict The Support Angle
Keep all temporary vertical support posts as close to plumb as possible, never exceeding a ten-degree angle. Angled posts create dangerous lateral thrust forces that can cause the temporary supports to slide or kick out forcefully under the weight of the roof or upper floor.
Bonus Questions And Answers
While mastering the physical setup of temporary supports is crucial, understanding the broader structural rules will ensure a safe and legally compliant project. Here are a few common questions regarding structural repairs that go beyond the basic setup.
Do I Need A Building Permit To Install Temporary Structural Supports?
Yes, replacing or significantly altering load-bearing framing elements almost always requires a building permit. According to Chapter 1 of the International Residential Code, permits are required for any work that involves the removal or alteration of a load-bearing wall, structural column, or floor joist. Municipal inspectors need to verify that the load path has been safely managed during construction and that the final repair meets current engineering standards.
What Size Lumber Should Be Used For Temporary Vertical Shoring Posts?
Standard two-by-four lumber should generally be avoided for heavily loaded vertical shoring. The International Building Code dictates that structural columns must resist buckling based on their height and the load applied. Because temporary supports are often unbraced in the middle, a two-by-four can easily bow and snap under the compressive weight of a roof structure. Best practices require using four-by-four solid posts, or fastening multiple two-by-fours together to create a rigid, built-up structural column.
How Do I Protect The Temporarily Supported Structure From Wind Or Seismic Loads?
Temporary vertical shoring only supports gravity loads pushing downward. When you remove structural wall sheathing or framing, you temporarily destroy the building's shear resistance, leaving it highly vulnerable to high winds or minor seismic activity. To maintain structural stability during a repair, you must install temporary diagonal bracing across the remaining wall framing or utilize heavy-duty structural panels to lock the frame against lateral, side-to-side movement until the permanent repairs are fully secured.