Temporary Emergency Repair For A Leaking Waste Pipe
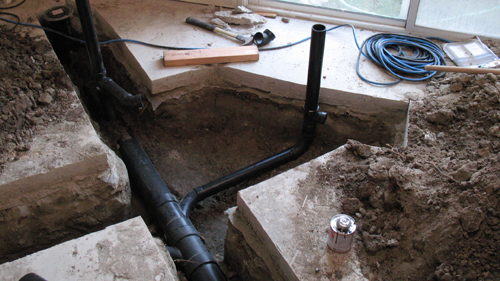
A sudden leak in a non-pressurized drain, waste, or vent line requires immediate attention to prevent severe water damage. While a permanent code-compliant repair is always the ultimate goal for any property owner, knowing how to fashion a temporary patch can buy you vital time until the system can be properly overhauled. The accompanying instructional video demonstrates a field-expedient method for temporarily sealing a cracked waste pipe using a common, easily accessible plumbing component.
Understanding The Mechanical Coupling
The core component utilized for this emergency patch is a standard shielded flexible coupling. In traditional plumbing applications, these connectors are designed to join two separate sections of piping together. They are highly versatile, allowing a plumber to connect dissimilar materials, such as tying a metal pipe into a plastic polyvinyl chloride line. A standard coupling assembly features an inner rubber gasket surrounded by a stainless steel shear ring and secured with heavy-duty hose clamps.
Modifying The Gasket For A Patch
To adapt this connector into a wrap-around patch for a damaged pipe, the unit must first be fully disassembled. The internal rubber sleeve features a raised center stop, which is a small flange designed to sit between the two joined pipe ends to prevent them from sliding too far into the fitting. Because a patch requires the rubber to sit flush against the exterior of a cracked pipe, this center flange must be removed.
The rubber gasket is cut lengthwise so it can open up and wrap around an existing pipe. Then, the internal raised flange is carefully shaved away using a utility knife. The goal is to create a completely flat, smooth piece of rubber that will provide an even seal over the leak.
Securing The Temporary Fix And Prioritizing Safety
Once the rubber is flat, it can be wrapped tightly around the damaged section of the waste pipe. The metal shield and hose clamps are then reinstalled over the rubber sleeve and tightened down securely to stop the leak.
When performing this modification, safety is the absolute highest priority. Never hold the rubber gasket in your hands while slicing away the internal flange. Always place the rubber component flat against a stable wooden board or workbench. Utility knives can easily slip when cutting dense rubber, and stabilizing the material on a hard surface is the only way to prevent severe lacerations.
Three Key Construction And Safety Tips
Always verify the pipe type before attempting this patch. This modification is strictly intended for non-pressurized gravity-fed drain or waste pipes. Do not use this method on highly pressurized water supply lines, as the internal pressure will easily blow out a compromised rubber seal.
Practice strict knife safety when altering plumbing materials. Cutting heavy rubber requires significant force. Always push the blade away from your body and keep the material pinned down to a solid work surface, keeping your stabilizing hand entirely clear of the blade's path.
Treat this exclusively as a short-term mitigation strategy. Altering a manufactured plumbing fitting immediately voids its safety listing. Standard building codes dictate that these couplings must be installed fully intact as a jointing mechanism to guarantee a proper, leak-free seal.
Bonus Questions And Answers
While the emergency patch method is useful for immediate mitigation, understanding standard plumbing practices ensures the long-term integrity of your home's infrastructure.
What Is The Proper Code Compliant Way To Permanently Fix A Cracked Waste Pipe?
Under both the International Residential Code and the Uniform Plumbing Code, the most reliable and approved method for permanent repair is the complete removal of the damaged section. You must cut out the cracked or punctured span of pipe entirely. A new section of matching pipe is then cut to size and spliced into the line using approved, unaltered mechanical couplings or, in the case of plastic piping, proper solvent-welded fittings.
Why Are Shielded Couplings Preferred Over Unshielded Rubber Sleeves In Drain Systems?
Standard building codes generally mandate the use of shielded couplings for above-ground drain, waste, and vent applications to maintain structural rigidity across the plumbing system. The stainless steel band wrapped around the exterior of the coupling is called a shear ring. This ring prevents the pipes from shifting out of alignment due to structural settling, natural vibrations, or the heavy weight of flowing wastewater, which could otherwise cause a plain rubber sleeve to sag, deform, and eventually leak.
Can I Hide A Mechanical Coupling Behind Drywall Once The Repair Is Finished?
According to current model plumbing codes, standard shielded mechanical couplings used for joining permanent pipe sections are generally permitted to be concealed within wall cavities, provided they are installed exactly to the manufacturer's specifications. However, because local jurisdictions occasionally adopt specific amendments that restrict concealed mechanical joints to prevent hidden water damage, you should always verify the allowable practices with your local municipal building department before sealing a wall.