How To Repair Shed Wood Rot And Raise A Foundation
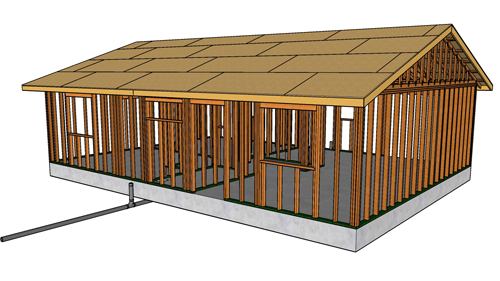
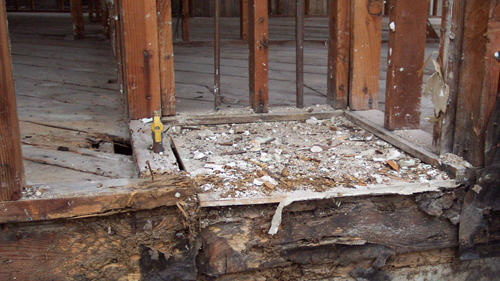
Dealing with wood rot at the base of a shed is a common issue for homeowners, especially when the surrounding soil level sits higher than the foundation slab and makes direct contact with the exterior siding. Moisture wicking into the wood framing creates an ideal environment for decay. While pouring a new, elevated concrete foundation is a viable long-term fix, the process requires significant structural preparation. Alternatively, altering the site grading and drainage often provides a highly effective and budget-friendly solution.
The First Line Of Defense: Perimeter Drainage Systems
Before attempting the complex task of lifting a building, evaluate the surrounding landscape. If the soil sits artificially high against the structure, excavating the perimeter is the most cost-effective approach. By trenching around the shed and installing a perforated drainage pipe surrounded by gravel, you create a subsurface water management system.
This effectively lowers the soil level and prevents moisture from banking against the siding. Gravity will safely carry ground runoff away from the shed framing to an appropriate discharge point. A fresh concrete threshold pad can then be poured independently over the gravel fill at the door entry for stable access.
Preparing To Raise The Shed
If site grading cannot be altered and a new concrete foundation is mandatory, the structure must be completely detached and prepared for lifting. Begin by removing the bottom course of siding. Whether dealing with lap siding, plywood panels, or stucco, cutting away the lower 16 to 48 inches exposes the structural framing and provides essential clearance for finishing the new concrete slab later. With the sill plate exposed, carefully remove all foundation anchor bolts, nuts, and heavy washers binding the wall framing to the existing slab.
Structural Support And Beam Placement
A building cannot be lifted by its exterior sheathing; the load must be transferred through heavy timber beams. Structural beams, such as four-by-tens, must be passed entirely under or through the structure, protruding at least two feet past the exterior walls on every side. Larger sheds carry immense dead loads and will mandate heavier beams engineered for the specific span.
To prevent the walls from sagging during the lift, vertical support studs should be fastened to the existing wall framing and allowed to rest directly on the lifting beams. Alternatively, a heavy ledger board can be secured horizontally across the wall studs using heavy-duty lag screws, ensuring deep penetration into the vertical framing members.
The Jacking And Cribbing Process
Lifting a structure is a slow, methodical process requiring multiple jacks working in unison. Whether utilizing heavy-duty floor jacks or mechanical screw jacks, the structure should only be raised in small increments, typically an inch and a half at a time per side. As one side lifts, solid wood blocking must immediately be inserted beneath the main beams. Never allow the weight of the structure to rest solely on hydraulic or mechanical jacks while transitioning to another corner. As you work your way around the perimeter, the beams must remain fully supported by the wood blocking.
Safety Considerations For Structural Lifts
Raising a building introduces severe safety risks. Attempting to lift a shed too high on temporary cribbing can result in catastrophic lateral instability. For standard DIY cribbing setups, the maximum safe lifting height is generally limited to around 12 inches. Pushing past this height requires professional engineering and cross-bracing. If you are inexperienced with heavy structural loads, soil grading and drainage corrections remain the safest, most reliable methods for mitigating foundation rot.
Three Key Construction Tips
Always remove the lower sections of exterior siding before lifting a shed. This prevents the siding from catching on the old foundation, exposes the sill plate for anchor bolt removal, and provides the necessary physical clearance for a mason to trowel and finish the edges of the new concrete slab.
Never rely on a jack to hold a structural load. Whether you use one jack or six, jacks are exclusively for lifting. The moment the desired incremental height is reached, the load must be fully transferred to solid, level wood cribbing blocks before you step away or move to the next corner.
When attaching temporary lifting ledgers to the exterior of the shed, structural fasteners must bite deeply into the vertical wall studs. Use lag screws that are at least three and a half to four inches long to ensure they pass through the sheathing and fully anchor into the center of the framing members.
Frequently Asked Questions
To ensure your shed restoration project complies with standard building practices, here are a few additional considerations not covered in the primary guide.
Do I Need A Building Permit To Pour A New Shed Foundation?
While the International Residential Code often exempts one-story detached accessory structures from building permits if they are under 200 square feet, this exemption typically only applies to the structure itself. Modifying site grading, altering stormwater runoff, or pouring a permanent concrete foundation often triggers local zoning and permitting requirements. Always verify with your local municipal building department, as property line setbacks and permanent foundation rules vary heavily by jurisdiction.
What Is The Minimum Clearance Required Between Exterior Siding And The Ground?
To permanently prevent the wood rot that plagued the original shed, the new foundation must be built to code standards regarding soil clearance. The International Residential Code mandates a minimum clearance of 6 inches from the finished ground level to the bottom of any wood siding or structural wood framing. This 6-inch buffer prevents soil moisture from wicking upward into the porous wood grain and protects the structure from splashing rainwater.
Should I Use Treated Wood For The Bottom Wall Plate When Rebuilding?
Yes, any framing lumber that comes into direct contact with the new concrete foundation must be treated. Concrete acts like a hard sponge, constantly absorbing and releasing ground moisture. Building codes strictly require the use of naturally durable wood or approved pressure-treated lumber for any sill plates or sleepers resting on concrete or masonry exterior foundations to prevent fungal decay and termite damage.