Correcting A Tall Bottom Stair Step For Safety And Code Compliance
Discovering that the bottom step of a staircase is taller than the rest is a common frustration in residential construction and deck building. An uneven bottom riser is not just an aesthetic issue; it creates a significant trip hazard and directly violates standard building codes. When navigating a flight of stairs, a person assumes a consistent rhythm. A sudden deviation of an inch or more at the bottom can easily cause a dangerous fall. Fortunately, there are precise methods to correct this structural oversight without necessarily replacing all of your expensive lumber.
The Root Cause Of An Uneven Bottom Step
When a staircase features a bottom step that is substantially taller than the rest of the flight, the mistake almost always traces back to the initial layout phase. Often, the original builder failed to account for the thickness of the stair treads. In standard stair layout, framing carpenters must drop the stringer. This process involves subtracting the exact thickness of the tread material from the bottom of the stringer before making any cuts. If you are using standard lumber for treads, failing to trim that bottom edge will result in a first step that is notably taller than intended.
Evaluating Your Repair Options
Depending on your site conditions and budget, there are a few ways to approach this repair. The simplest solution involves elevating the lower landing to meet the stairs. If the stairs terminate onto a gravel walkway or landscaping, adding more compacted base material can effectively raise the ground level, reducing the overall height of the first step.
However, if the stairs land on a concrete patio, pouring a thin layer of concrete over the existing slab to bridge the gap is highly discouraged, as the thin concrete cap will eventually crack and spall under foot traffic.
The most thorough solution is to completely remove the existing stair stringers and cut brand new ones. While this guarantees structural integrity, the high cost of lumber makes total replacement an expensive route for many property owners.
Modifying Existing Stringers For Consistent Riser Heights
If you want to save materials, you can modify the existing stringers to distribute the height difference equally across the entire flight. To begin, determine the total overall rise of the stairway. Rest a long, perfectly straight piece of lumber on the upper landing, project it outward horizontally, and use a level to ensure it is perfectly plumb. Measure straight down from the bottom of this straight edge to the lower landing. Divide this total rise measurement by the number of risers in your staircase to find the new, mathematically correct riser height.
To adjust the existing framework, you must establish a level line on each step of the current stringers reflecting the new tread locations. Starting at the bottom, measure up to your new calculated riser height minus the tread thickness, mark a level line, and repeat this process moving up the stairs. You will carefully cut along these new lines to remove a small amount of material from each step. If your stringers are attached to a solid ledger board at the top that is difficult to remove, you can strategically notch the uppermost tread to fit securely around the ledger. Always double check your measurements with a framing square and level before making any cuts.
Three Key Tips
Always Account For Tread Thickness
Before cutting a new stringer, you must subtract the thickness of your final tread material from the very bottom cut of the stringer. This industry standard practice ensures your first step matches the remaining stairs once the horizontal treads are installed.
Verify Total Rise Over Site Conditions
Never assume the ground level is perfectly flat. Always measure your total rise from the exact landing point of the stairs up to the top deck level to ensure your divided riser calculations are based on reality rather than architectural blueprints.
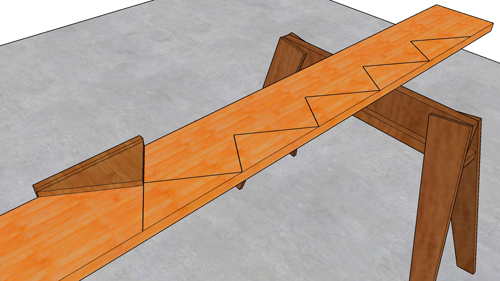
Use A Master Pattern Stringer
If you decide to dismantle the stairs to trim them on the ground, carefully measure, mark, and cut just one stringer first. Test its fit against the deck and lower landing. Once verified, use this master stringer as a tracing template for all the remaining stringers to guarantee absolute uniformity across the entire staircase.