Proper Exterior Stucco Repair After Plumbing Access
When performing renovations, it is not uncommon to uncover exterior wall patches that were hastily executed. Often, these patches surround water supply lines or hose bibs where a plumber needed quick access to a valve or fitting. While the plumbing issue may have been resolved, an improper exterior repair can leave the home vulnerable to significant moisture damage.
Assessing The Water Supply Line
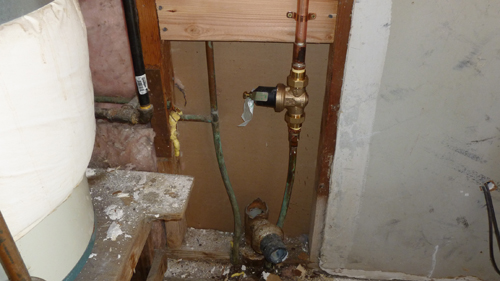
While examining plumbing access points, it is crucial to verify the sizing of the water supply lines. For example, discovering a half-inch main water supply line feeding an entire three-bedroom, two-bathroom house indicates a severely undersized system. According to standard plumbing codes, a home of that size requires at least a three-quarter-inch, or even a one-inch, main supply pipe to maintain adequate water pressure and volume across multiple fixtures. When accessing a wall to repair a gate valve or hose bib, property owners should consider whether upgrading the main supply line is a necessary long-term investment.
Proper Stucco Patching Techniques
A common mistake made during emergency plumbing repairs is simply filling the access hole with stucco without restoring the underlying protective layers. To permanently and correctly repair a stucco exterior, the affected area must be chipped back to expose a solid perimeter, often expanding to a one-foot by one-foot square or extending to the nearest framing studs.
Restoring The Building Envelope
The most critical step in this repair is properly integrating the water-resistive barrier, commonly referred to as building paper. This weather barrier must be shingled correctly with the existing layers to ensure that any trapped water sheds outward rather than draining into the wood framing. After the paper is completely secure, new metal lath must be installed and firmly tied into the existing wire mesh. Only then should the base coats and final color coat of plaster be applied. Failing to restore the lath and protective paper essentially creates a funnel for rainwater to enter the wall cavity, leading to hidden wood rot and structural degradation over time.
Three Essential Construction Tips For Stucco And Plumbing Repairs
Always verify main water supply line sizing. A half-inch pipe is insufficient to serve a modern home with multiple bathrooms; ensure your main service line is at least three-quarters of an inch to comply with standard plumbing volume requirements.
Never skip the water-resistive barrier when patching exterior walls. Simply filling a hole with cement traps moisture; you must integrate new building paper beneath the upper existing layer and over the lower existing layer to maintain proper downward water shedding.
Expose enough of the original wall to tie in metal lath. Do not attempt a superficial patch. Chip away enough surrounding stucco to expose the original lath so the new wire mesh can be securely fastened, preventing the new stucco patch from cracking and falling out.
Frequently Asked Questions About Stucco And Plumbing Integration
Beyond the basic repairs mentioned above, there are several advanced building science principles to consider when maintaining the exterior envelope and plumbing systems of an older home.
Why Is A Weep Screed Required At The Base Of A Stucco Wall?
When repairing stucco at the bottom of an exterior wall, it is critical to ensure proper drainage exists. According to the International Residential Code, stucco applications require a weep screed installed at the foundation plate line. This metal flashing allows any moisture that penetrates the stucco and travels down the weather-resistive barrier to exit the wall assembly safely. The code mandates that this screed must be placed at least four inches above exposed earth or two inches above paved surfaces to prevent ground moisture from wicking upward into the wall framing.
What Causes Pinholes Or Leaks In Copper Water Pipes Near Valves?
If a plumber had to open a wall to replace a leaking valve, the root cause may be galvanic corrosion. This structural degradation occurs when two dissimilar metals, such as a copper pipe and a galvanized steel fitting, are connected directly without proper insulation. The chemical reaction between the metals accelerates corrosion, leading to sudden leaks. Building codes require the use of dielectric unions or brass fittings when transitioning between different metal pipes to interrupt the electrical conductivity and protect the plumbing network.
How Long Should Stucco Patching Materials Cure Before Painting?
While it might be tempting to immediately paint a newly patched exterior wall to hide the repair, rushing the process will lead to paint failure. Traditional cement-based stucco requires a proper curing period to achieve its intended structural strength and for the high alkalinity to neutralize. Industry standards dictate that the base coats should moist-cure for at least forty-eight hours, while the final finish coat should cure for a minimum of twenty-eight days before the application of elastomeric or acrylic exterior paints. Applying paint prematurely traps moisture and inevitably leads to peeling and blistering.