How To Create A Siding Story Pole For Perfect Installation
Installing horizontal lap siding requires meticulous attention to detail to maintain consistent lines across an entire wall surface. A siding story pole is an indispensable carpentry tool that guarantees each course of siding remains evenly spaced and perfectly level from the foundation to the eaves. Taking the time to craft and utilize this simple layout board will dramatically improve the final appearance of your exterior wall covering.
Understanding The Siding Exposure
Before constructing a story pole, you must determine the siding exposure, which is the visible portion of the siding once it is installed. For example, if you are working with a standard lap siding profile, your target exposure might be seven inches. The total width of the siding board minus the required overlap determines this exposure measurement. Accuracy at this stage is foundational to the entire installation process.
Crafting And Marking The Story Pole
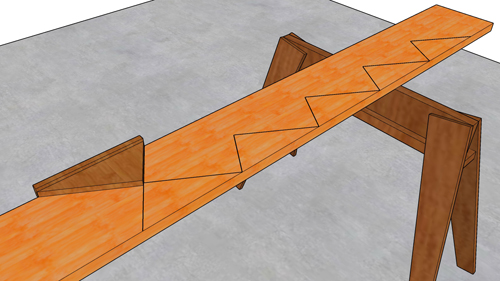
To create the tool, select a straight, unwarped piece of lumber that can span a significant portion of the wall height. Starting from the bottom, make equally spaced marks along the length of the board corresponding to your determined exposure measurement. If your exposure is seven inches, each mark will be placed precisely seven inches apart. These marks represent the top edge of each subsequent row of siding. Once the board is marked, hold it against the wall and transfer these layout lines directly onto the protective weather-resistant barrier or building paper.
The Importance Of Verifying Your Layout
Never assume a newly created story pole is flawless. Small measuring discrepancies compound over the height of a wall, leading to highly visible layout errors. The best practice is to mark your wall, install the first two or three courses of siding, and then physically measure the actual exposure on the wall. Compare this real-world measurement against your intended layout. Verifying the layout early prevents compounding errors and ensures the siding courses remain perfectly parallel throughout the entire installation.
Three Key Tips For Using A Story Pole
Calculate your precise siding exposure based on the board width and the manufacturer-mandated overlap before marking your layout board.
Transfer the layout marks from the story pole directly onto the weather-resistant barrier at multiple points across the wall to keep courses perfectly horizontal.
Always install a test course and physically measure the applied siding to verify the story pole accuracy before fastening the rest of the wall covering.
Frequently Asked Questions About Siding Installation
While mastering the story pole is essential for aesthetics, understanding the broader building science principles ensures your siding performs perfectly against the elements.
What Is The Minimum Overlap Required For Horizontal Lap Siding?
According to the International Residential Code, standard wood lap siding requires a minimum overlap of one inch, or one and one-quarter inches if the siding is not rabbeted. This minimum overlap is critical for shedding bulk water away from the wall assembly and preventing wind-driven rain from penetrating the exterior envelope. Always verify specific overlap requirements with the siding manufacturer, as their installation instructions dictate the final warranty compliance.
Can I Splice Two Shorter Boards Together To Make A Story Pole?
It is highly discouraged to splice boards together when fabricating a story pole. Any joint introduces a hinge point and a potential gap, which compromises the precise vertical transfer of measurements. In residential framing, even a one-eighth-inch discrepancy can cause window units to bind or drywall joints to fail. For accurate layout, always use a continuous, straight, and kiln-dried piece of lumber.