Correcting Shower Valve Alignment And Choosing Wall Substrates
Achieving a flawless finish in a custom shower installation requires precise coordination between the plumbing rough-in and the final tile layout. One of the most common challenges encountered during bathroom renovations is dealing with shower and bath valves that do not perfectly align with the finished tile surface.
Whether the valve sits slightly too high, too low, or off-center, adjusting the tile rather than replumbing the entire system can save substantial time and resources. Furthermore, the choice of wall substrate plays a critical role in preventing future structural issues such as cracking or water intrusion.
Managing Misaligned Shower Valves
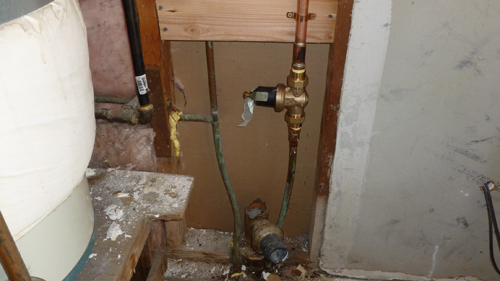
When roughing in plumbing, valves are typically secured before the final wall substrate and tile are installed. Because the thickness of a floated mortar bed or thin set application can vary slightly, a valve that was perfectly positioned during the framing stage might appear misaligned once the final surface is prepared.
If a shower valve sits a fraction of an inch too low or off-center, you can often correct the visual alignment by carefully enlarging the hole in the surrounding tile. Using a dedicated rotary cutting tool, such as a Rotozip with a diamond bit, allows you to carve a larger, clean radius around the valve body. As long as the enlarged opening remains smaller than the valve trim flange, also known as the escutcheon plate, the finished installation will completely conceal the oversized hole.
Choosing The Right Substrate Floated Mortar Versus Cement Board
The foundation of a durable, long-lasting shower is the wall substrate. While cementitious backer boards are extremely common due to their affordability and ease of installation, they do introduce seams into the wall assembly. If these seams are not meticulously treated with alkali-resistant fiberglass mesh tape and modified thin set mortar, structural movement can cause hairline cracks to transmit through the finished tile.
For those who wish to avoid the vulnerability of seams entirely, a traditional floated mortar bed offers a superior alternative. By floating concrete or traditional mud onto metal lath, you create a monolithic, completely customized wall surface. Although applying a mortar bed requires more advanced masonry skills, it allows for micro-adjustments in wall plumbness and completely eliminates the board joints that are prone to cracking in standard installations.
Three Key Tips
Rely On The Escutcheon Plate Tolerance. When cutting tile around plumbing fixtures, familiarize yourself with the exact dimensions of your trim kit. The escutcheon plate provides a margin of error, allowing you to widen the tile hole slightly in any direction to accommodate minor lateral or vertical valve misalignments.
Utilize Rotary Tools For Precision Modifications. Attempting to chip or nip away small amounts of tile around a pipe can easily lead to shattered material. Using a high-speed rotary tool equipped with a diamond-grit bit allows for smooth, controlled grinding to create perfectly round, oversized holes without compromising the structural integrity of the surrounding tile.
Account For Substrate Thickness Variations. If you are floating a custom mortar bed, be acutely aware of your depth. A variation of just one-eighth of an inch in the mortar thickness can sink a valve too deeply or push it too far forward. Always verify the manufacturer required depth for your specific shower valve body against your anticipated finished wall thickness before the mortar cures.
Bonus Questions And Answers
To further enhance your understanding of professional shower construction, here are a few additional technical insights regarding valve corrections and waterproofing standards that go beyond the basic installation process.
How Do You Ensure A Watertight Seal When Enlarging A Tile Hole For A Valve
Whenever you enlarge a penetration through a shower wall, you increase the risk of bulk water infiltrating the wall cavity. According to standard building practices, the gap between the tile and the valve body must be sealed before the trim plate is installed. Apply a generous bead of high-quality, 100-percent silicone sealant around the perimeter of the valve body where it meets the tile. When installing the escutcheon plate, apply silicone behind the top and sides of the plate, but leave a small weep hole at the bottom. This ensures that if any water does get behind the trim, it has an unobstructed path to drain back into the shower pan rather than pooling inside the wall.
What Is The Solution If A Shower Valve Is Installed Too Deep In The Wall
If a mortar bed is floated too thickly or the original plumbing was set too far back during rough-in, the valve stem may not protrude far enough through the tile to attach the handle. You do not need to tear down the wall to fix this. Plumbers rely on valve extension kits, which are specific to the manufacturer and model of the shower valve. These kits generally include an extended brass broach for the temperature control stem, longer mounting screws, and an extended sleeve. This allows you to safely bridge the gap and bring the operational components out to the proper depth mandated by the fixture specifications.
Are Waterproofing Membranes Required Over Floated Mortar Or Cement Board
Yes, maintaining a continuous moisture barrier is a critical requirement of the International Residential Code for wet areas. Neither a traditional floated mortar bed nor standard cement board is inherently waterproof. They are merely water-resistant, meaning they will not deteriorate when wet, but they will still allow moisture vapor to pass through to the wood framing. To comply with modern building science, you must install a waterproofing layer. This can be achieved either by installing a vapor retarder like asphalt felt behind the mortar bed or backer board to protect the studs, or preferably, by applying a liquid-applied elastomeric waterproofing membrane or a bonded sheet membrane directly over the finished substrate before applying the tile thin set.